How to Live
Without
Paying Rent
A Real-World Van Conversion Guide
From Someone Who Actually Did It
By Jared Leighton
$10kInitial Build Cost
2 yrsFull-Time Van Life
3xUpgrades Completed
7 daysOff-Grid Capability
I've flipped 7 houses, converted a van from scratch, upgraded it three times, and lived in it for two years travelling Australia. My initial build cost about $10,000. Over those two years I saved well over $60,000 in rent alone. Looking back, I should have kept my last house, rented it out, and travelled with an income rather than drawing down savings. But that's hindsight for you.
What I learned quickly is that YouTube gives you inspiration, but actually building a van is a completely different game. Its great watching someone do it in a 15 minute video but they don't show you the weeks of planning before the first cut. And nobody tells you what goes wrong.
This guide will. I'm going to walk you through the entire process, what I did, what I got wrong, and what I'd do differently if I started again tomorrow. If you follow this properly, you'll get it right the first time instead of rebuilding three times like I did.
"Every hour you spend planning saves you five hours of rework and hundreds of dollars in wasted materials."
Here's how to do it right, starting with the decisions that shape everything else.
01
Planning
Planning is the single most important phase. Every hour of planning saves five hours of rework and hundreds of dollars in wasted materials.
Choosing Your Van
First question: what size? Small wheelbase, medium wheelbase, or long wheelbase. This depends entirely on how you want to live.
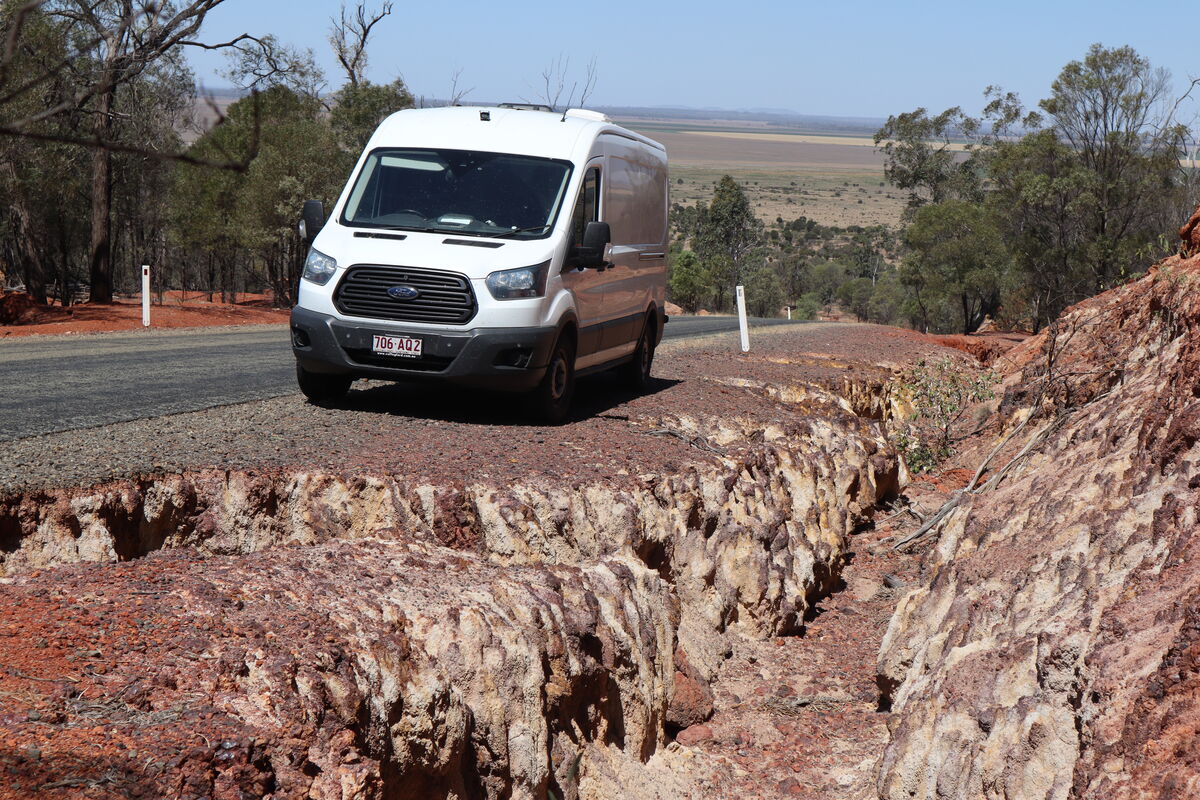
I went with a Ford Transit 2.0 diesel EcoBlue, medium wheelbase, medium height. 6 metres long. The reason I chose medium wheelbase is it fits in a normal shopping centre parking spot. You can drive it like a regular vehicle. But you still have enough room for a full setup inside.
The essential thing for me was being able to stand up inside. The older Ford Transit medium height models, I found out you cant stand up in them. So check the internal standing height before you buy, not after.
I bought mine from Pickles auction for $29,000 plus GST with 63,000 kms on the clock.
Pro Tip
A good rule for buying any vehicle: if you're on a budget, buy newer with high kms, or older with low kms. If budget isn't tight, go for low kms, full service history, and the fewest previous owners. Always go for models known for being robust.
| Size | Pros | Cons |
|---|
| Short WB | Parks anywhere, easy to drive | Limited living space |
| Medium WB | Fits standard car parks (~6m), room for full setup | Check standing height on older models |
| Long WB | Maximum space, large solar array possible | Restricted parking, harder in cities |
The Ford Transit MWB — stealth look, nothing visible from the outside
How Will You Use It
This single decision shapes your entire build. Ask yourself honestly:
- Power style: campground hookups or full off-grid. This decides your battery, solar, and inverter sizing from day one.
- Stealth level: work-van look or obvious camper look. This affects windows, awning, shore inlet, and external fittings.
- Cooking style: gas, electric, or both. This is one of the biggest load and layout decisions in the whole build.
- Shower setup: no shower, inside shower, or outside shower. This drives tank size, hot water location, drainage, and wall build.
- Climate plan: mainly hot weather or cold weather. This affects insulation strategy, fan setup, and heater/air con decisions.
- Water autonomy: how many days between top-ups. Work out real daily litres so tank sizing is based on facts, not guesses.
I went full stealth. Nothing on the outside. No side windows, no shore power connection, no external gas bottle, no water inlet, no awning. I could park anywhere and nobody looked twice. Over two years I spent money on fuel and food and that was it. Anything else was just for pleasure.
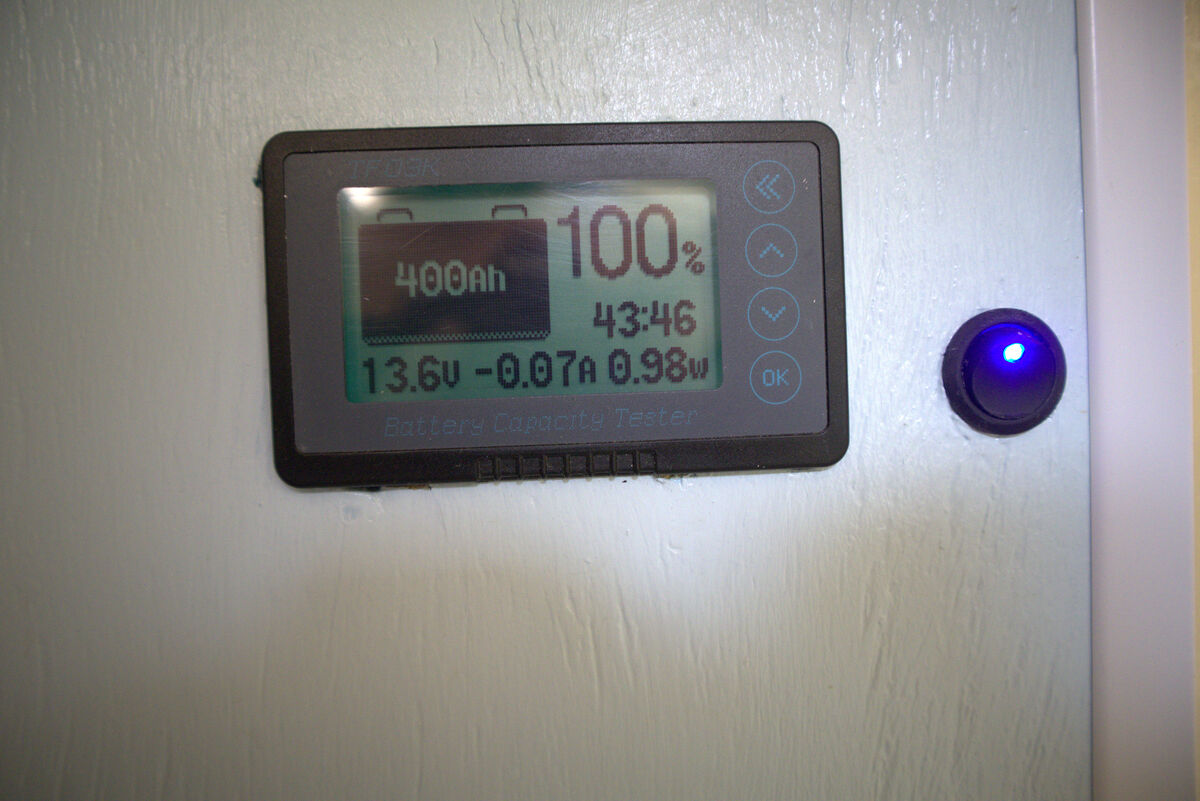
In my van I could live completely off grid for 7 days before needing a water top up. Its all about the maths, knowing exactly how much energy and water you'll use. Once you work that out, everything else falls into place.
Lesson Learned
I went full stealth from day one but didn't fully plan my power needs for comfort appliances. When I wanted a coffee machine, air fryer, toaster and kettle later on, I had to upgrade the entire solar and battery system. Plan for the lifestyle you actually want, not the minimum.
The Master Checklist
Before you commit to any layout, work through every single one of these. Skipping any of them is how you end up rebuilding areas of the van. I know because I did it three times.
- Cooking method: gas oven/hob, or air fryer/microwave, or both
- Coffee machine, kettle, toaster (affects power requirements massively)
- Bed type: fixed, pull out, or seating that converts to a bed
- Shower: yes or no, inside or outside, extractor fan route to roof
- Fresh water tank: size and location
- Grey water tank: under van, strapped, with a breather
- Hot water system
- Toilet: portable, cassette, or composting
- Fridge or fridge/freezer: compressor type, ventilation, slide out or fixed
- Solar: number of panels, rigid or flexible, exact roof layout
- Battery bank: AGM or lithium, size in amp hours, ventilation
- Inverter size
- DC to DC charger
- Solar charger
- Diesel heater for cold climates
- Maxx Air fan placement (must avoid roof cross members)
- Skylight placement
- Awning: yes or no (affects stealth)
- Shore power inlet: yes or no (visible connection affects stealth)
- CCTV and reversing camera
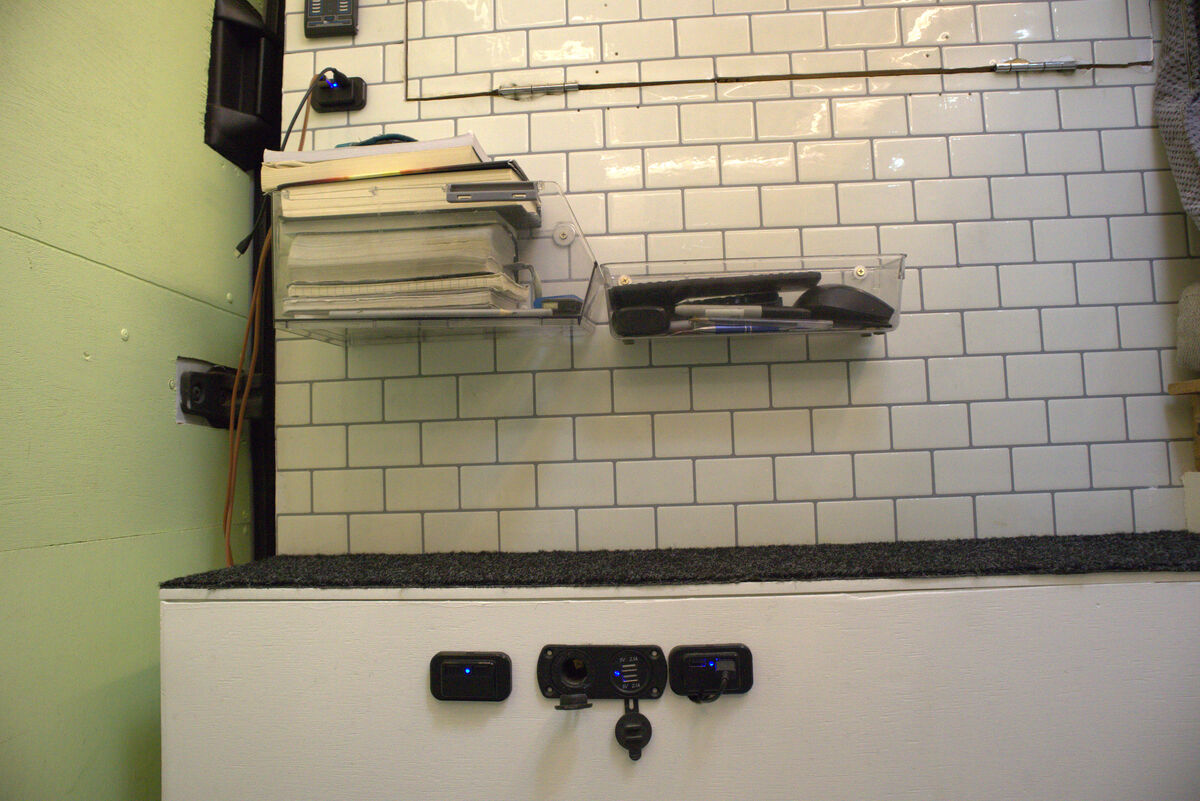
- USB positions throughout the van
- TV mount and entertainment setup
- Weight budget: check your van's payload rating
- Gas: plumbed or portable (portable does not require certifying for insurance)
- Storage for bikes, surfboards, gear
- Ventilation: windows, fan, skylight, shower extractor
- Fire extinguisher
Compliance Checks (Australia)
Before spending big money, check insurance, registration class, and legal weights for your state. Modified vans can be refused claims if key modifications are not disclosed.
Insurance: tell your insurer about plumbing, electrical, gas, and structural changes. Living full-time in the van can also affect cover terms.
Registration: some states may treat heavily converted vans differently to a standard commercial van, which can affect rules and costs.
Weights: confirm your GVM and payload, then estimate build weight early (tanks full, batteries, tools, gear, people). Over-GVM can be illegal and can affect insurance.
The Layout
The next job is to plan the layout, which can be the hard, fun and exciting part. The layout depends on the van unless you're willing to compromise. The underneath of every van is different, there's plenty under there including the petrol tank.
Sometimes it's buying the right van first then designing everything around its structure. I'd recommend this approach. Get the van, measure everything, find out where the obstacles are underneath, then design.
Pro Tip
Use tape on the floor to map out where everything will sit. Kitchen here, bed here, shower here. Live with the tape layout for a few days. Sit in it. Lie down. Pretend to cook. You'll quickly find out what works and what doesn't before you've cut a single piece of wood.
02
Stripping & Preparation
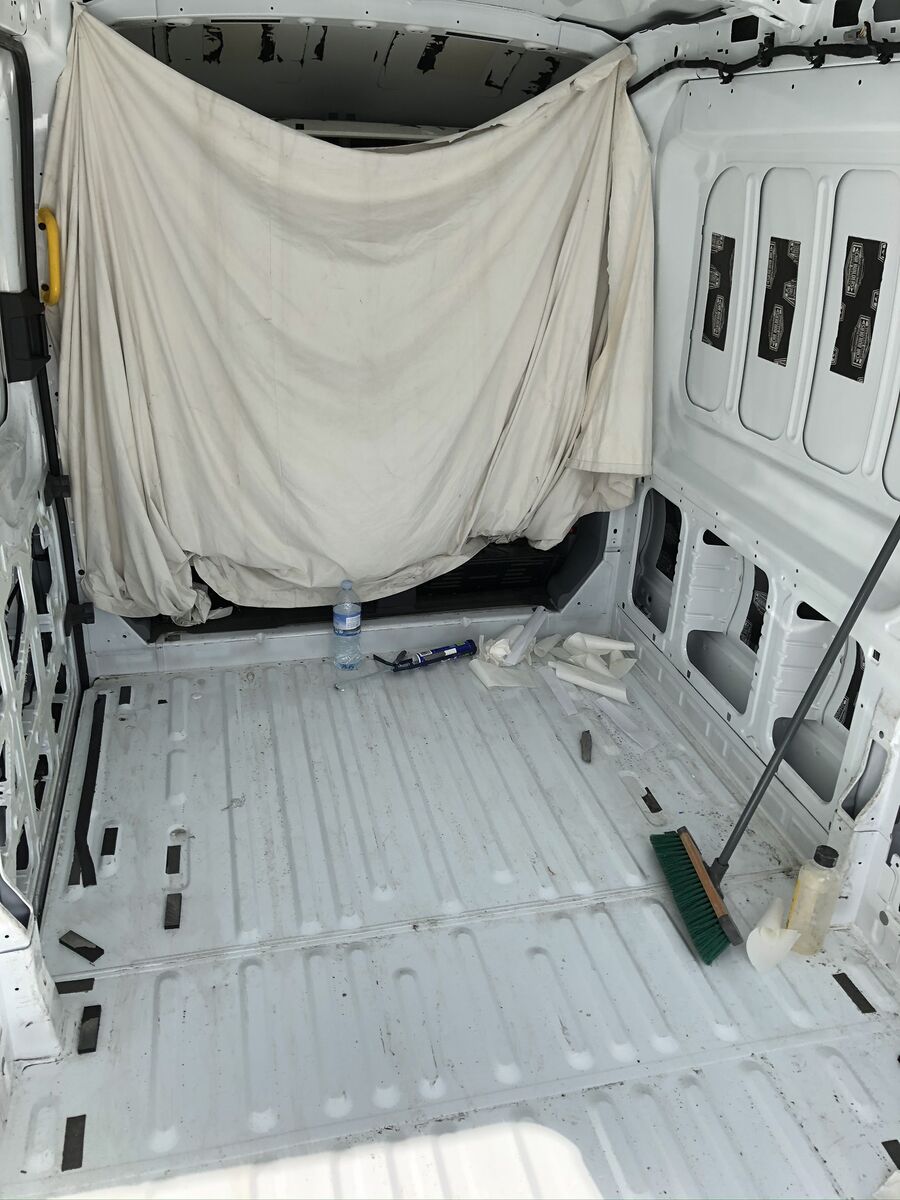
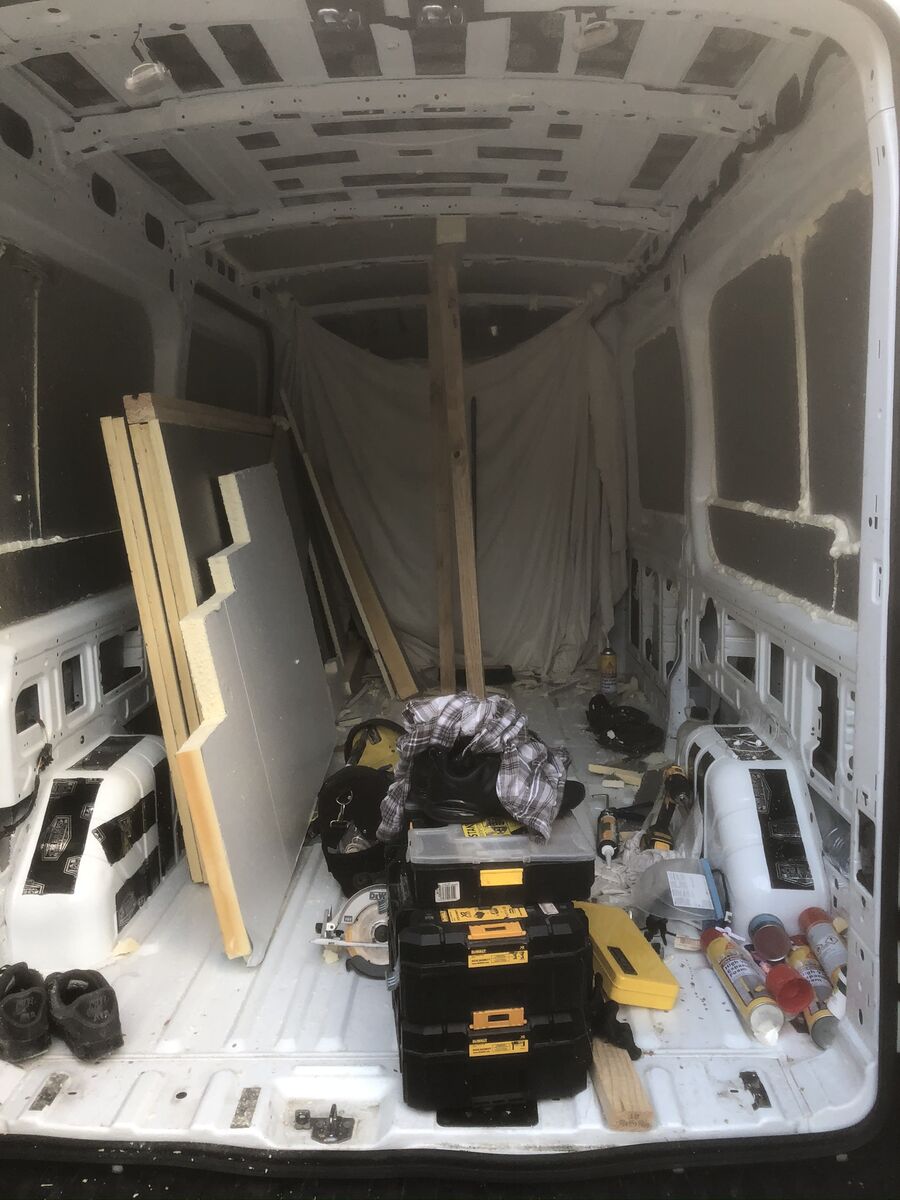
Once your plan is locked in, strip the van back to bare metal. This is where the real work begins.
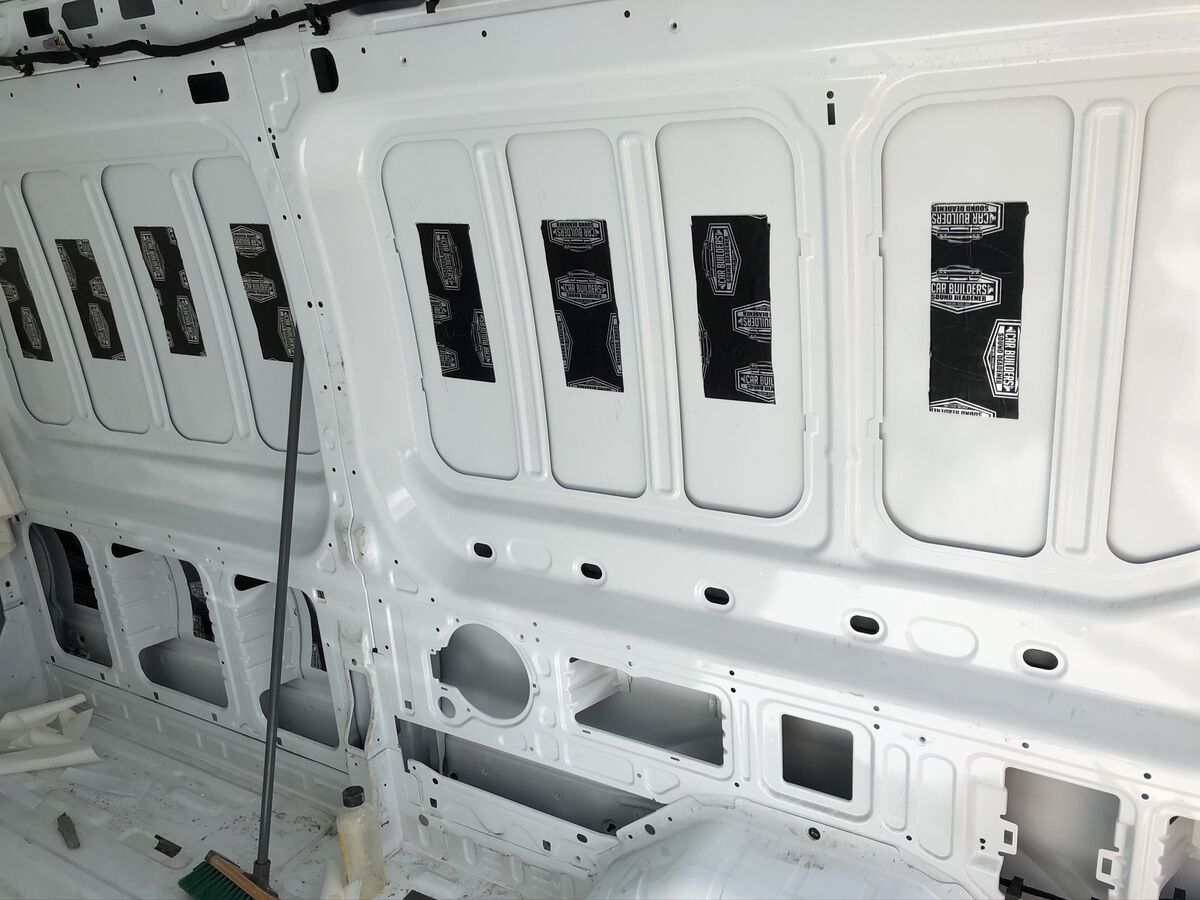
Sound Deadening
Before anything else goes in, stick sound deadening mats to every bare metal panel. You can buy these from eBay fairly cheap. This stops the rattling noise when driving. Without it your van sounds like a giant tin drum on the highway.
Don't Skip This
Clean all panels with white spirits before applying. If there's any grease or dust, the adhesive won't hold and the mats will peel off with heat over time. Don't skip the cleaning. Use in a well-ventilated area.
If there are any existing cables running through the van for the rear door and lights, they'll need to be rerouted out of the way or you'll have to build around them.
Pro Tip
Take photos of everything before you cover it up. Future you will be grateful when you need to remember where a cable or beam was.
Sound deadening mats applied to every bare metal panel before anything else goes in
03
The Roof
The roof determines your solar capacity, ventilation, and natural light. Get this right early because everything inside depends on it.
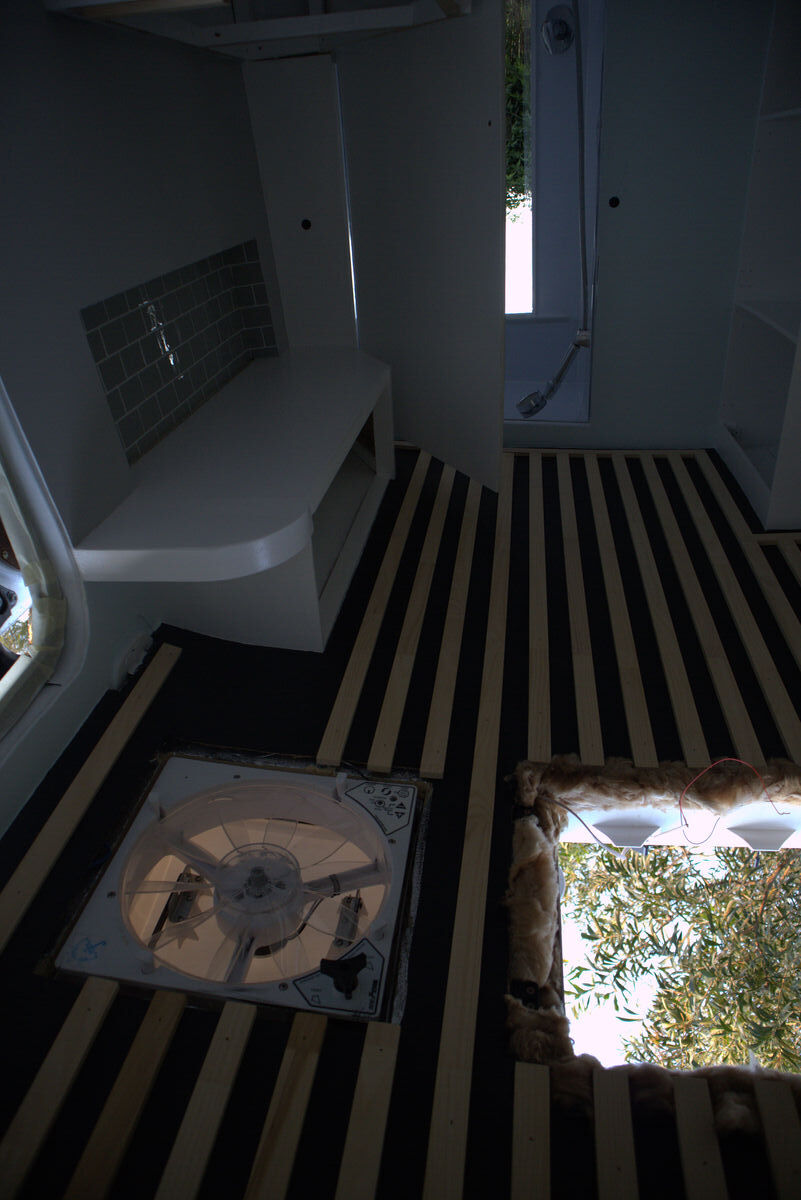
First, identify all the cross members running across the roof. These must never be cut. Once you know where they are, plan the location of your Maxx Air fan, skylight, and solar panels around them. Cut these openings before any insulation or internal work.
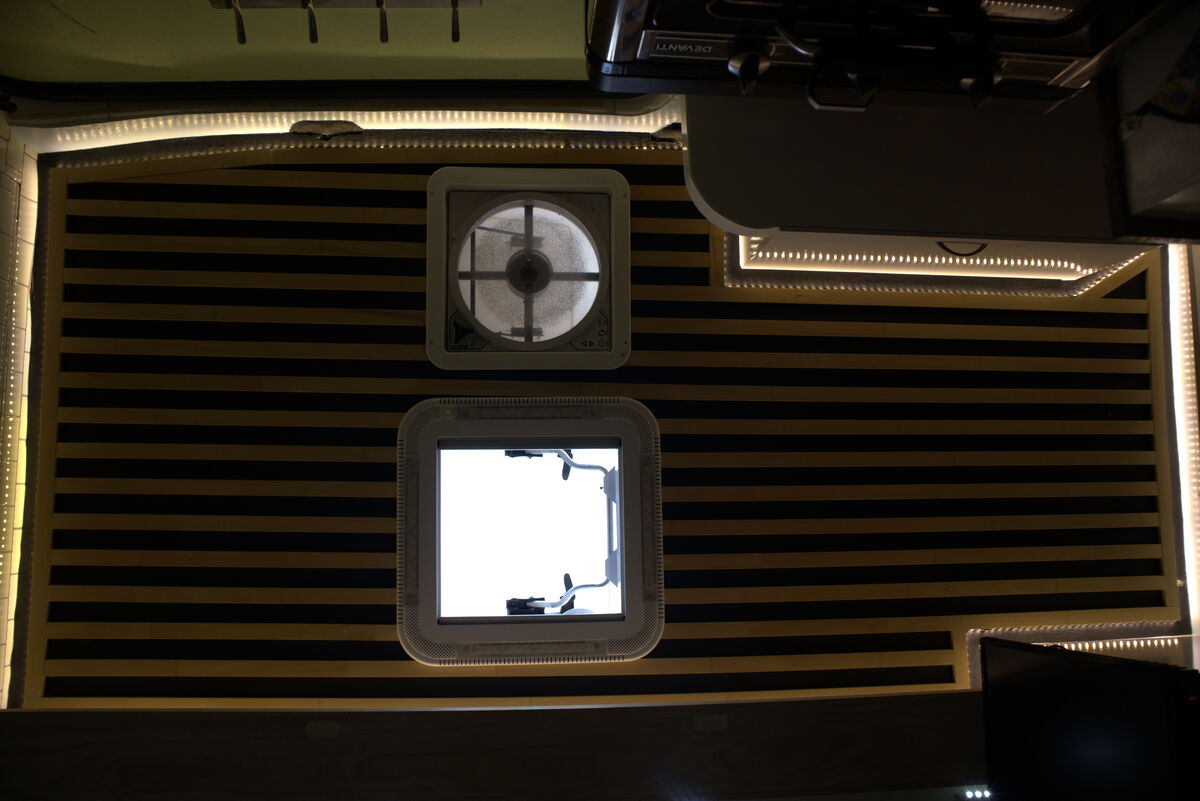
Maxx Air Fan
The Maxx Air fan is one of the best things you can put in a van. When it's running it pulls a gentle breeze through the entire space, even on still nights. Pair it with an open skylight and you get constant airflow without needing air conditioning. It removes heat, moisture, cooking steam, and keeps the van from feeling stuffy. Get one with a rain cover.
Run the cable to the fan before insulating the roof. Its much easier now than trying to fish a cable through later.
Skylight
"There's something genuinely special about lying in bed and looking up at the stars. A skylight changes the entire feel of the van."
A skylight makes the space feel bigger, brighter, and more connected to the outside. Natural light floods in during the day so you barely need artificial lighting. At night with the Maxx Air fan pulling a breeze through, it's honestly one of the best things about van life. Don't skip it.
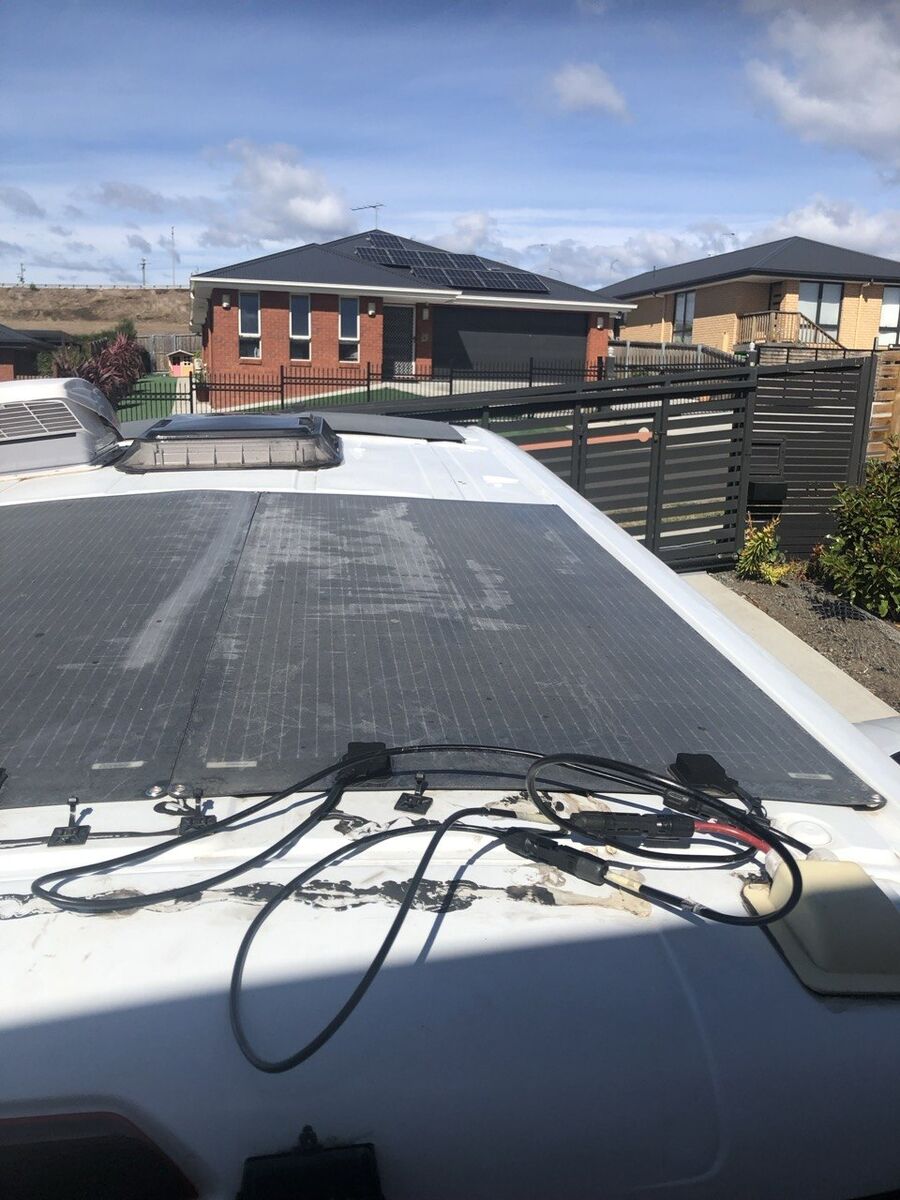
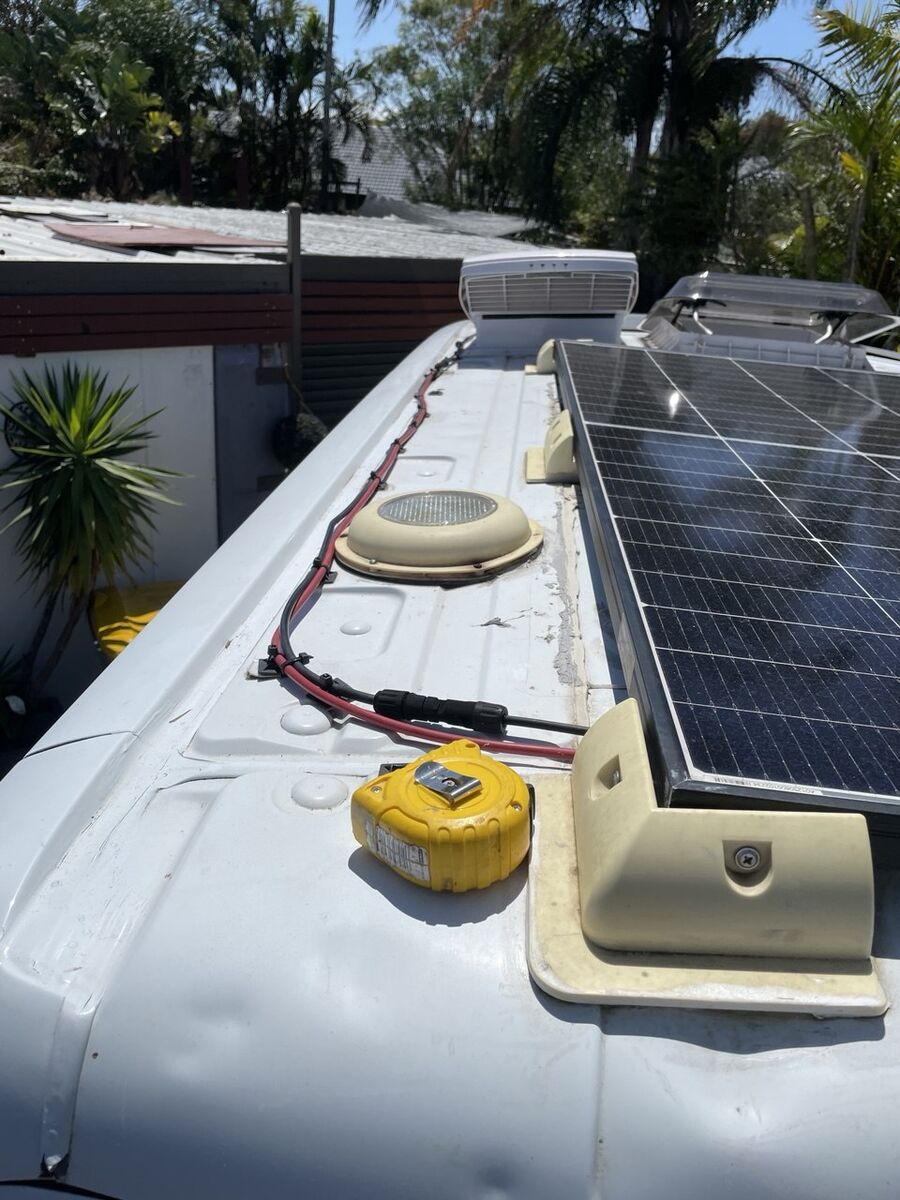
Solar Panels
On my initial build I used three 180 watt flexible solar panels. These suited the stealth look because they sit flush on the roof. They worked well but when I wanted more power for a coffee machine, air fryer, toaster and kettle, I upgraded to rigid glass panels mounted on brackets bonded with Sikaflex silicone. That stuff is so strong that when I did my third upgrade I couldn't even get the brackets off.
For most builds, one quality rigid panel of 440 watts or more is the right answer. Keep it simple.
Run your solar cables inside the van through a single entry point on the roof. Fewer holes means fewer potential leaks. I ran mine down into the garage area where all my electrical gear lived.
Left: Initial flexible panels for stealth. Right: Upgraded rigid glass panels on Sikaflex-bonded brackets
Go Deeper
The exact solar sizing calculations and how to work out your power consumption are covered in the Electrical Guide.
04
Cabling
All cables must be run before insulation goes in. Going back afterwards means ripping walls apart.
This is where a lot of people go wrong. All cables must be run before insulation goes in. Going back afterwards means ripping walls apart, which I had to do during my upgrades.
From your layout drawing you should already know where every single thing is going. That means you know exactly where cables need to run.
In my build I wired for:
- All lights and their switches
- USB charging points
- Maxx Air fan
- Water pump
- Automatic release valve for grey water
- CCTV
- Reversing camera and screen
- Hot water system
- 12V TV
- Ventilation fans
Plus the heavy cables: 4 gauge from the van battery to the DC to DC charger, 0 or 1 gauge from the house batteries to the main block and inverter, and solar cable with MC4 connectors from the roof.
I ran all my cables to one central point in the garage area. Any house batteries have to be physically separated from the living area and ventilated. This is a requirement, not optional.
Pro Tip
Run spare cables to areas you can reach, just in case. I used every single one of them during my upgrades. Do this. You'll thank yourself later.
USB charging points throughout the van, and the wiring behind them
Go Deeper
The full wiring diagrams, cable sizing, fuse board layout and system design are in the Electrical Guide.
05
Insulation
Get insulation right and you'll be comfortable year-round. Get it wrong and moisture will destroy your build from the inside.
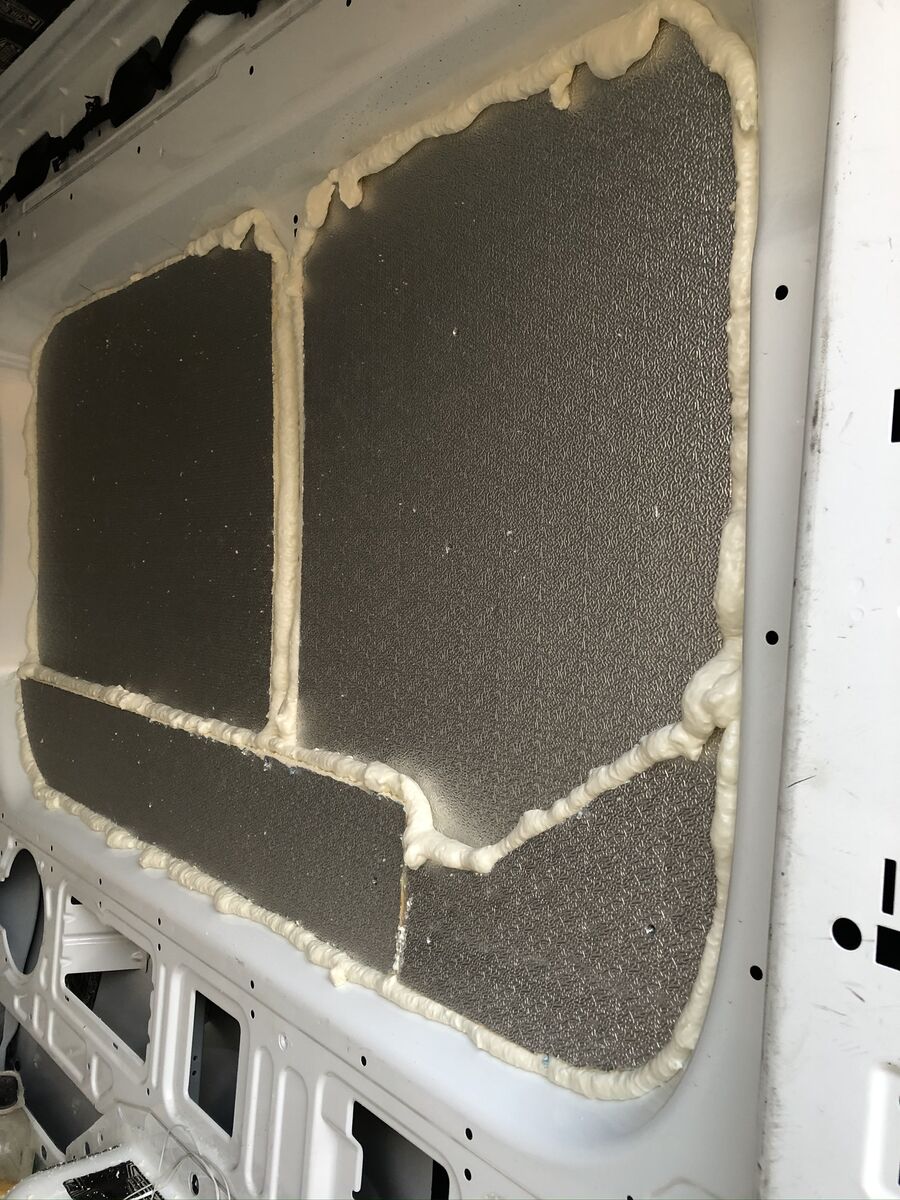
I used 2.5 R value solid double foil backed insulation sheets. Worked out the square meterage and found a supplier online.
To get the sheets to stick to the roof I used a thin layer of expanding foam. Other adhesives peel away with heat over time. For the walls I combined Sikaflex glue with expanding foam. Any gaps I couldn't reach with the sheets I filled with earthwool.
Critical
Leave an air gap between the foil backed sheet and the internal wall wherever possible. This prevents moisture build up. This is exactly why foil backed insulation is far better than exposed earthwool against bare metal. Moisture in a van is one of the biggest long term problems if you get insulation wrong.
Foil-backed insulation sheets going in — applied with expanding foam for a permanent bond
06
Flooring
Van floors are not even and can be challenging. Getting it flat and secure is essential for everything built on top.
Van floors are not even and can be challenging. People do it different ways.
My method: first I marked out where I could safely bolt through to the underside of the van, making absolutely sure I wouldn't hit the fuel tank or any lines underneath. Then I laid my insulation boards down, put 18mm plywood sheets on top, cut them to fit, and bolted them through the floor. Before applying the nut I used nylon washers to prevent rusting on the underside. I countersunk the bolt heads so they wouldn't protrude above the ply and the finished floor was completely flat.
Warning
Check underneath before you drill. There are fuel lines and components under there that will ruin your day.
07
Walls & Cockpit
The cockpit dividing wall and interior boarding define the living space and thermal envelope of your van.
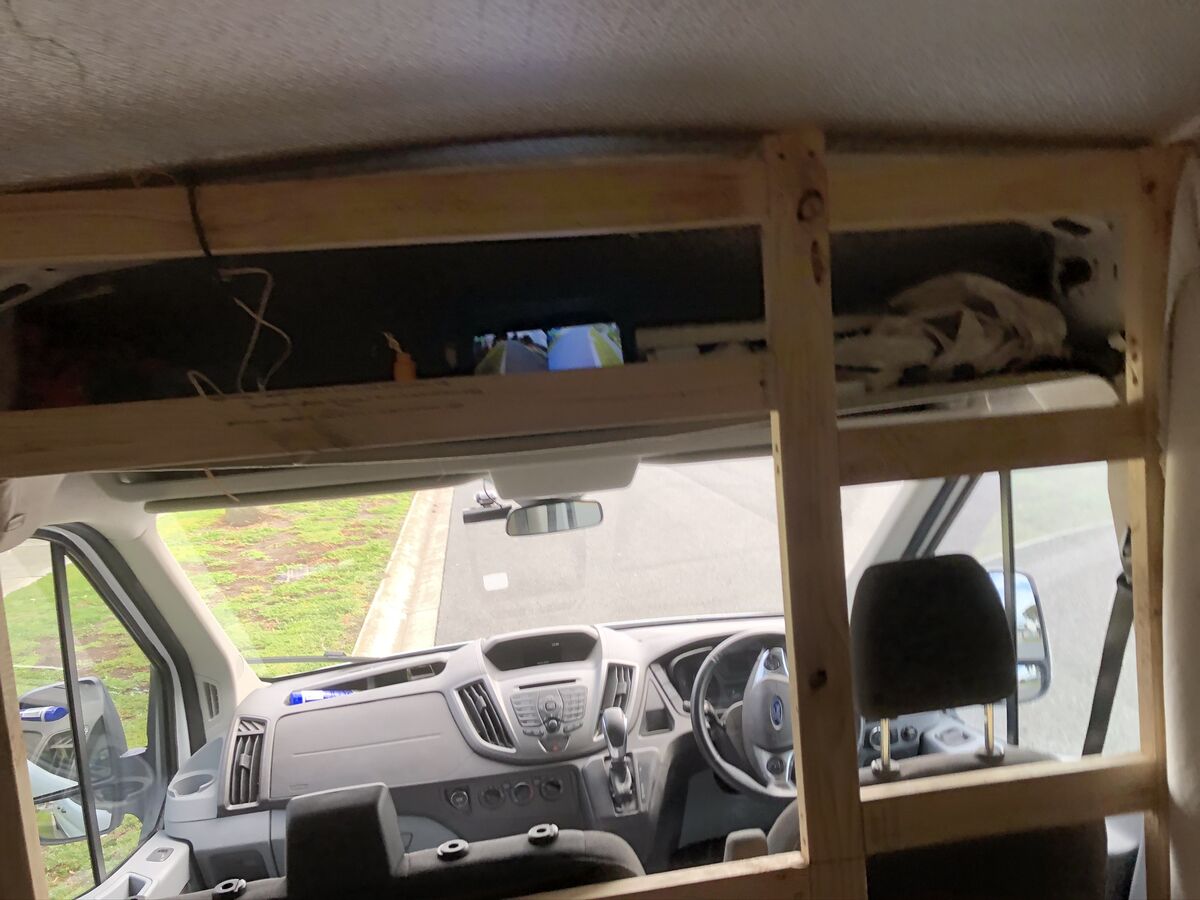
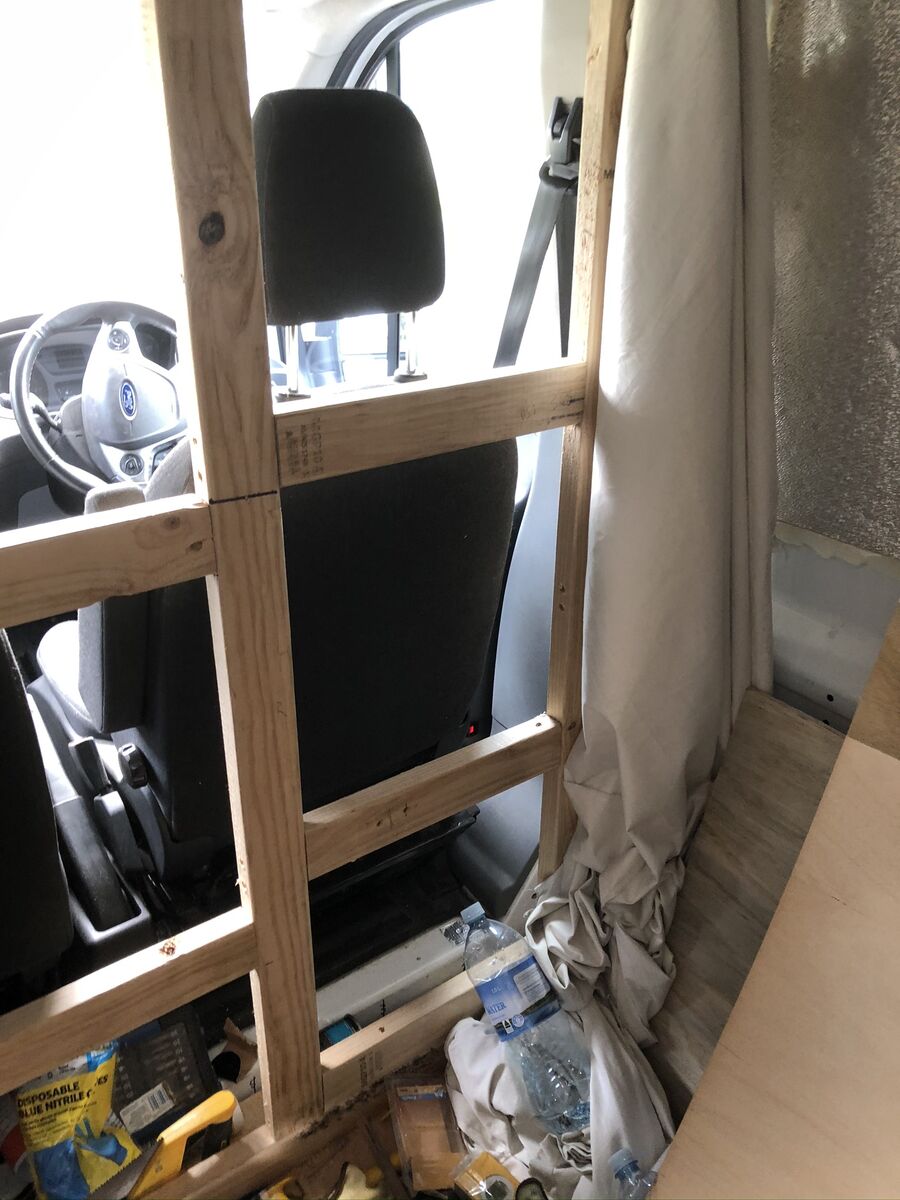
Cockpit Dividing Wall
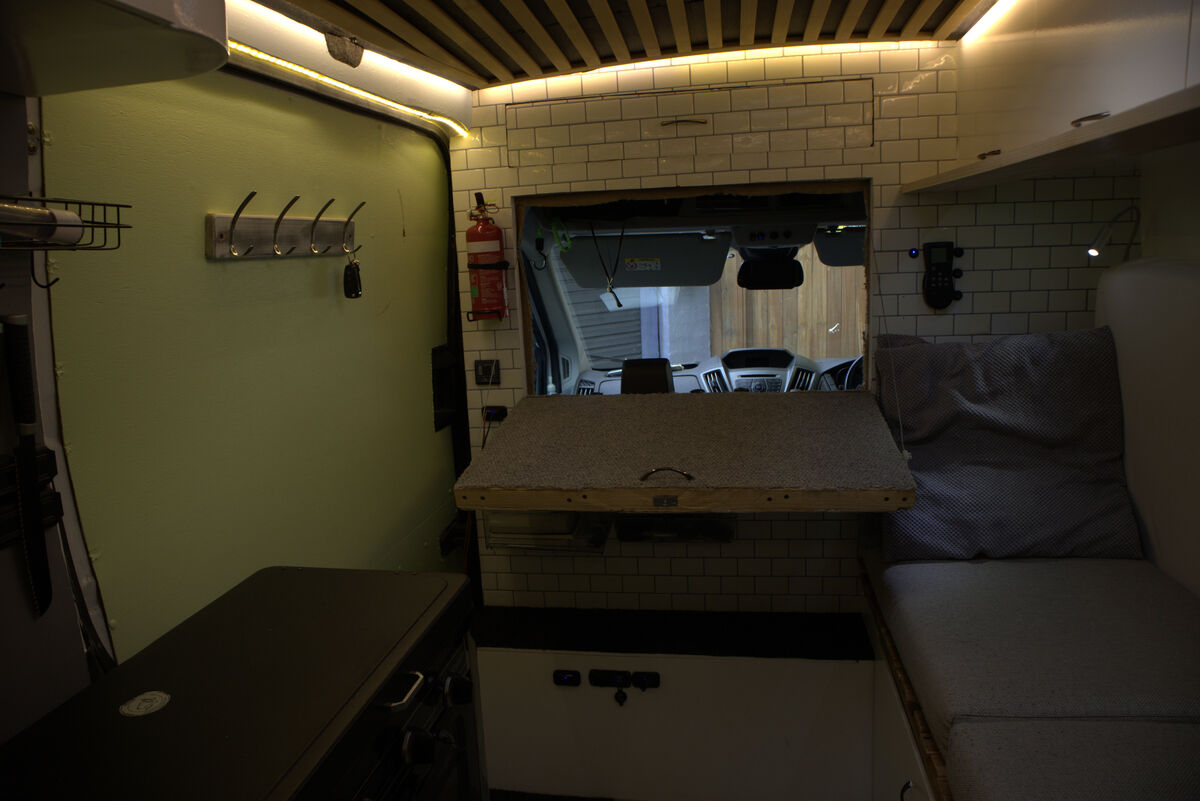
Before I started cabling I installed a solid insulated wall between the cab and the living area. The amount of heat that comes through from the cockpit is massive. I designed it with a hatch that doubles as a window and another flat surface. I used wood from the original side panels to save on cost.
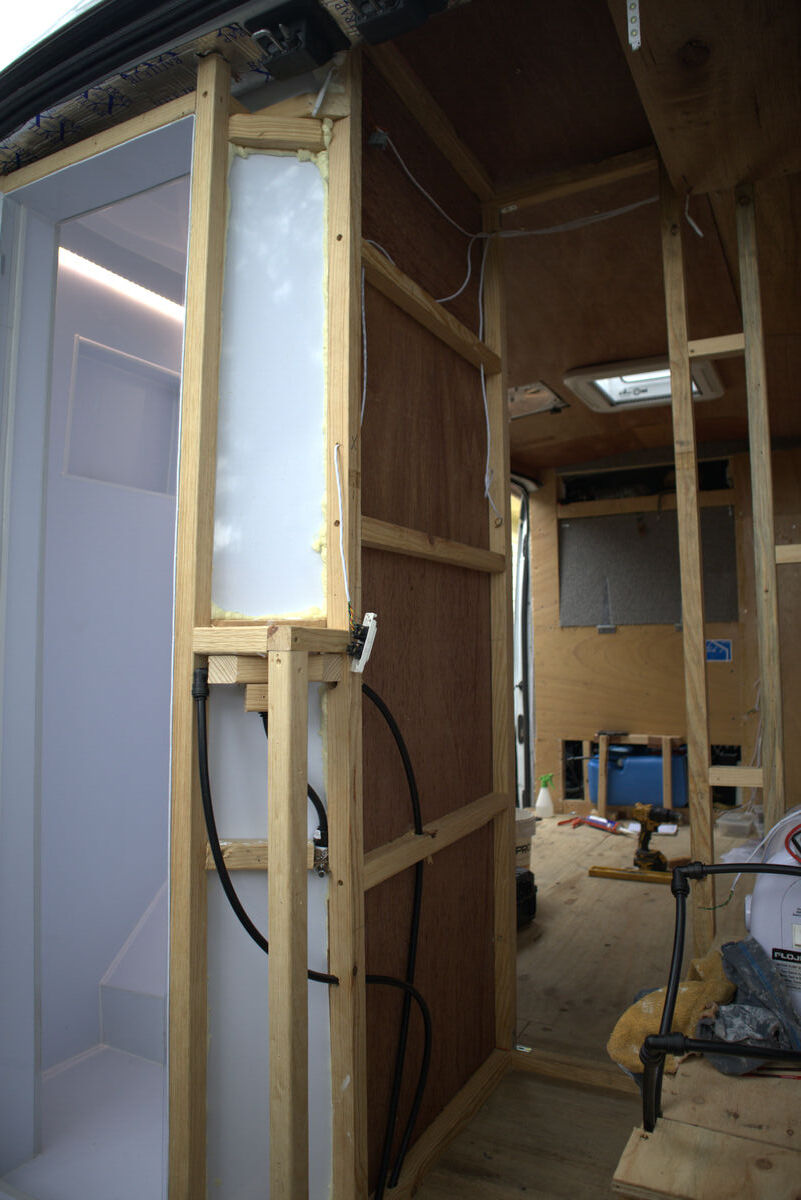
Building the insulated cockpit dividing wall — using reclaimed wood from the original panels
Completed dividing wall with hatch window
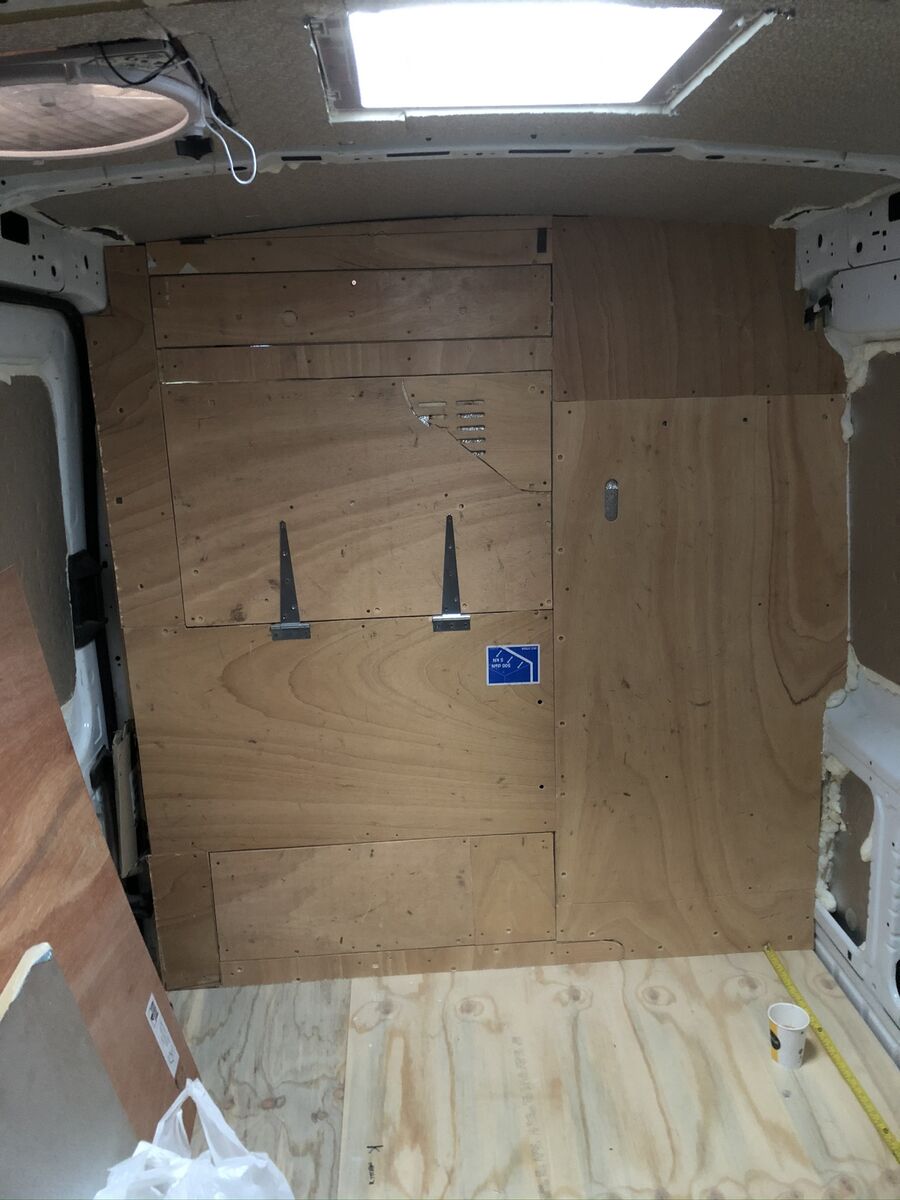
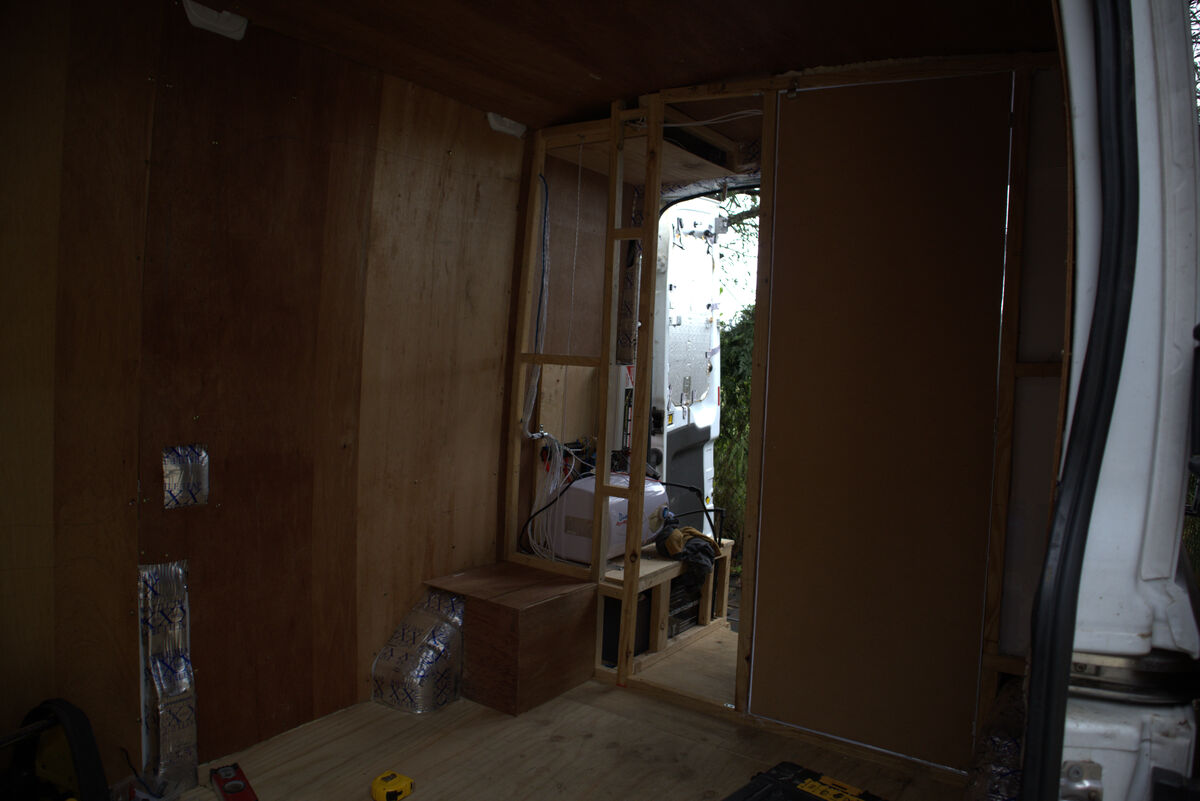
Boarding the Walls
A lot of people batten the walls horizontally then board the battens. I didn't. I didn't want any wasted space. Instead I screwed 6mm marine ply sheets directly to the metal upright beams. I marked out all the metal beams first so I'd know exactly where to screw cupboards in later.
This approach saves space inside the van, makes it lighter, and speeds up the build compared to traditional battening. Two birds, one stone.
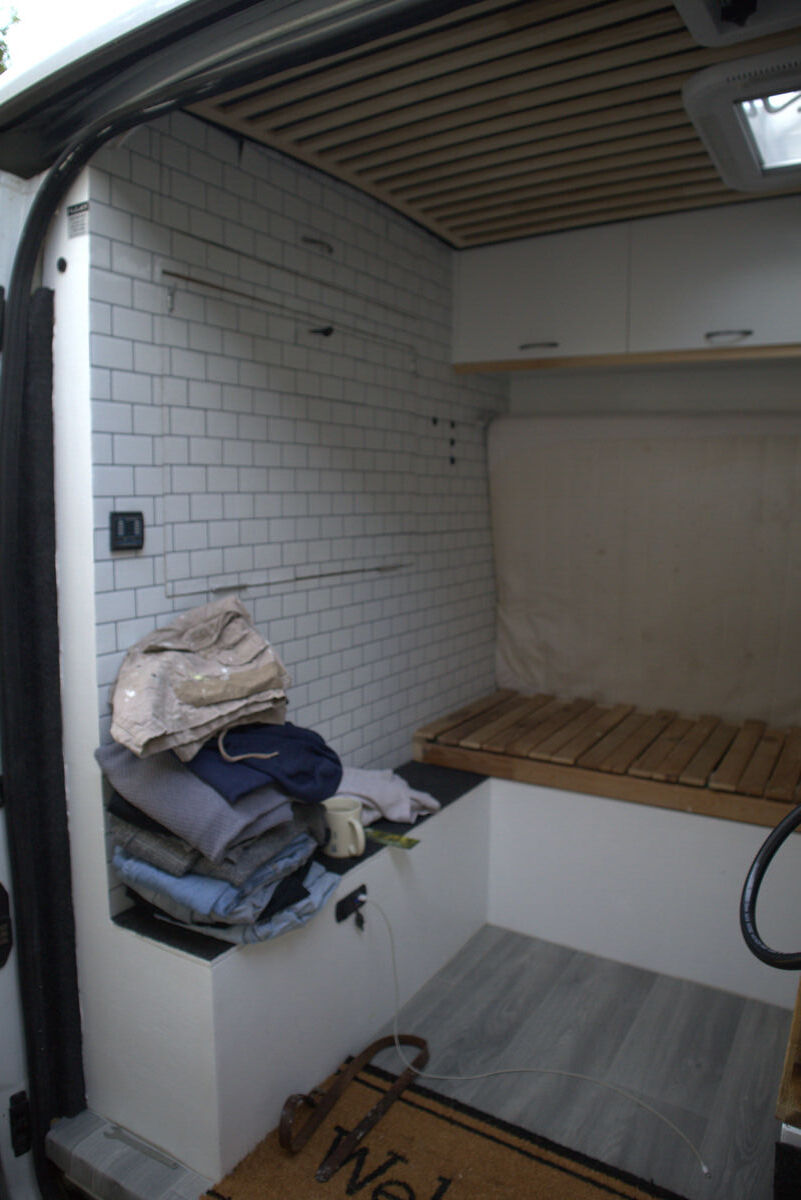
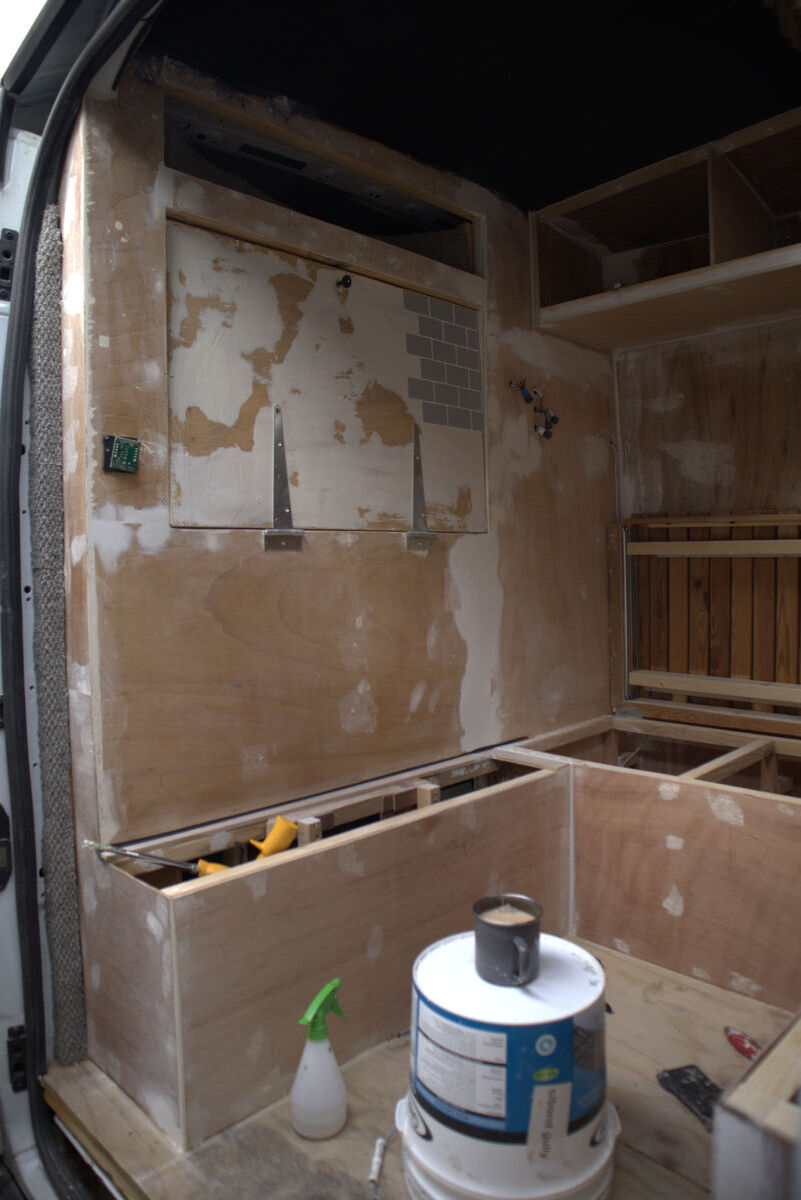
Bare cockpit wall ready for finishing
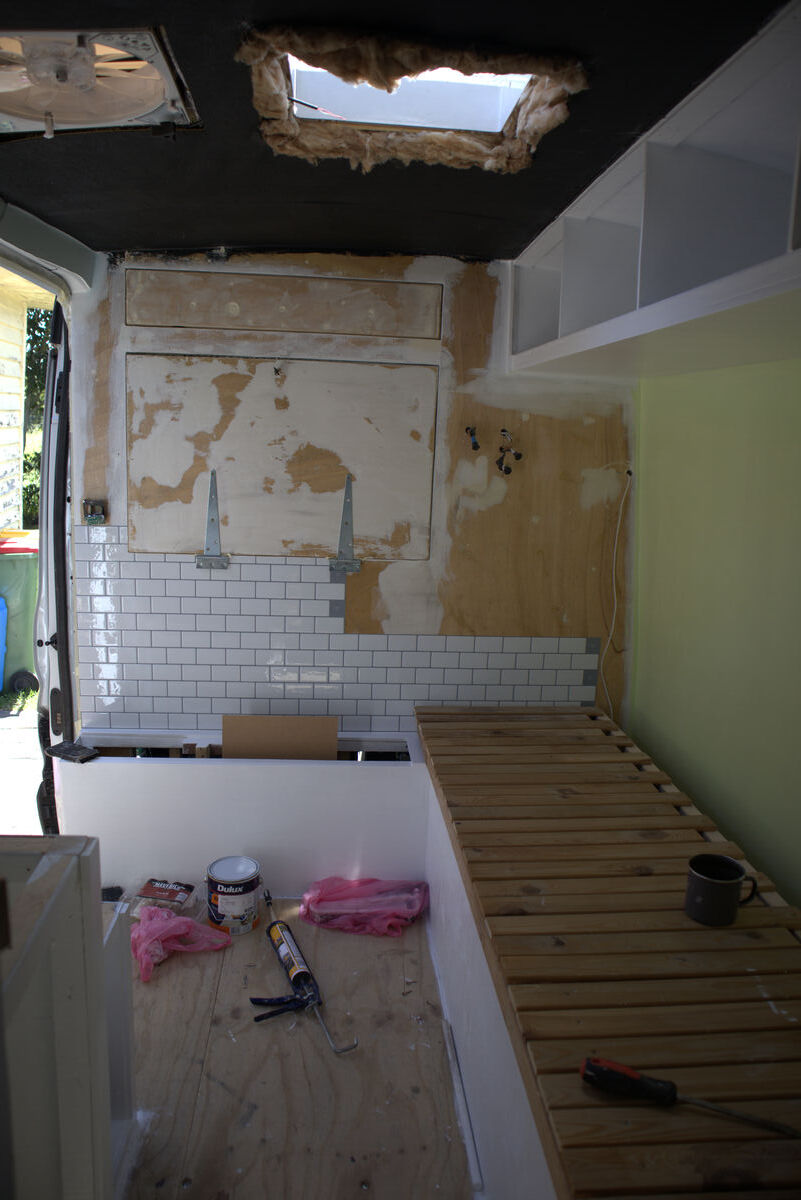
Left: Sanded smooth. Right: Metro-style sticky tiles applied as a feature wall
08
Plumbing
Draw out your plumbing diagram before you buy any fittings. Every van is different underneath.
Water Tanks
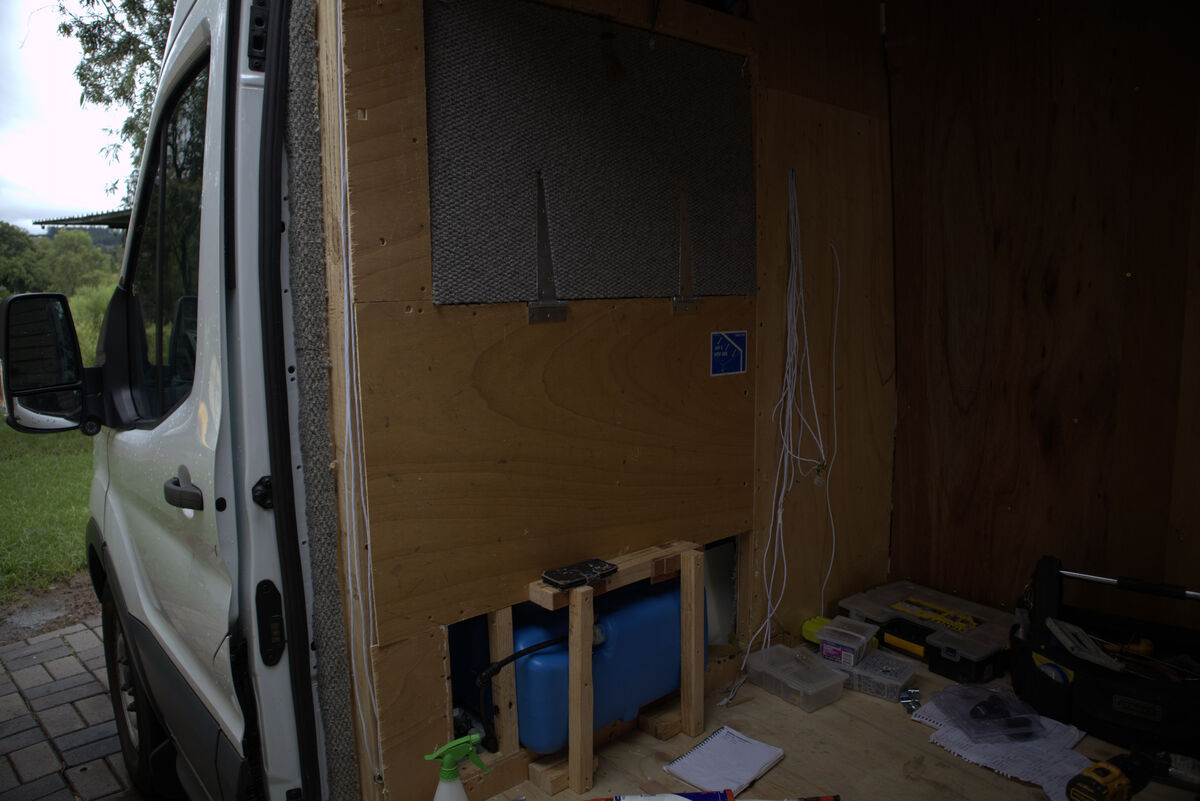
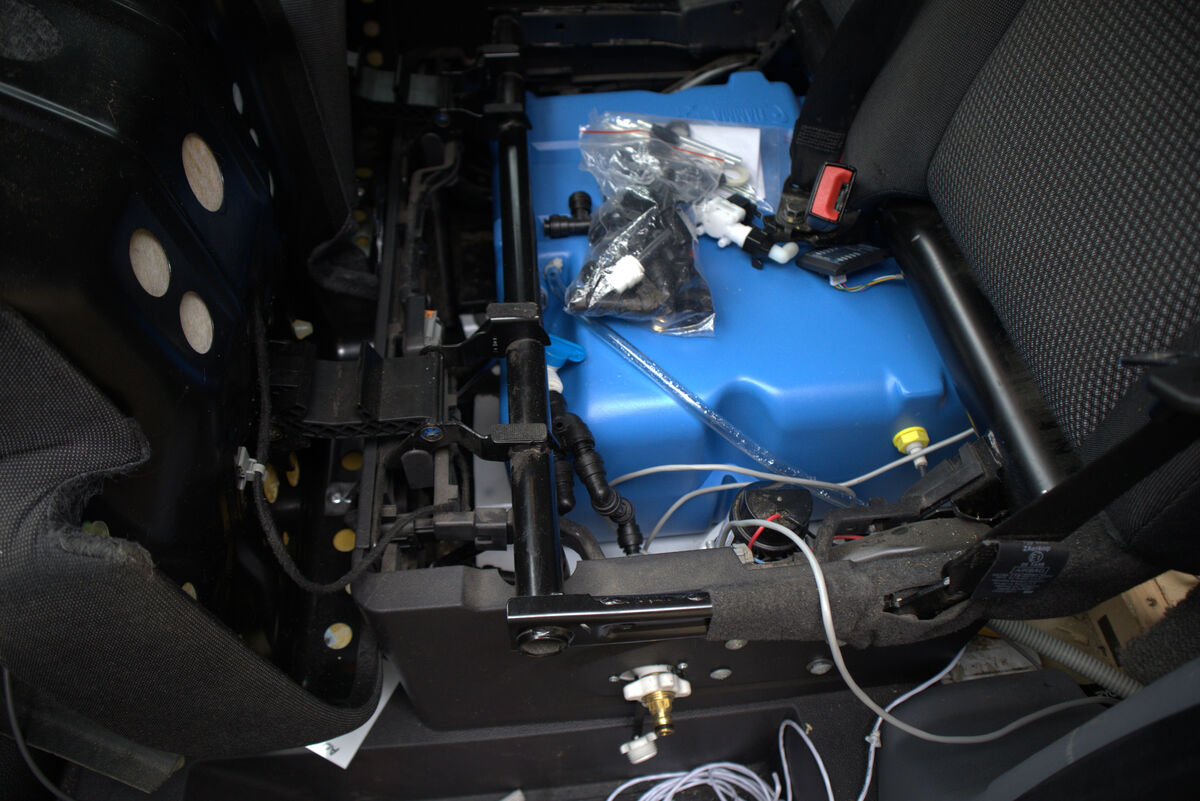
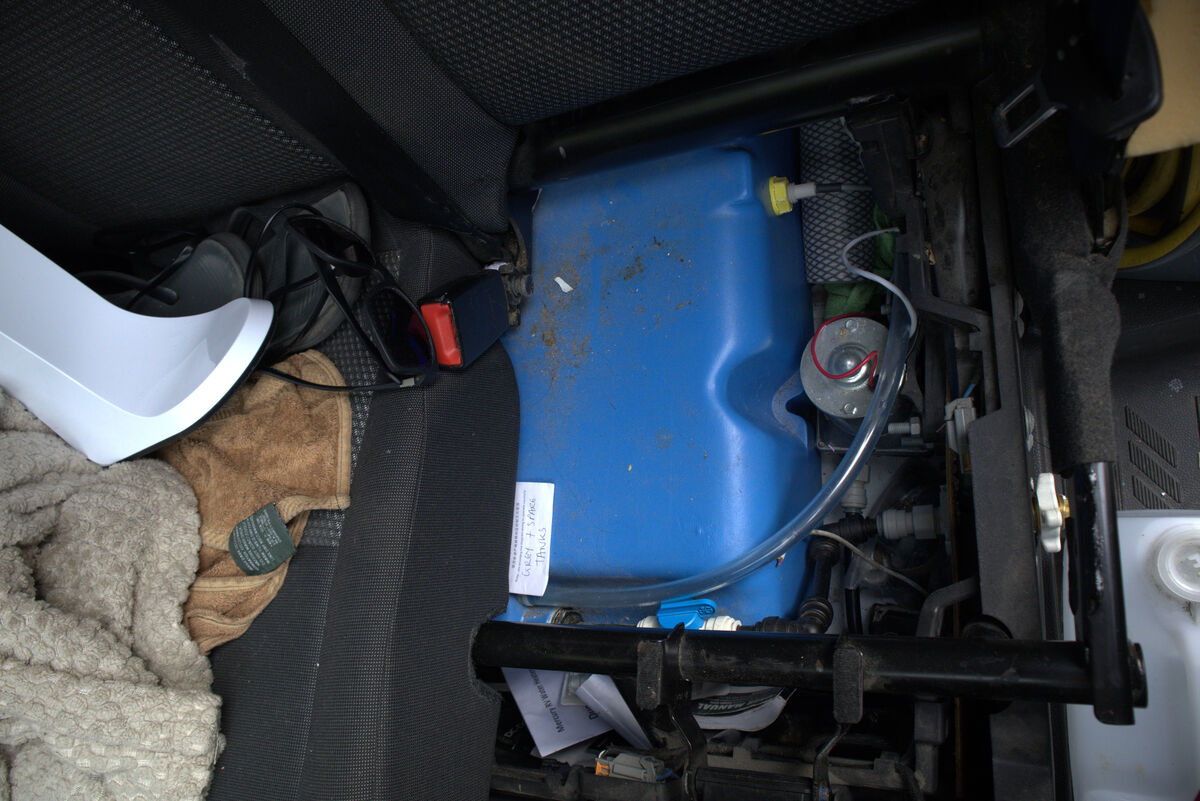
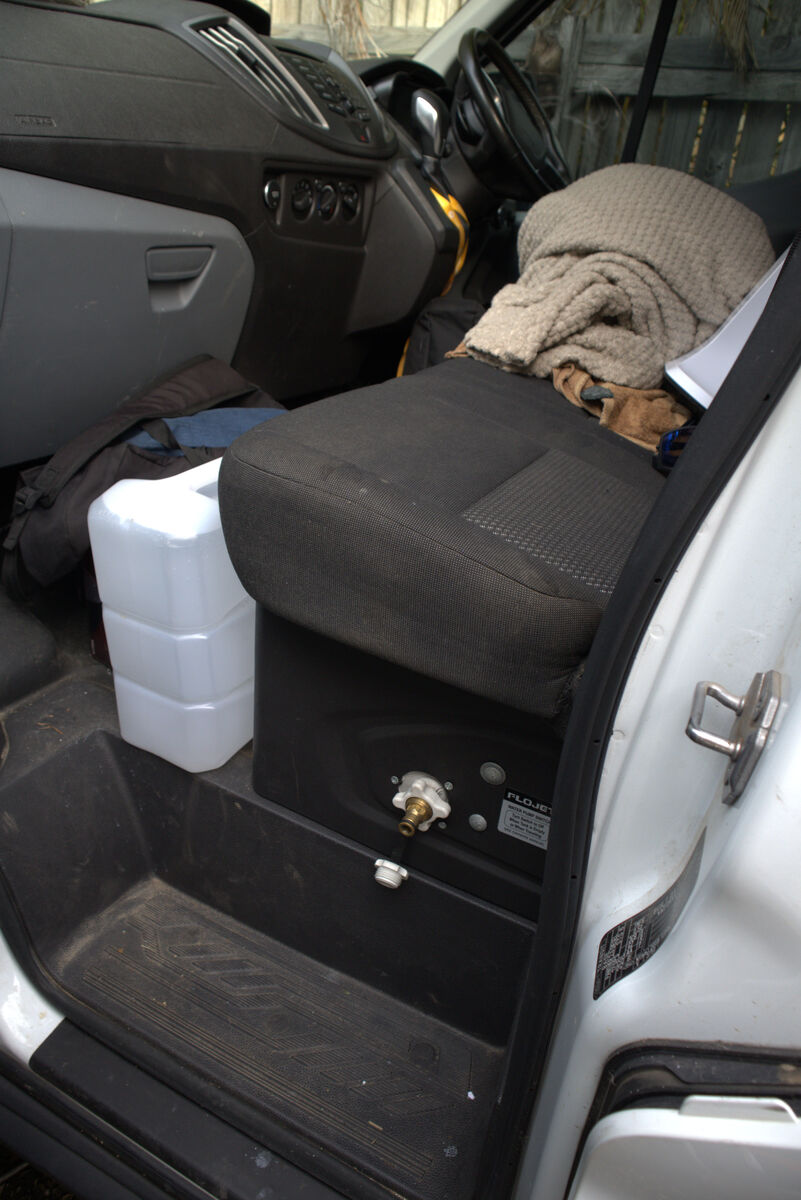
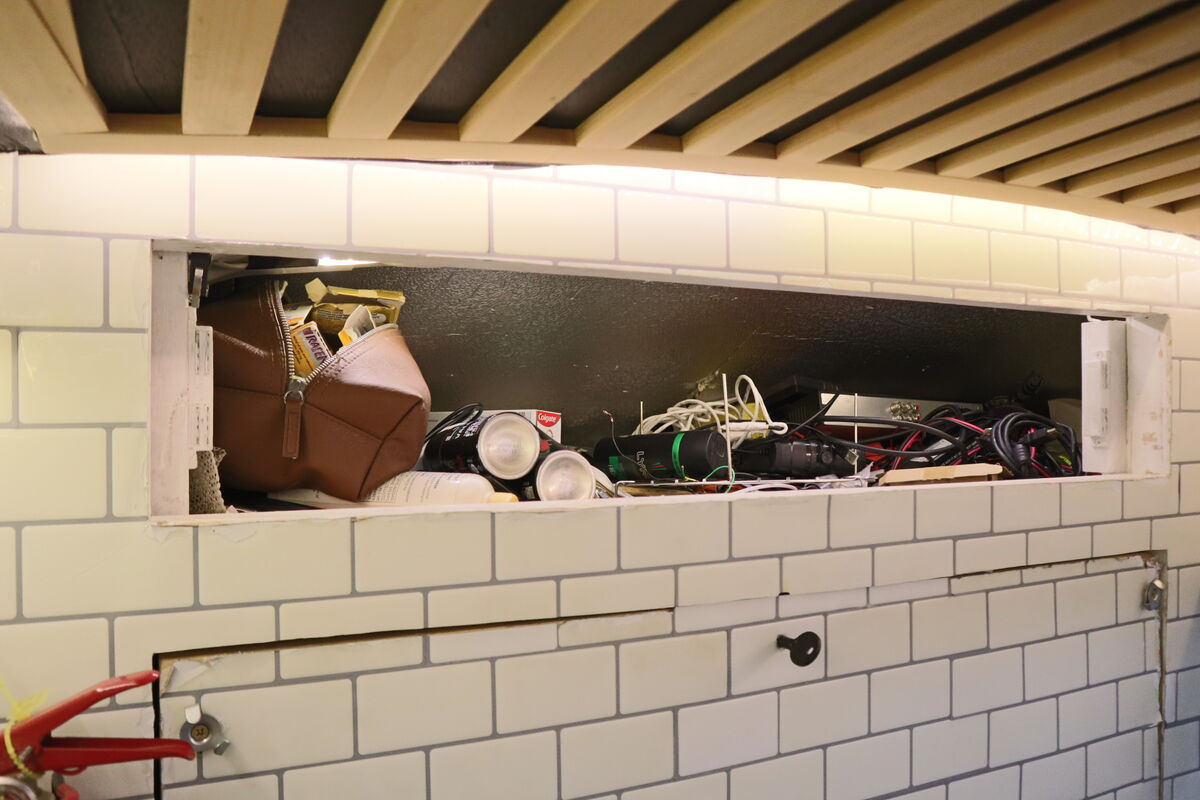
My van had too many obstacles underneath to fit two tanks under there. So I found a fresh water tank from Camec that fitted perfectly under the front seats. It protruded a bit past my cockpit wall but that actually made a nice feature because I built a storage cupboard around it.
I fitted my pump next to the fresh water tank under the seats. I was happy about this because I didn't want it underneath exposed to the road, and its much quieter being inside the van than mounted externally.
The grey water tank I strapped underneath the van with metal strapping. Install a breather on your grey water tank. Not all tanks come with one and without it you'll create a vacuum that stops the water draining properly from your sink.
Install the water level gauge before securing the fresh tank in its final position. Always flush the tank after drilling any hole in it to get rid of debris.
Fresh water tank tucked under the seats with the pump mounted right beside it
Water level gauge and the storage area built around the tank
Pipe Runs
I used 12mm water pipes and fittings throughout. Ran the pipes underneath the van secured with proper pipe clips. Where they needed to enter the van I drilled 25mm holes for both pipes to fit through, then sealed with expanding foam.
Pro Tip
Mark every pipe run on the walls after you board them. This saves you from accidentally screwing through a pipe later. I cannot stress this enough.
Testing
Once the plumbing was in, even without the sink being fitted, connect the tap, shower head and hot water tank and test the entire system. You DO NOT want to discover leaks after everything is finished and sealed up. Its so easy to make a simple mistake like not using the right tool for cutting the pipes.
Keep the run from the hot water to the shower as short as possible so you're not wasting water waiting for hot water to come through. Off grid, every litre counts.
Pipe runs to the shower area before everything was sealed up
Fresh water inlet — keeping it simple and accessible
Go Deeper
The full plumbing diagrams, tank sizing calculations and hot water system options are in the Plumbing Guide.
09
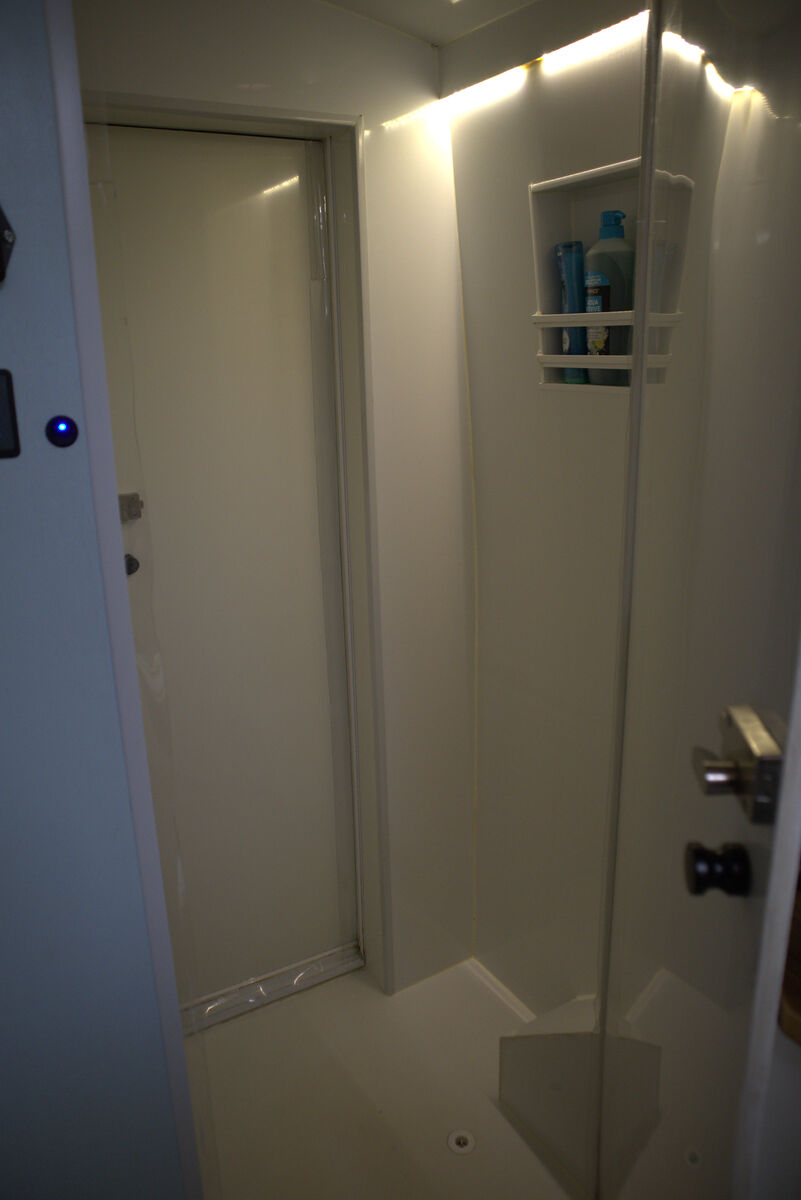
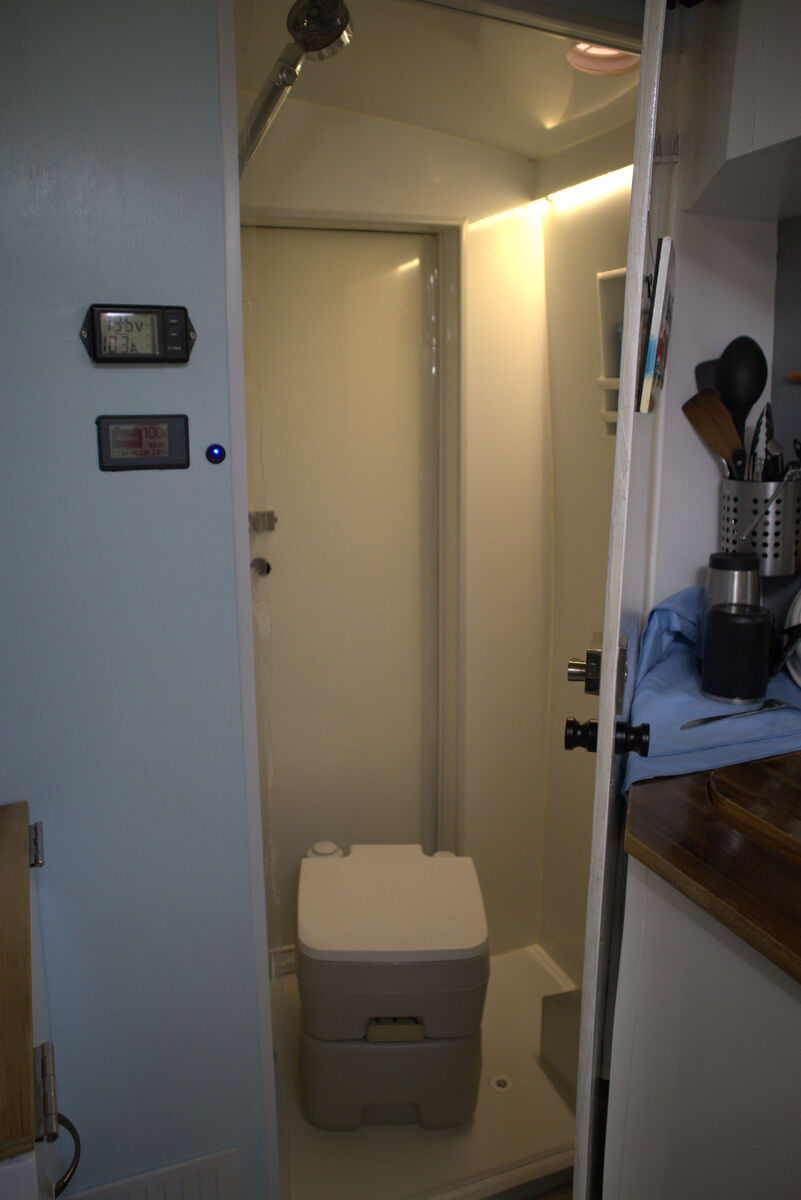
The Shower
A proper shower in a van is one of the biggest quality of life improvements. Plan it carefully.
I wanted a shower inside the van but I also wanted to use the space for other things, so my portable toilet lives in there too. I planned it so it was small enough to be practical but big enough to actually take a shower in, with enough height.
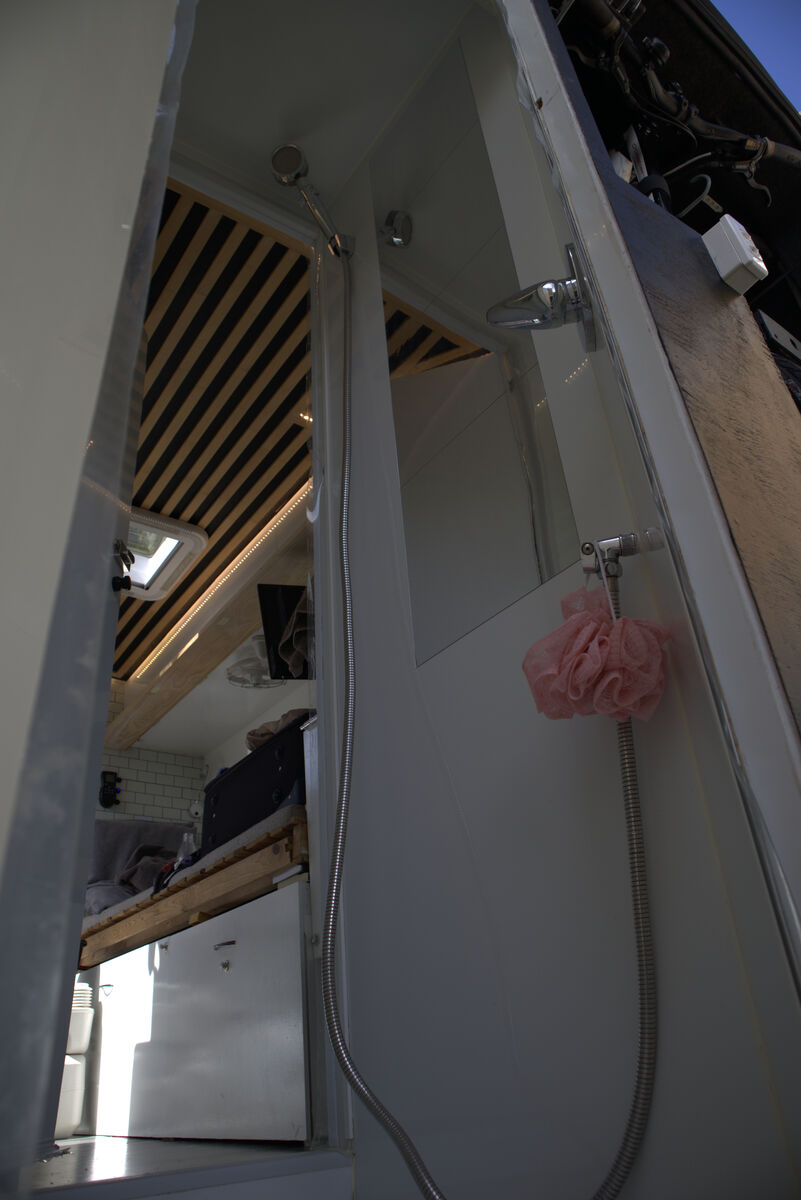
I wanted access from both inside and outside the van so I could easily fit anything long inside. I planned the whole thing with tape on the floor first, marking out exactly where everything would sit.
Building It
I built the frame, then took out the ply floor and insulation in the shower area to get better height. Filled the gaps in the floor with bits of marine ply, using the two most trusty adhesives ever: Sikaflex silicone and expanding foam.
I picked up two 2.4m by 1.2m plastic sheets and carefully cut them with a jigsaw on the slowest setting, keeping it as level as possible because they can shatter. Leaving the factory sticky coating on helps stop them cracking.
Waterproofing
This is where I'll say it plain: never be shy with silicone. Especially in areas you can't see. I used plenty on the floor and around all the edges, then placed the floor piece down with weight on it for a few hours. Same technique for every wall panel. Every place where a panel meets another panel, silicone. Every edge, silicone. Under the panels, silicone. I used plastic tiling edging where the external corners of the plastic meet.
I've sealed multiple showers and baths in houses and the same rules apply here, except a van moves and vibrates so the risk of failure is even higher.
For the doors I used MDF sheets, covered the inside with plastic sheet, then sealed all the edges so the MDF wouldn't get wet.
Lesson Learned
If I did it again I'd use marine ply instead of MDF for the shower doors. MDF swells and rots when moisture gets in through any pinhole you've missed.
I used tiling edging strips to hold a flexible plastic seal so water wouldn't escape out the doors. The extractor fan was a solar powered single unit. To seal it I used a 100mm pipe going from inside the plastic lining up to the roof.
Pro Tip
Test the shower before you consider it finished. Run water through it. Check every joint. Look for slow leaks. Fixing them now takes minutes. Fixing them later means pulling the whole thing apart.
Shower build progression: frame, walls, plastic lining, and finishing
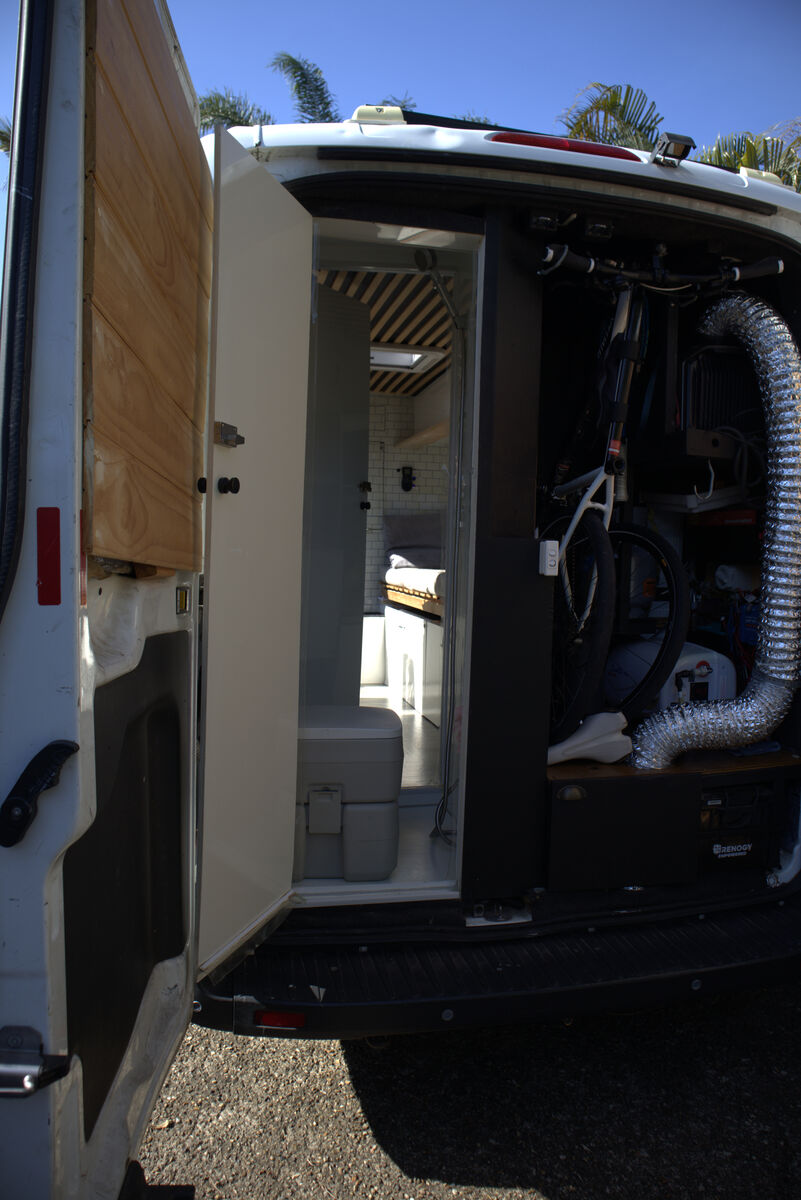
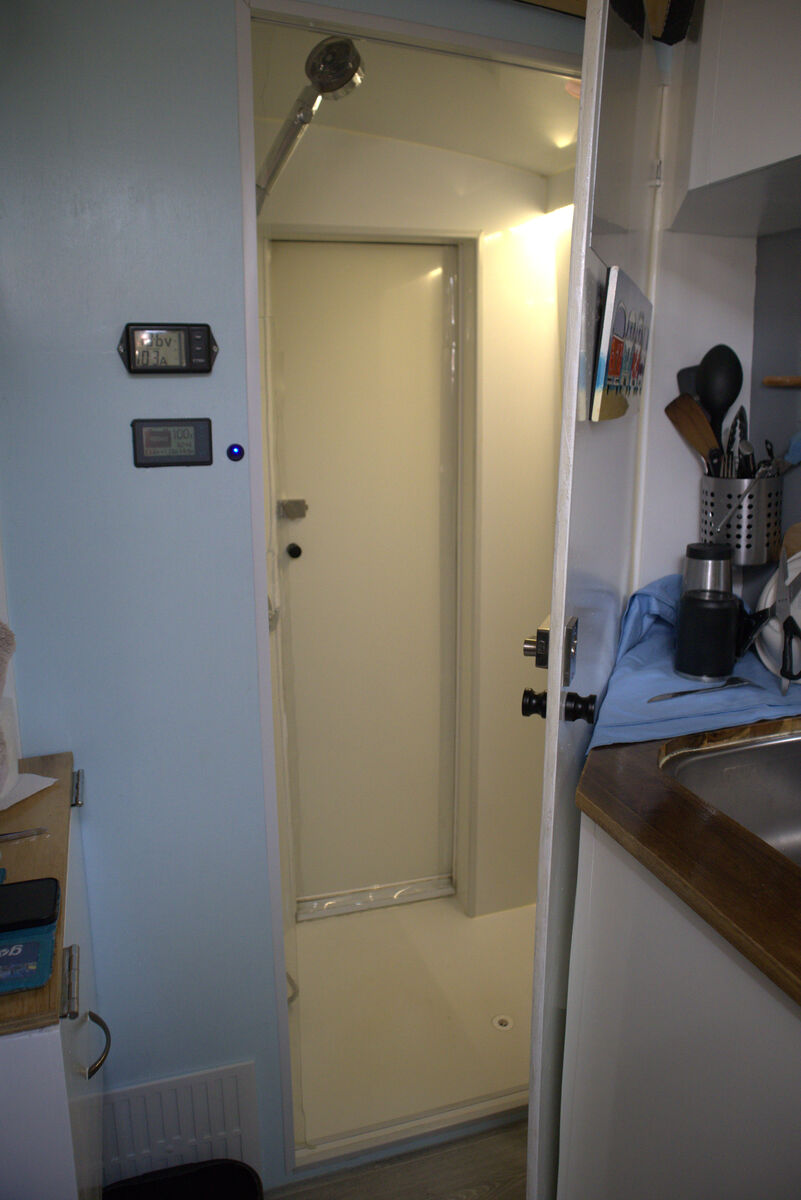
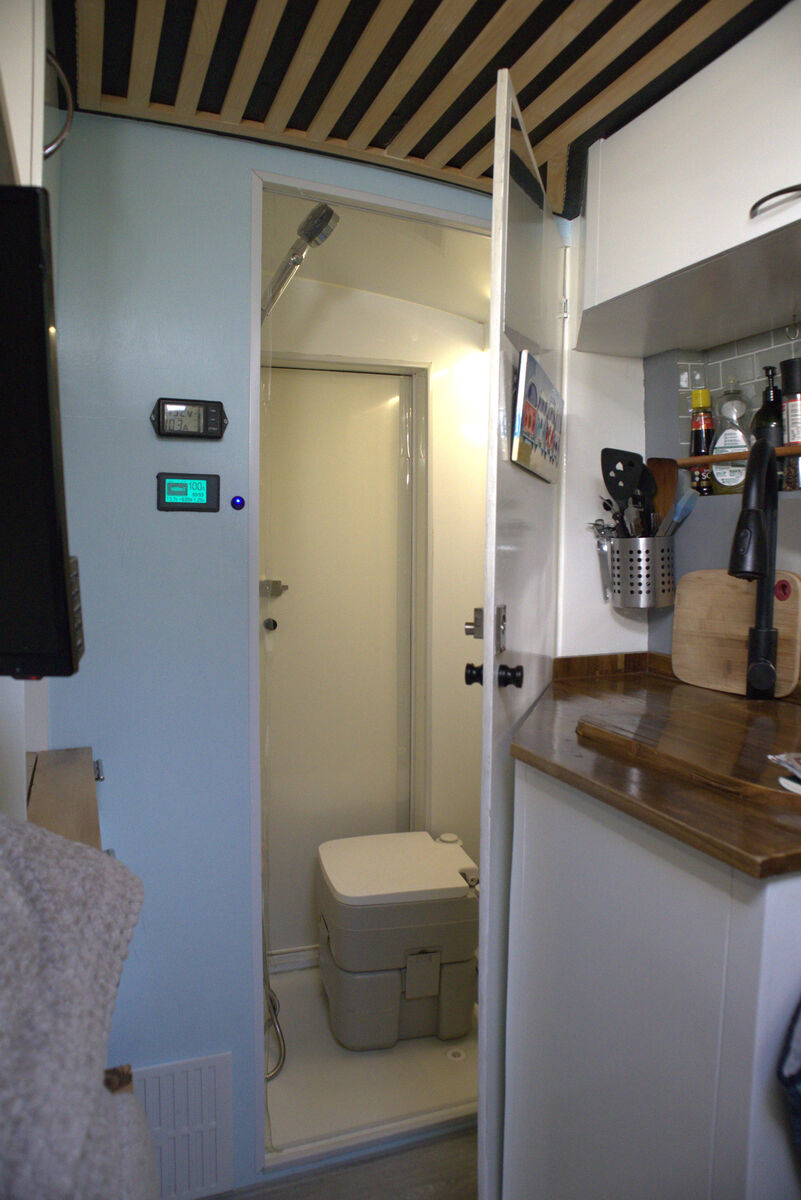
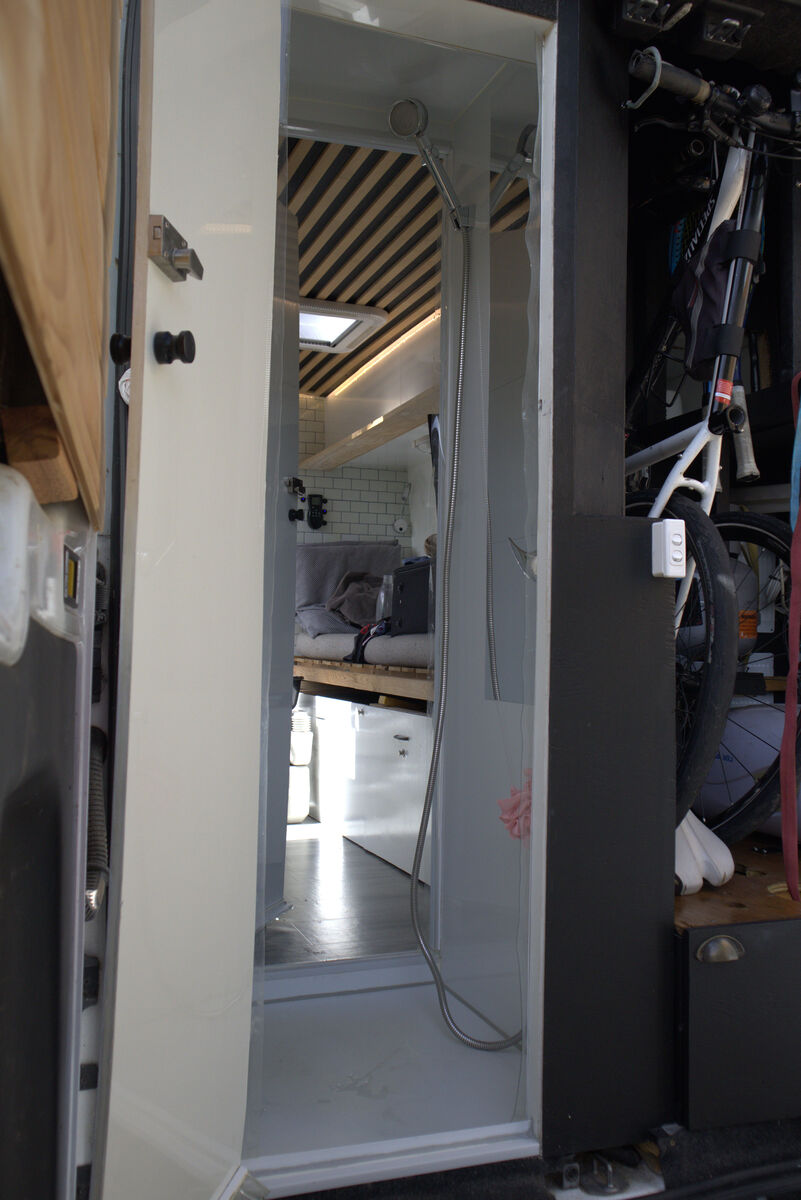
The finished shower — access from both inside and outside the van
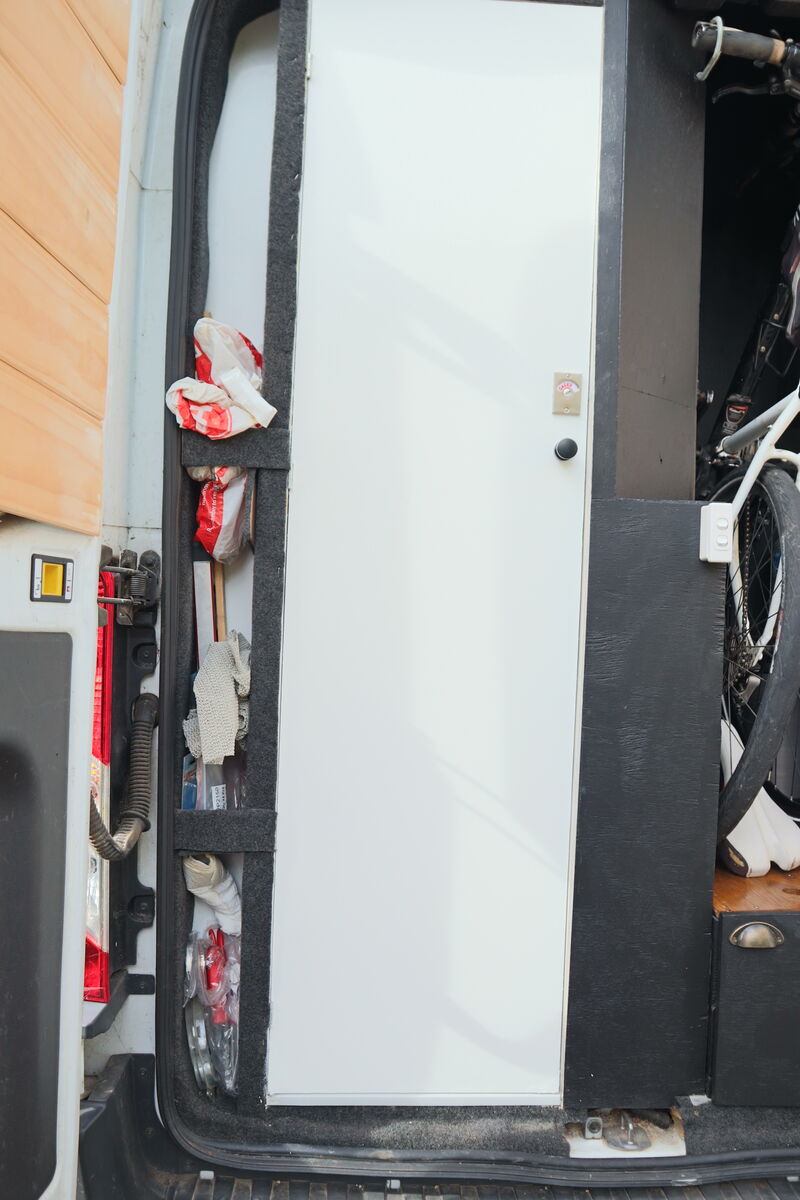
Rear access to the shower area
10
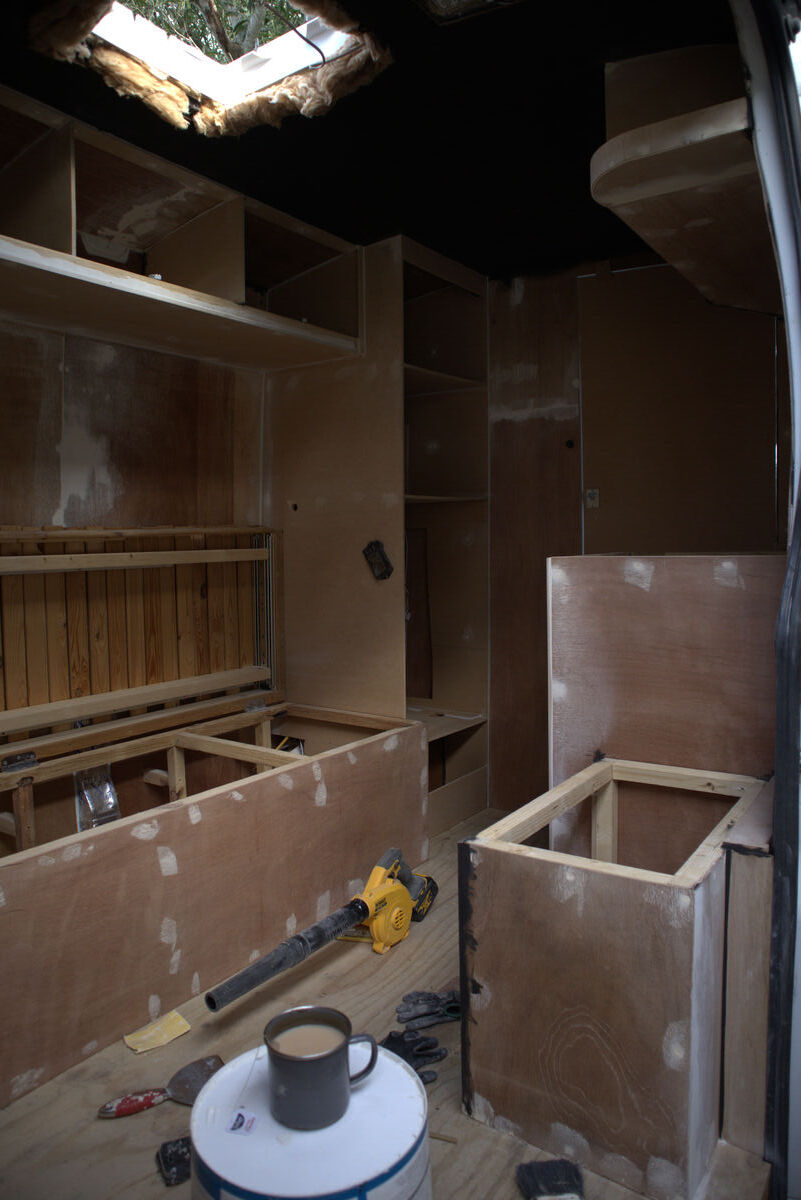
Cabinetry & Kitchen
The kitchen and cupboards define how liveable your van actually is day to day.
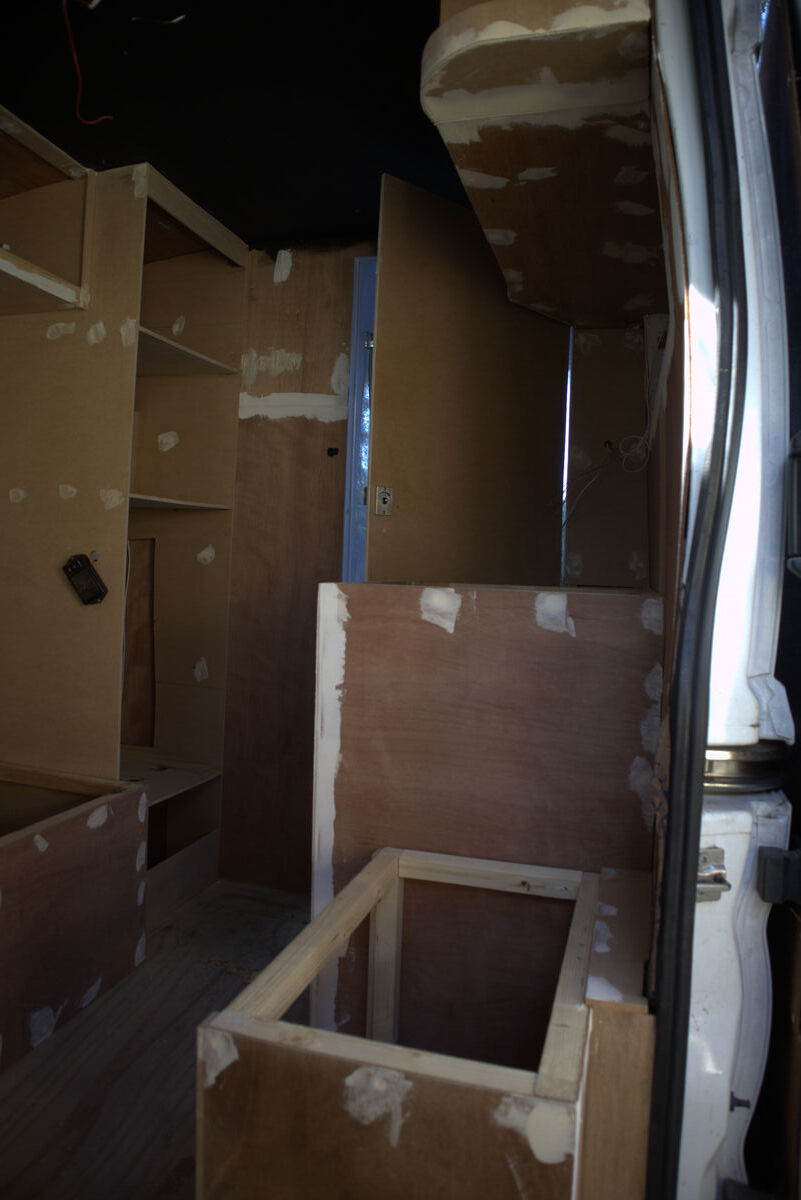
Cupboards
Use a square edge, not a spirit level, when setting out cupboards in a van. The van floor is never level but your cabinets should be square to each other.
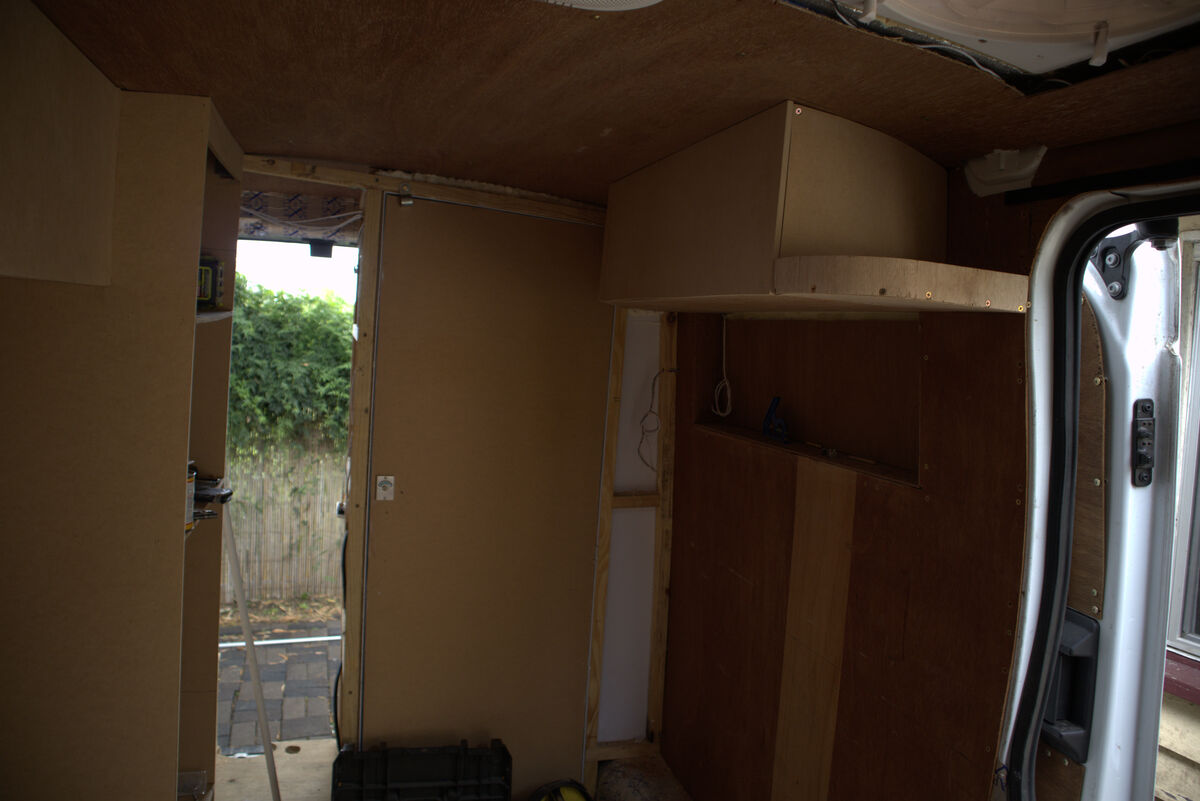
I built the main cupboard as a complete unit outside the van out of MDF, constantly measuring so that I could get the curve of the van walls right. This cupboard just slotted right in.
For all structural framing I used 70 by 35mm framing wood but I cut them in half to keep the weight down. Full section is unnecessary weight in a van. Every bit adds up.
The cupboards above the bed: I ran two strips of framing wood across, then a base plate, then the dividers inside, then strips of MDF on the ceiling just for the hinges to sit on. Cut the doors to suit. Same method for above the sink.
Pro Tip
Countersink every screw. Once all cupboards were fitted I wood filled everything and sanded back to make it perfectly smooth. Taking this step seriously is the difference between looking professional and looking amateur.
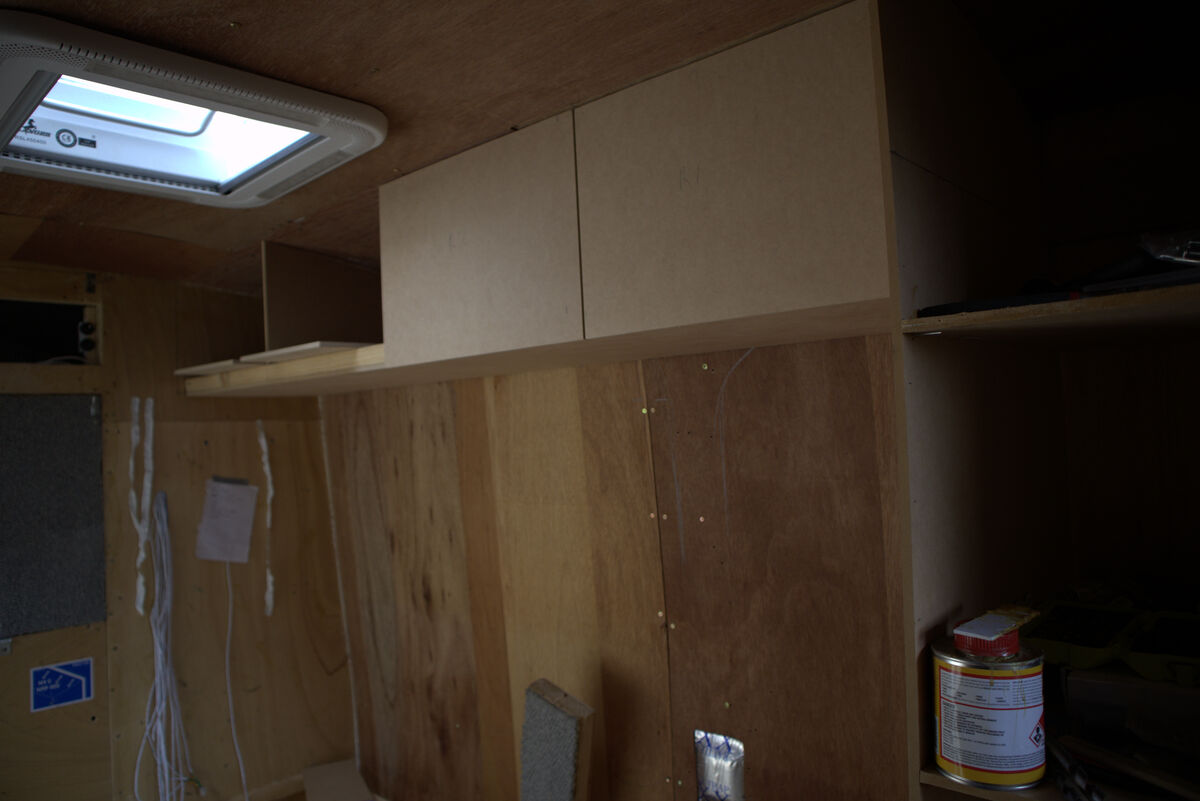
Main cupboard unit going in — built outside the van then slotted into place
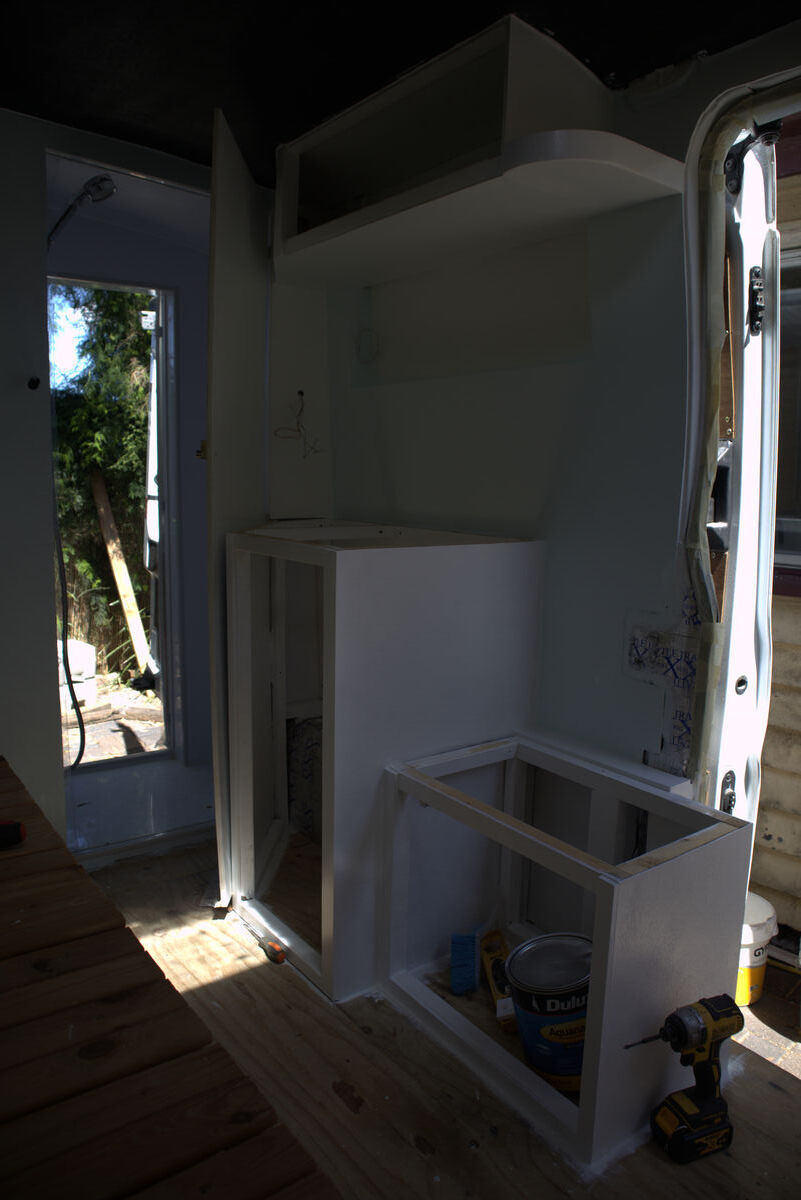
Seating area cupboards being fitted with framing cut in half to save weight
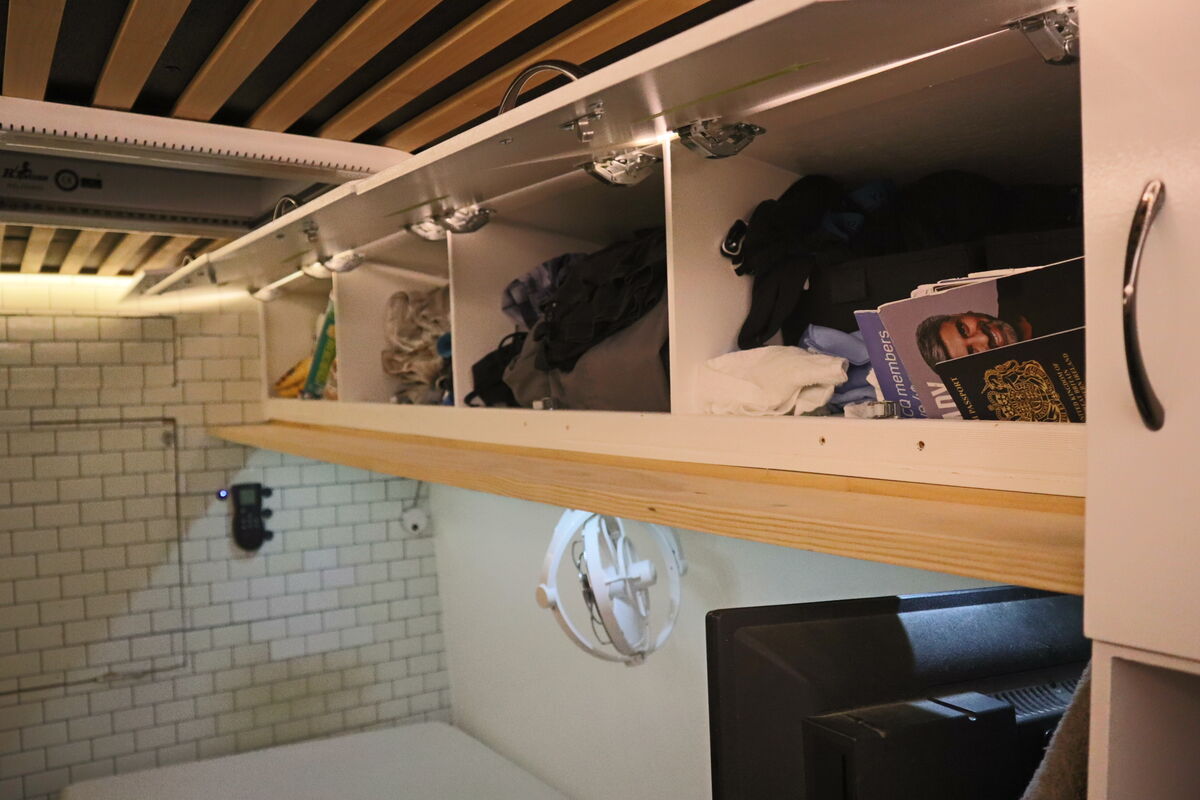
Overhead storage: above the bed (left) and above the cockpit (right)
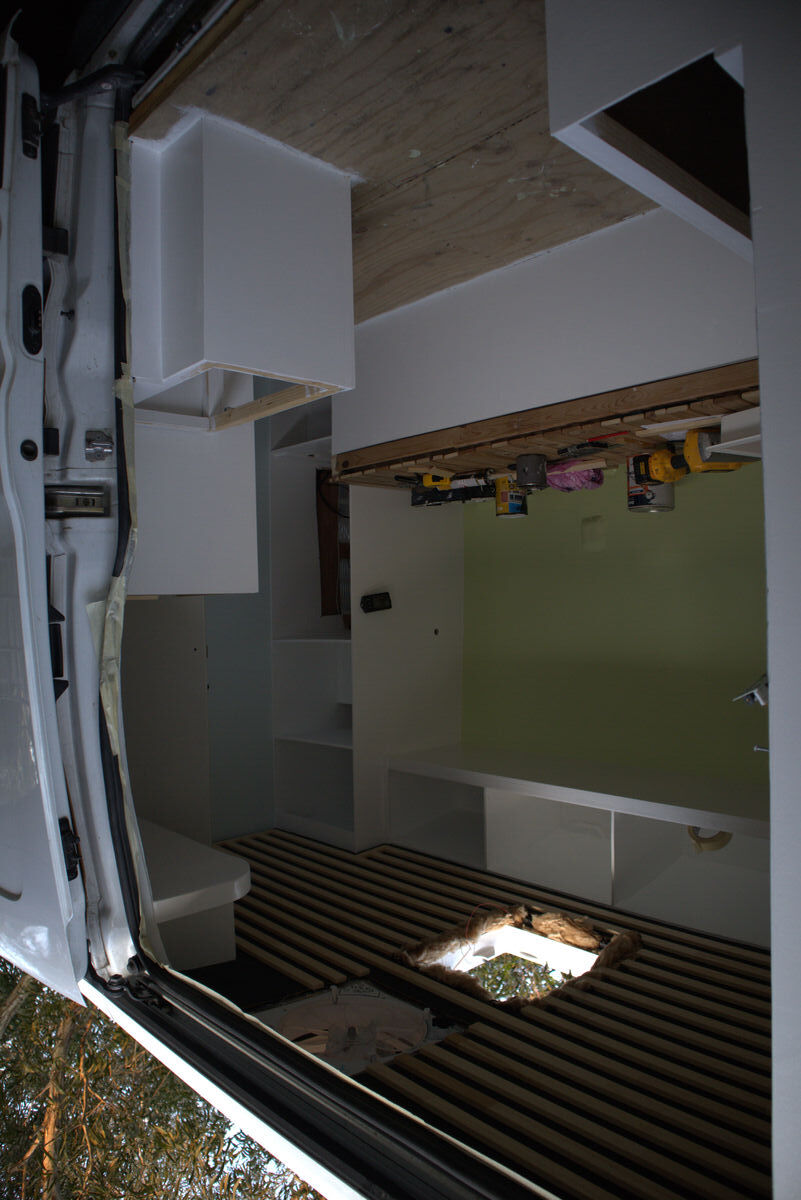
Kitchen
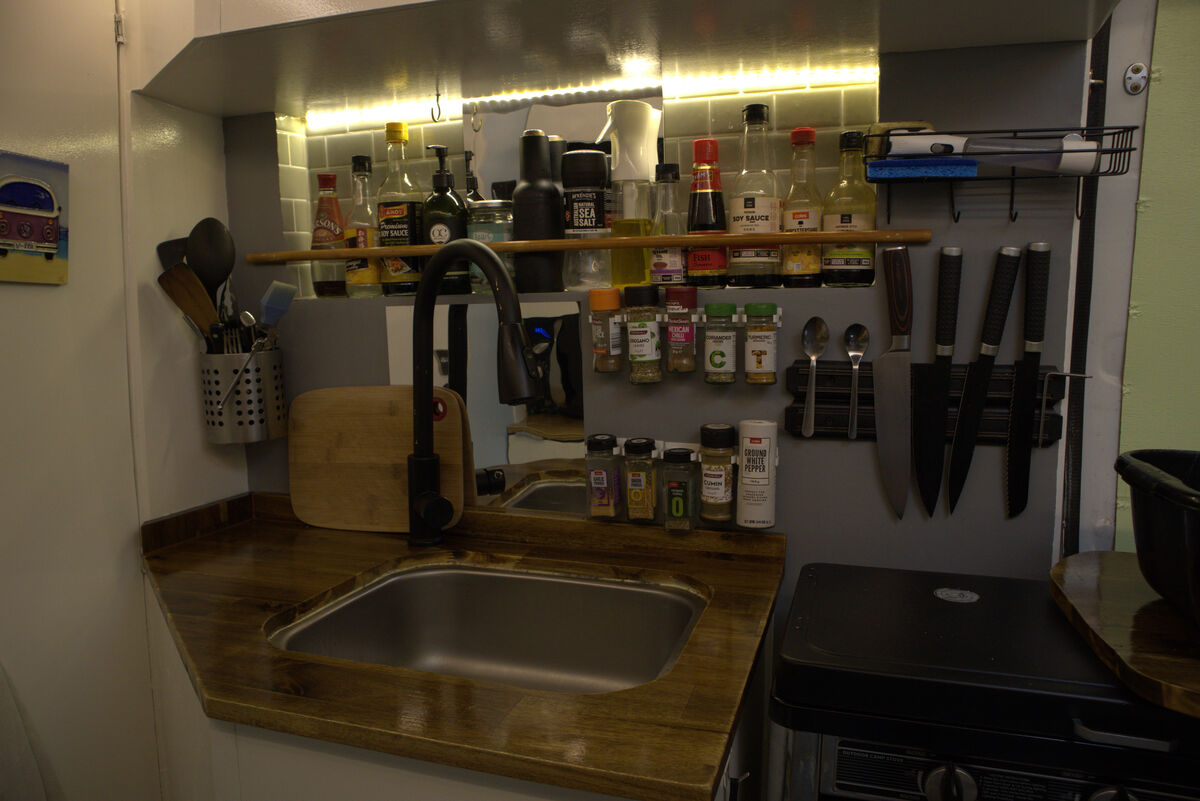
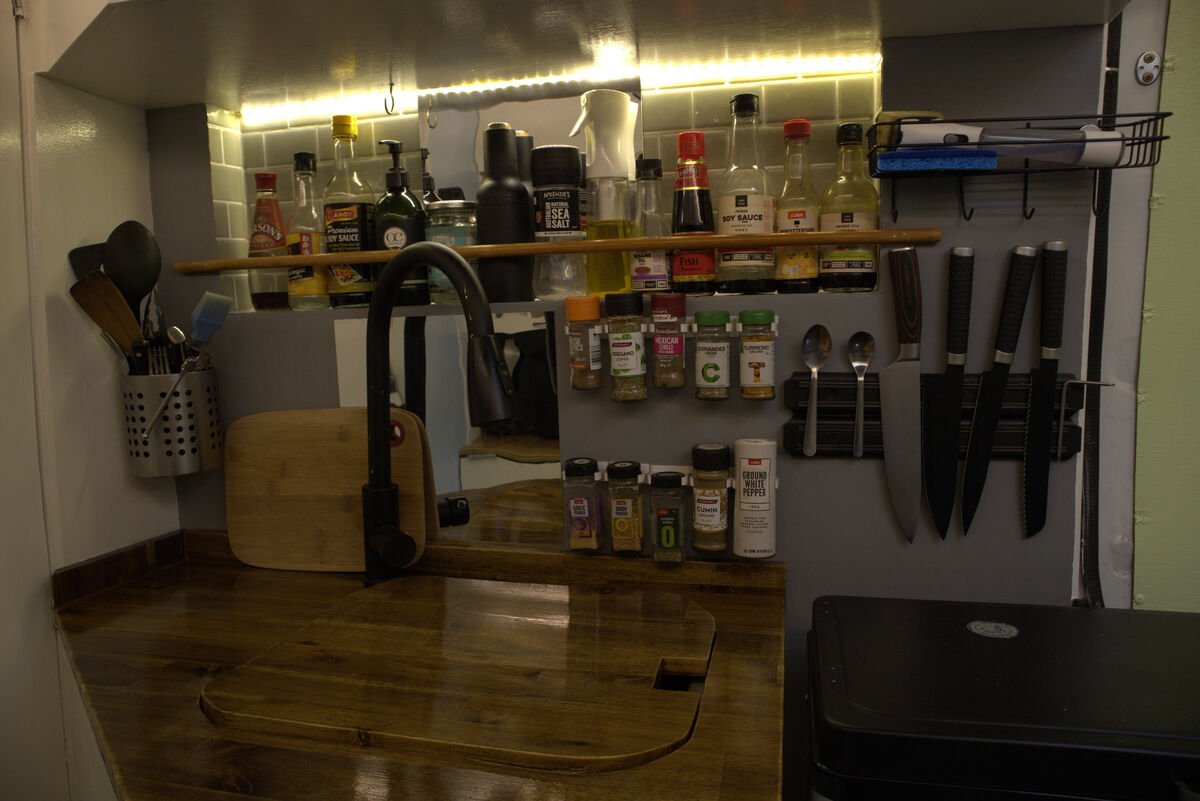
I used a real wood benchtop. To keep it light I went for a thinner benchtop than standard. I wanted a full size sink but so it wouldn't take up a lot of room. So I screwed a single bowl to the underside of the benchtop with silicone where the sink touched the wood, then cut the benchtop so it sat on top of the sink looking like there was no sink at all. Seamless.
I fitted a water saving tap with a spray function to save water off grid.
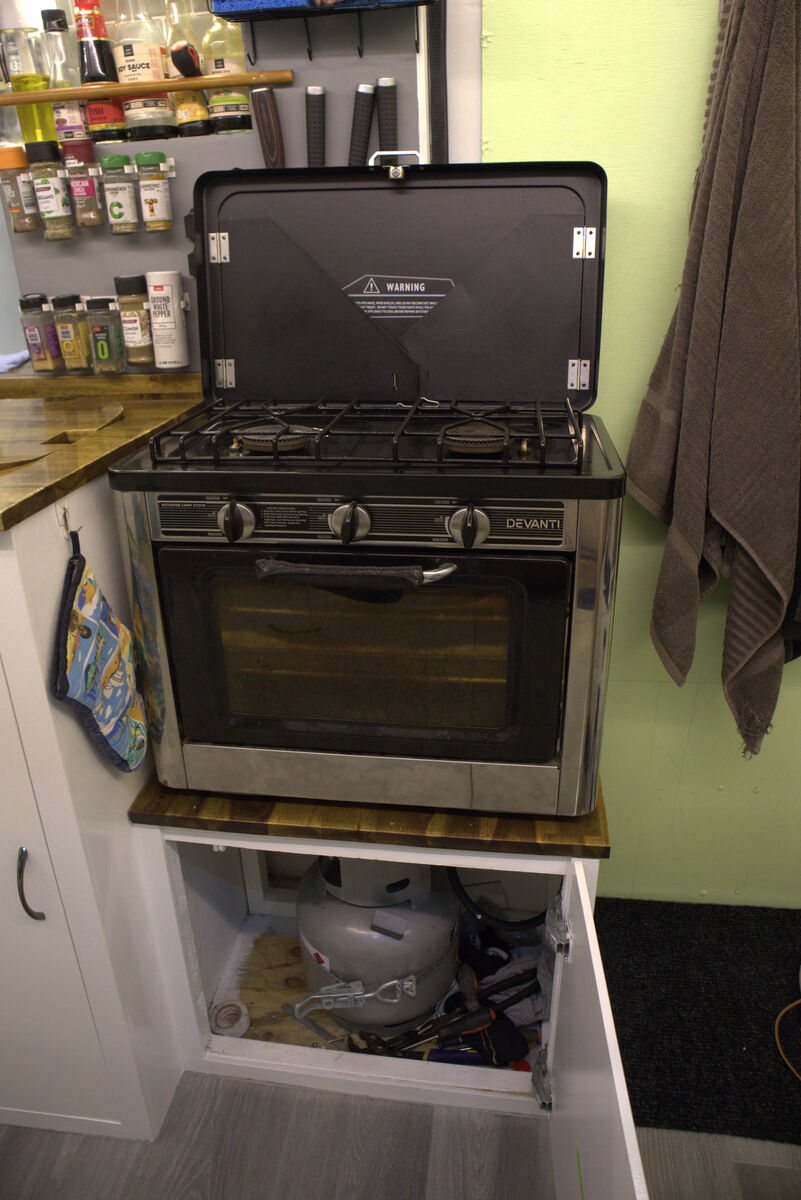
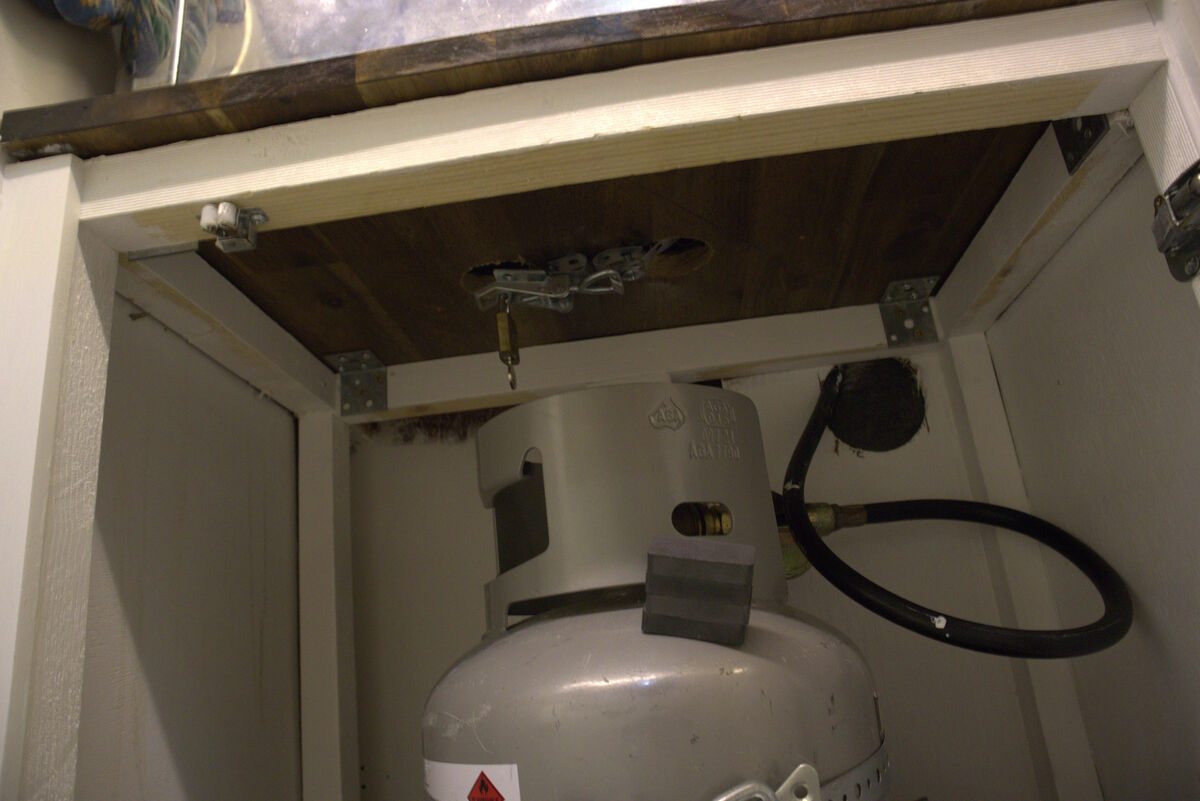
For the oven benchtop I drilled two 50mm holes, slipped flexible metal strapping through and around the base of the oven. In the cupboard I used a lock clasp so I could remove the oven easily and use it outside if I wanted. Same clasp method to secure the gas bottle. With portable gas not plumbed in, it doesn't require certifying for insurance.
Install a CO detector and smoke alarm in the living space, and test both regularly. Any gas use in an enclosed van needs active monitoring.
Lesson Learned
On the initial build I had a standing lockable fridge in the cupboard at the end of the bed. There were many times I forgot to lock the fridge and found the contents all over the floor after driving. Any fridge you fit needs to be properly secured with a positive latch.
Safety Note
Fridge ventilation is mandatory. Poor ventilation can overheat the unit and create a fire risk.
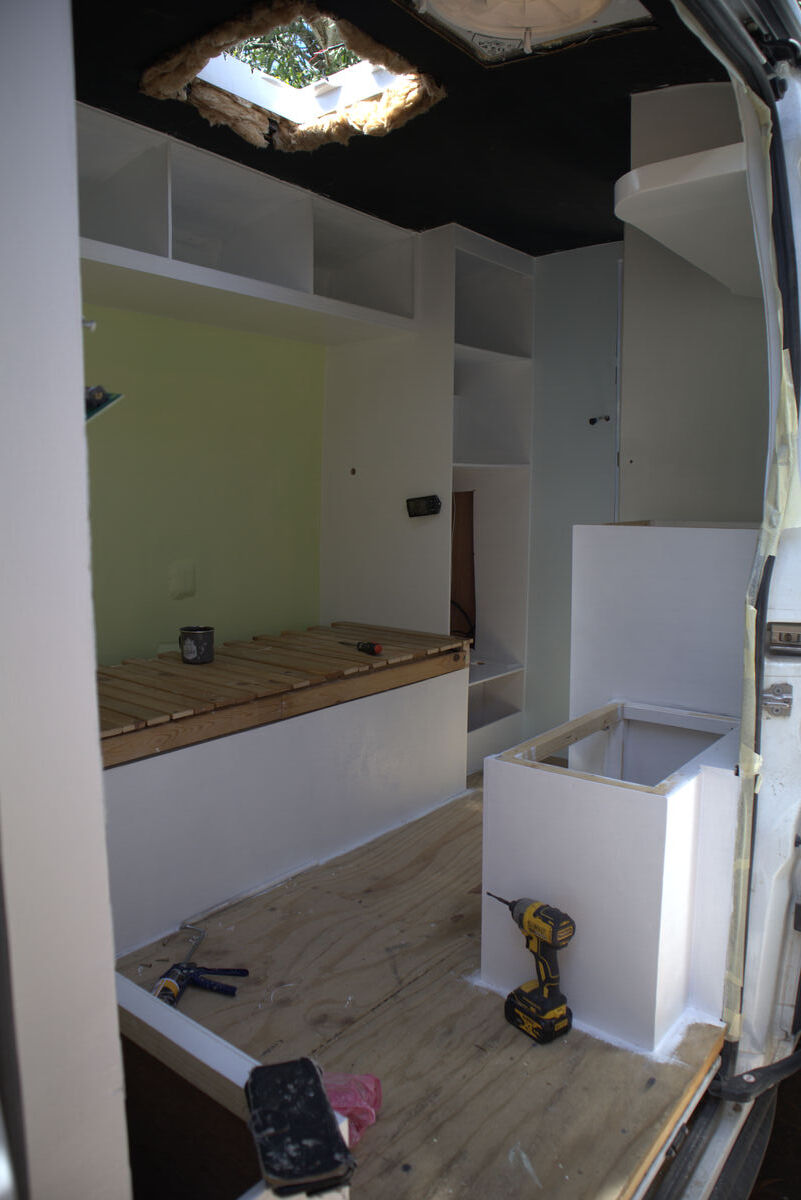
Kitchen area taking shape — bare wood before paint
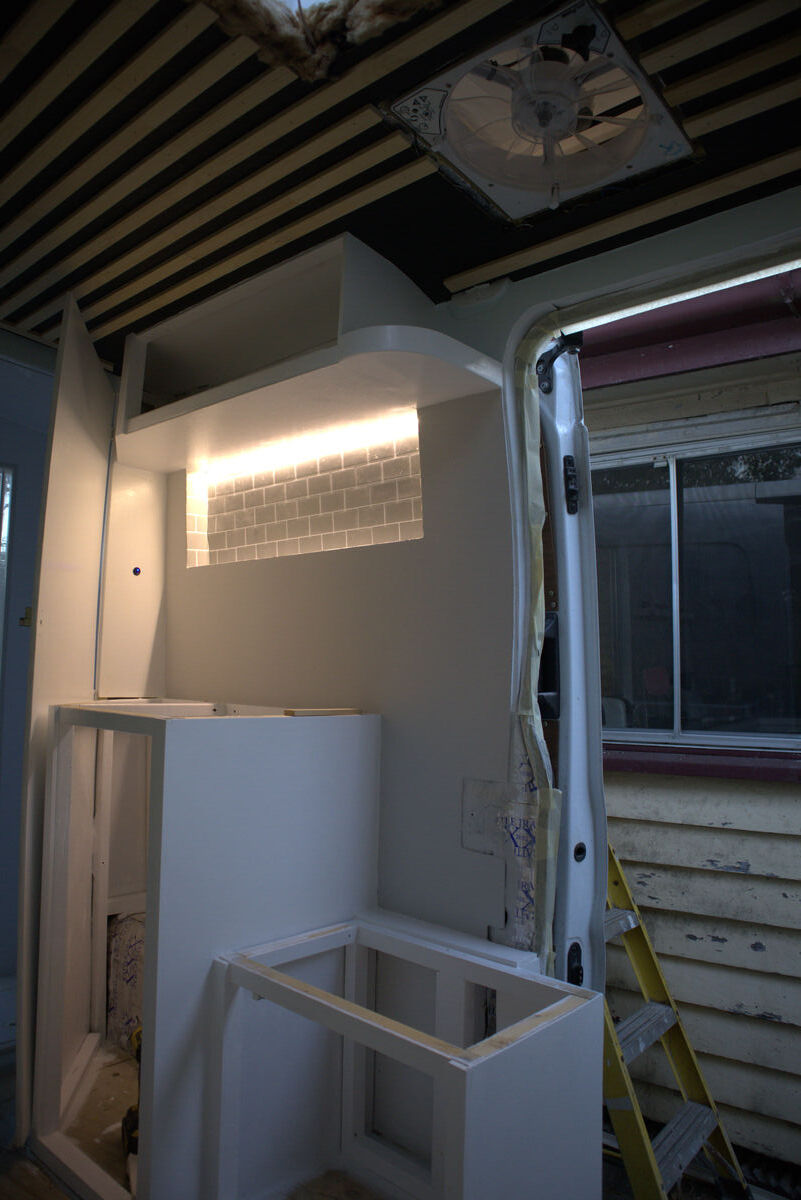
Kitchen after painting (left) and with the LED strip lighting turned on (right)
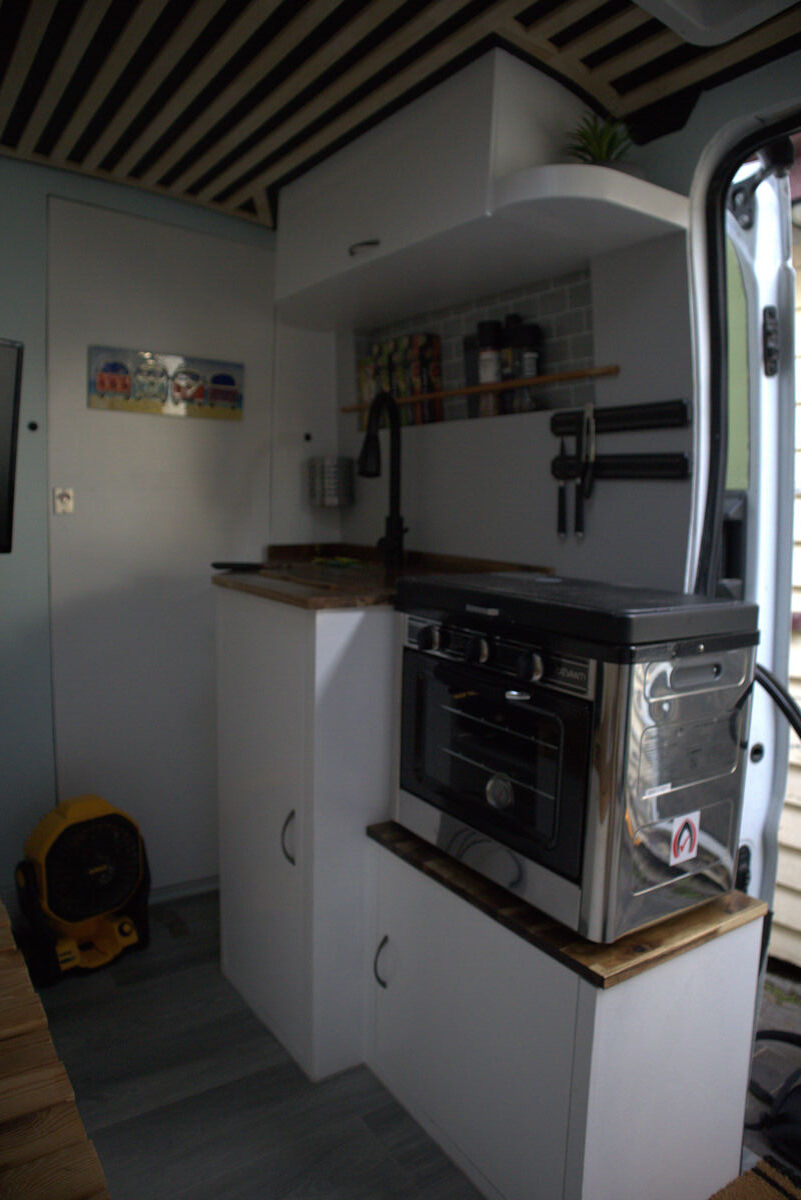
The finished kitchen — real wood benchtop with undermount sink
The kitchen after upgrades — oven secured with lock clasp, gas hob, and water-saving tap
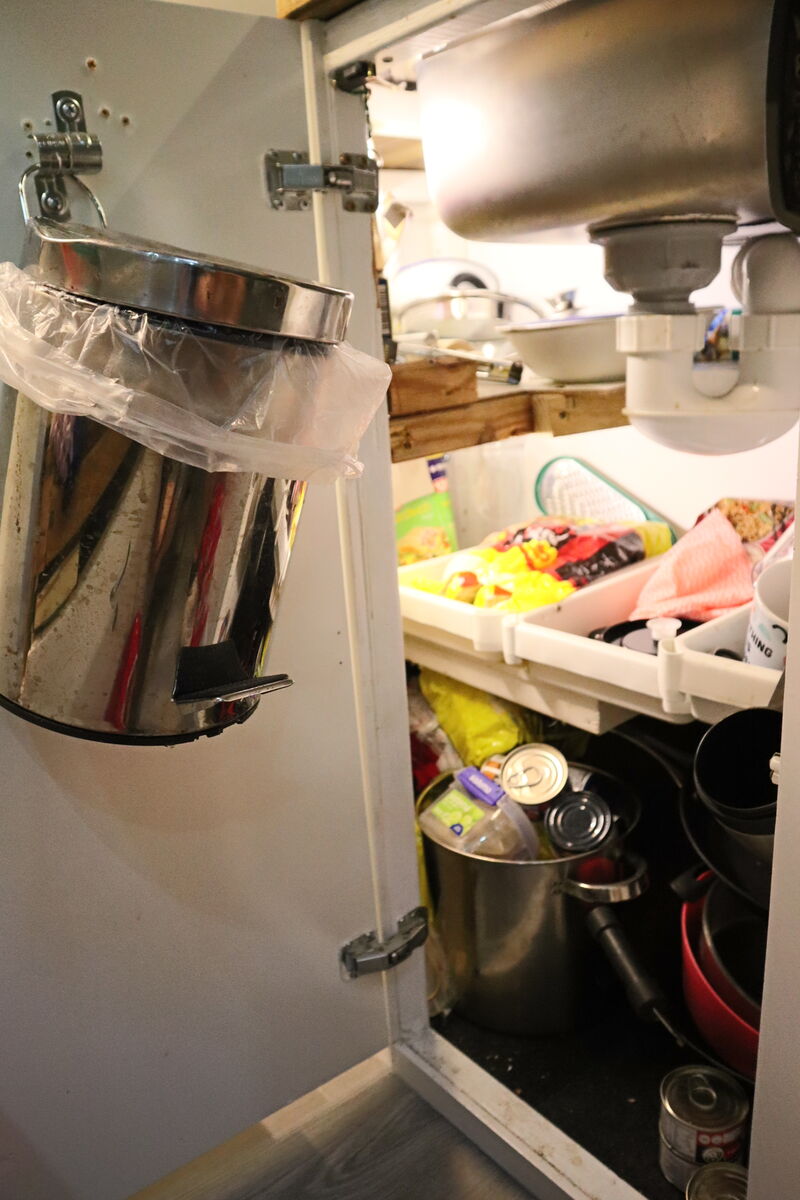
Under-sink plumbing access (left) and secured gas storage (right)
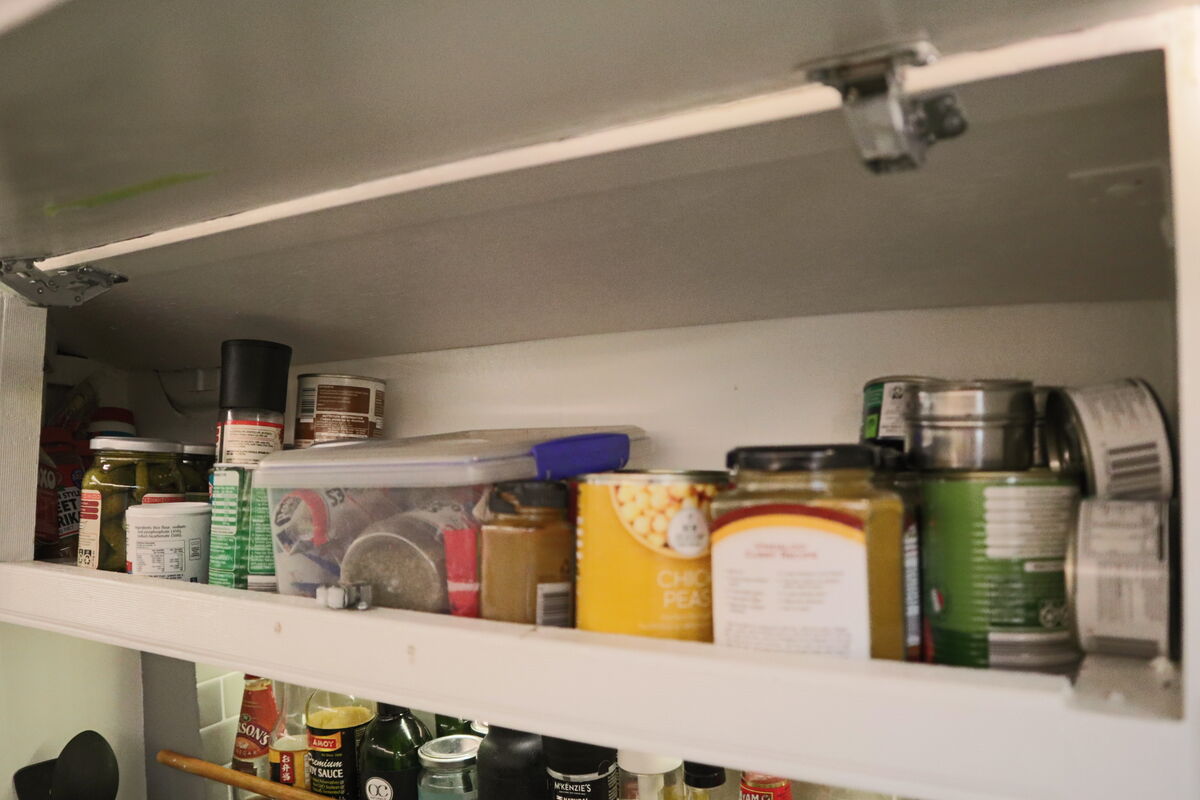
Kitchen cupboard storage — every space used efficiently
11
Roof Lining & Painting
The finishing touches that transform bare wood into a space that looks and feels like home.
Roof Lining
I went for a modern look and was so happy with how it turned out. I painted the roof black then used pine strips, laid out the design and worked out the exact measurement for the spacing. Sanded them with fine sandpaper, stuck them to the roof and used my nail gun to make sure they followed the contour of the roof. Filled with wood filler the same colour and sanded.
I left a gap around all the edges. Then I ran warm white LED strip lights all the way around and superglued them in. The result is a clean indirect glow around the whole ceiling. It looks incredible.
Pine strips going onto the black-painted roof — creating that modern finish
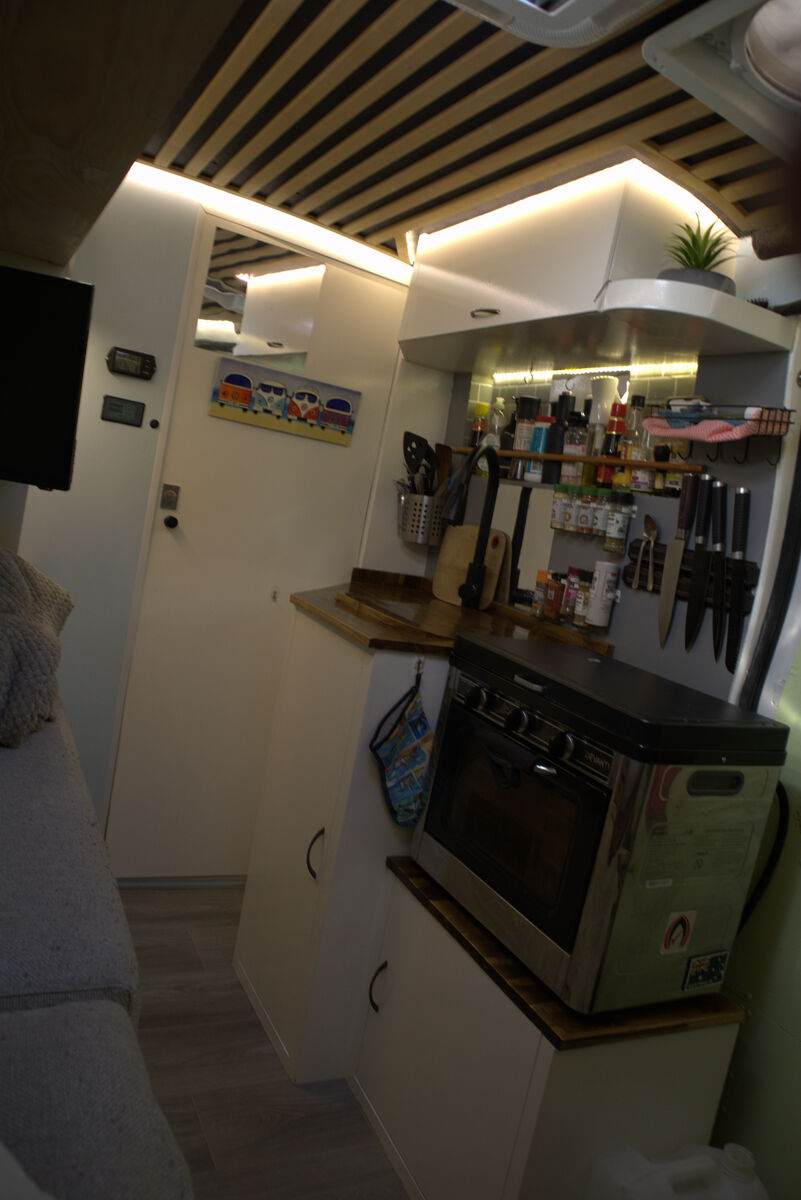
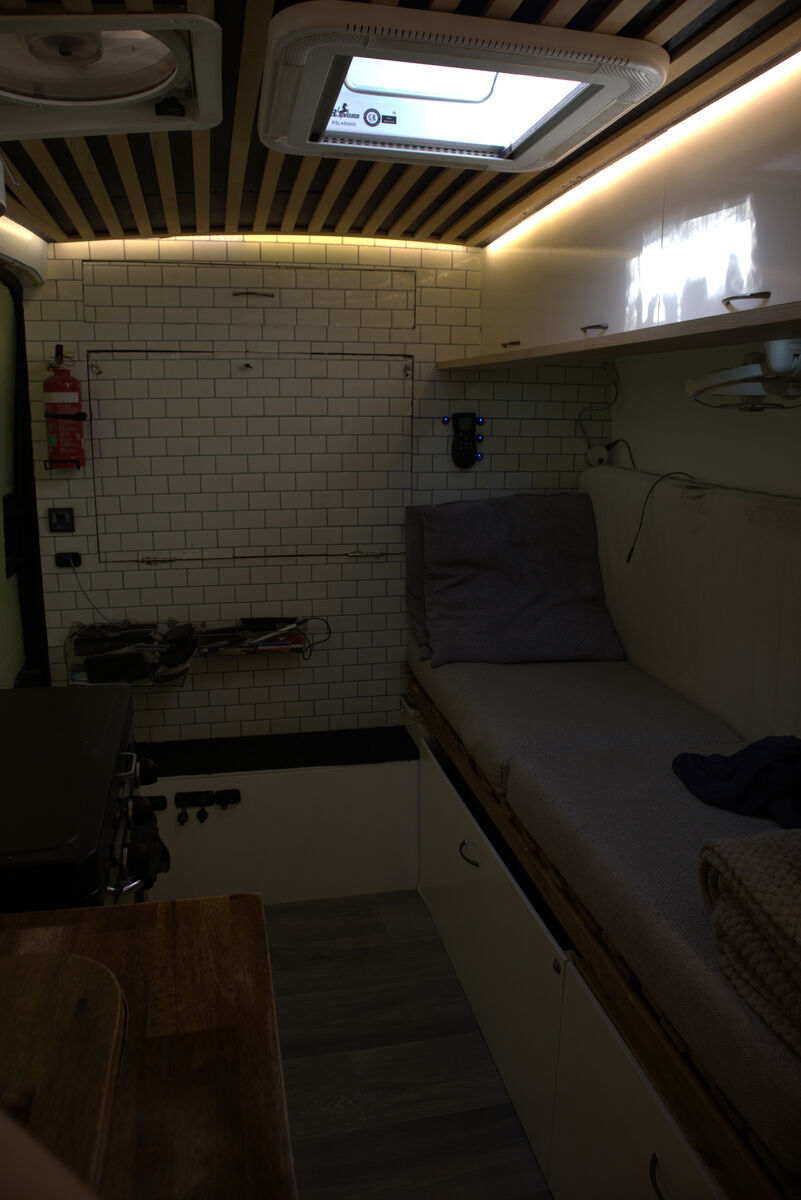
The finished roof — pine strips with warm white LED lighting around the edges
Painting
Fill all gaps and corners with gap filler and smooth them out first. Then primer on bare wood, undercoat, then final finish whether that's gloss or satin. I added some pastel colours to match a picture I had on my bathroom door.
Always use water based paint. It dries quicker, easy to clean brushes, and doesn't yellow over time like oil based.
Lesson Learned
Paint is touch dry in 24 hours but only reaches serviceable hardness between 7 and 14 days. Full cure is 30 days. So after painting doors, hold off at least a week before fitting them. Otherwise they stick together and pull the paint off when you open them. I learned this the hard way.
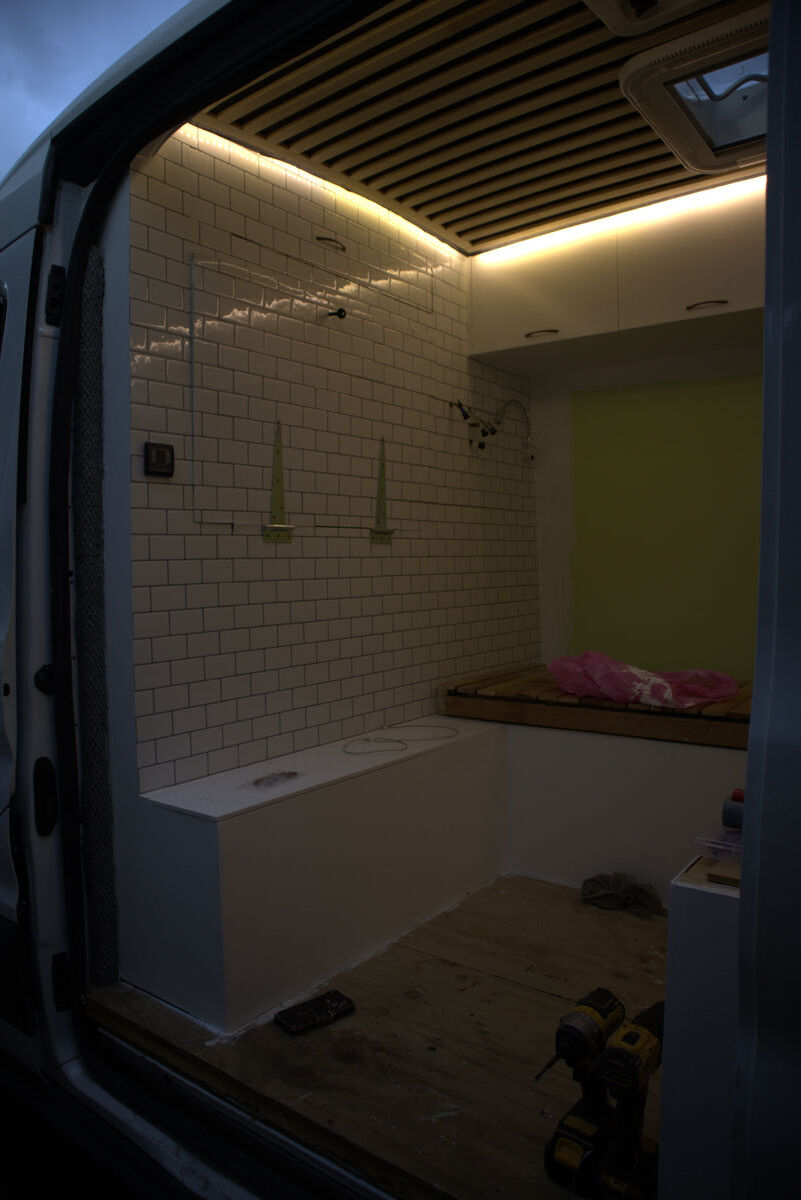
Lighting and Finishing
While the paint was curing I did the electrical fit off. Fitted all the lighting, wired up the electrical system. I used sticky back metro style tiles as a feature wall behind the kitchen, and cockpit wall. No way was I fitting real tiles in a van. I've seen people do it on YouTube. Great in a house but in a van with movement and the weight factor, no thanks.
Before and after wood filling — every screw hole and gap smoothed out
The whole interior filled, sanded and ready for paint
Freshly painted — primer, undercoat, then final finish
The LED strip lights on for the first time — clean indirect glow around the ceiling
Every area lit up — the pine strip ceiling really comes alive at night
12
The Bed
If it takes more than two minutes to set up your bed at night, you will eventually stop doing it.
I wanted a compact bed that would double as a seating area without taking up too much room. Nobody wants to spend time setting a bed up every night.
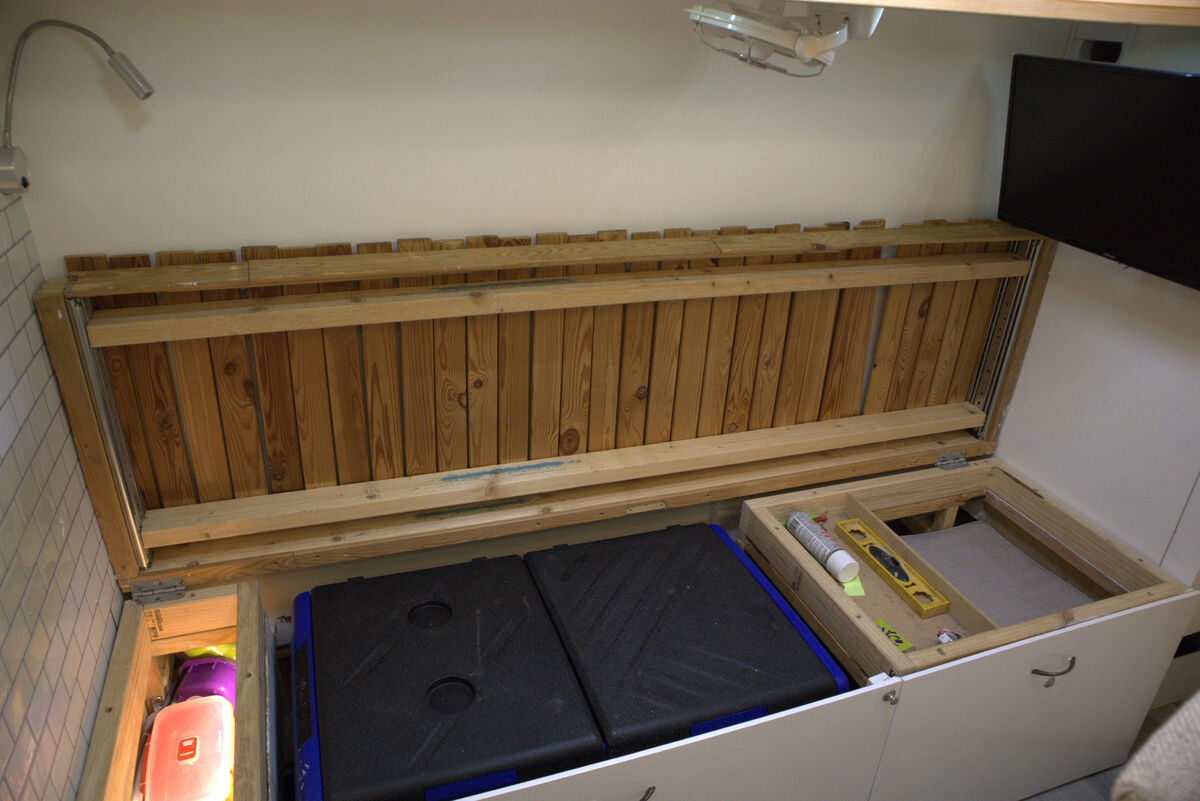
I built the base as a frame using the halved framing wood. The bed was hinged to access underneath for storage and it also doubled as a bed leveller for when I was parked on a slope. I could prop up one side with books to level it out.
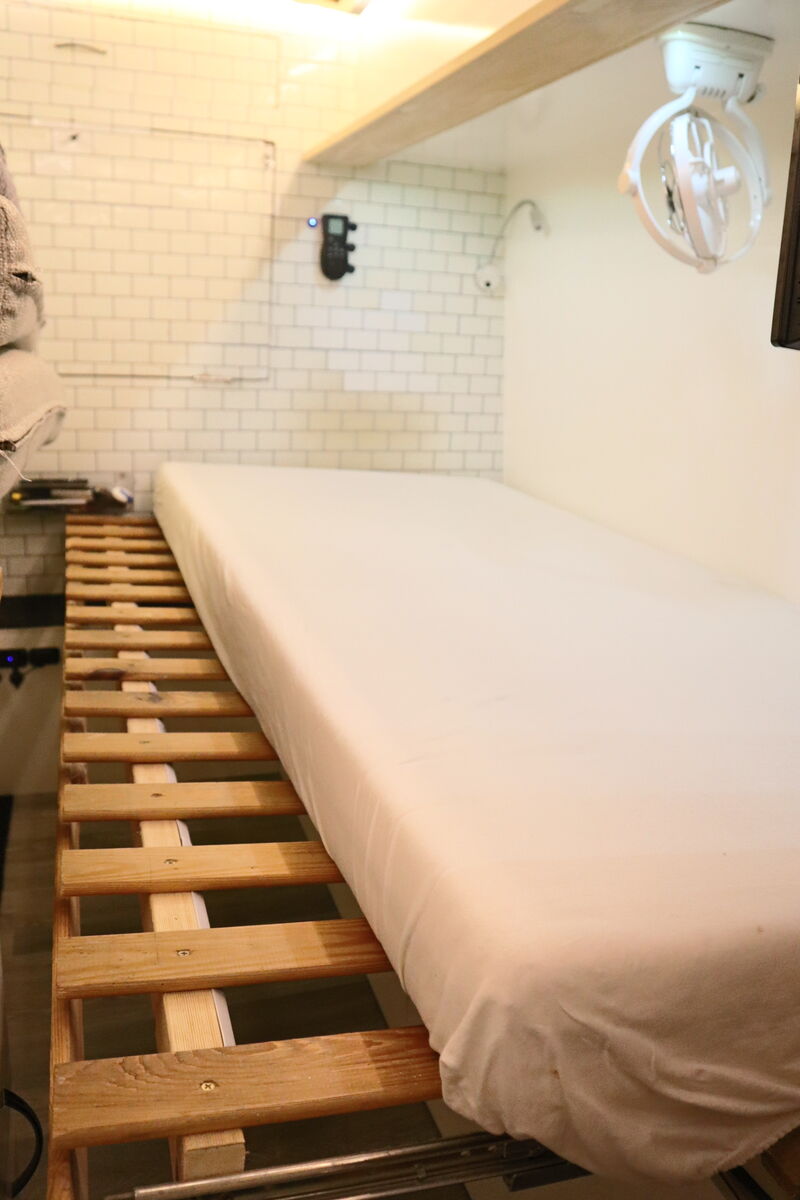
It slid out on hinges strong enough to take a persons weight and at full width it was just shy of a double bed. The mattress also doubled as storage. During the day it went against the side wall and slotted down behind the frame as a back cushion for the seating area. At night it pulled out onto the bed platform.
"In a small space, if it takes more than two minutes to set up your bed at night or pack it away in the morning, you will eventually stop doing it."
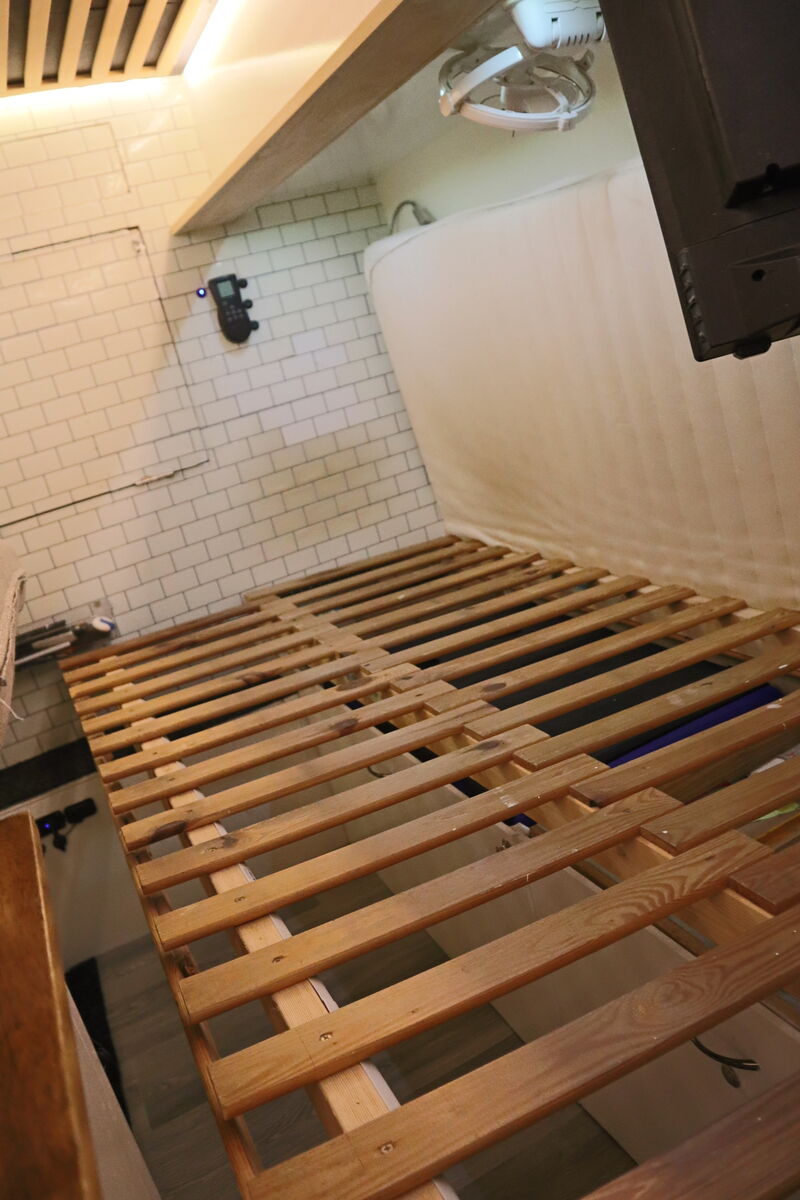
My slide out bed took no longer than 40 seconds.
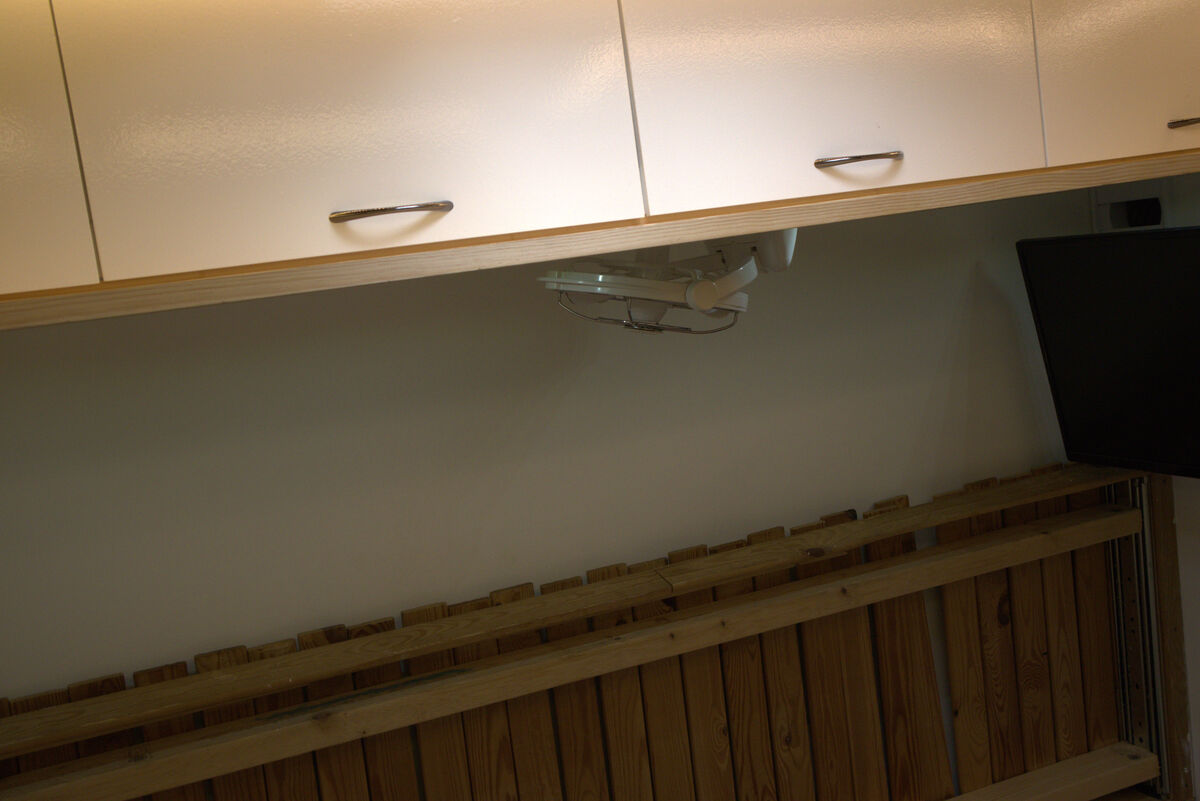
I fitted a 12V swivel fan above the seating and bed area which worked an absolute treat on hot nights.
The slide-out bed: fully extended (left) and with mattress (right) — 40 seconds to set up
12V swivel fan above the bed — absolute lifesaver on hot nights
During the day — mattress becomes the back cushion for the seating area
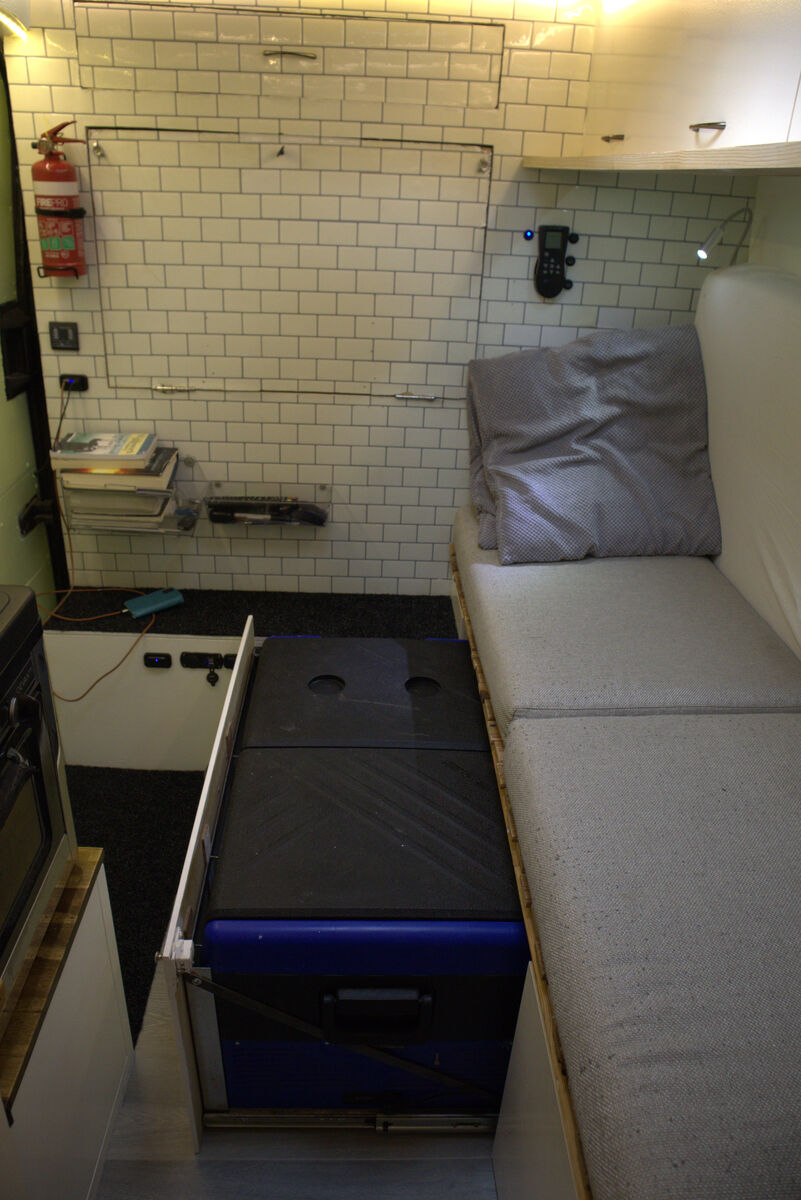
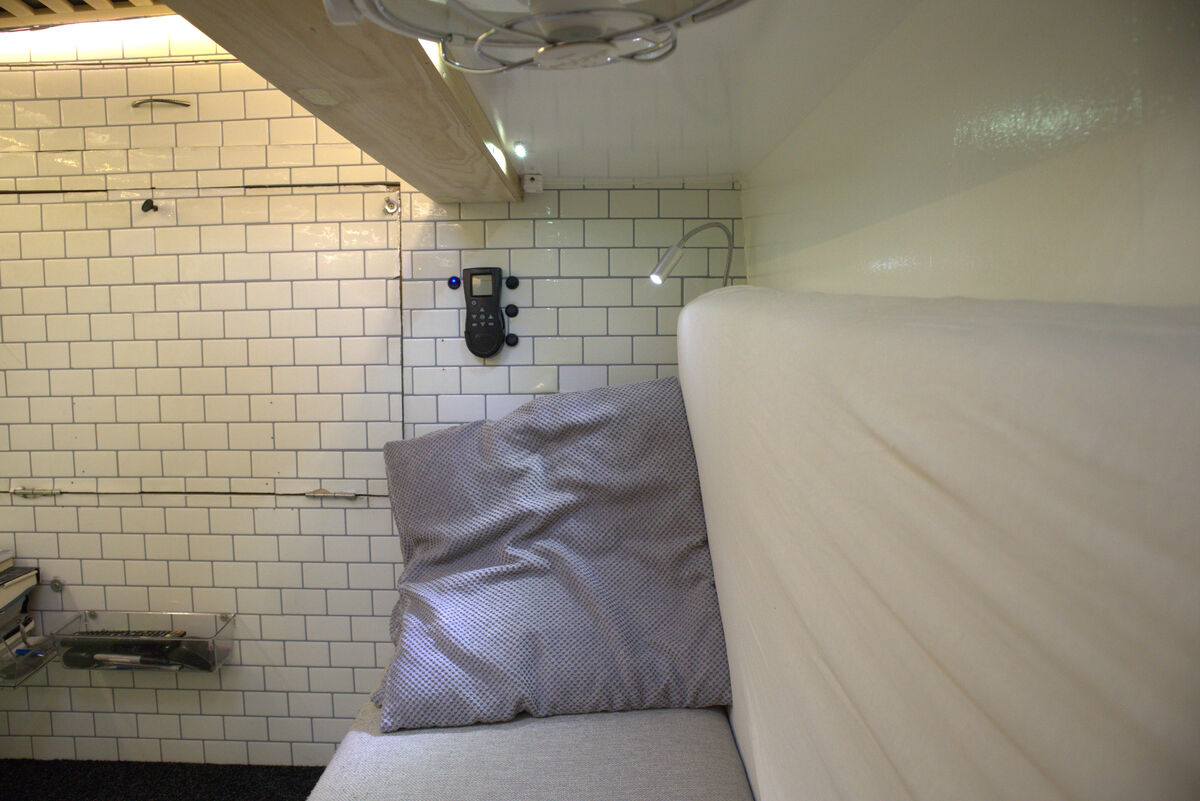
The finished seating and bed area
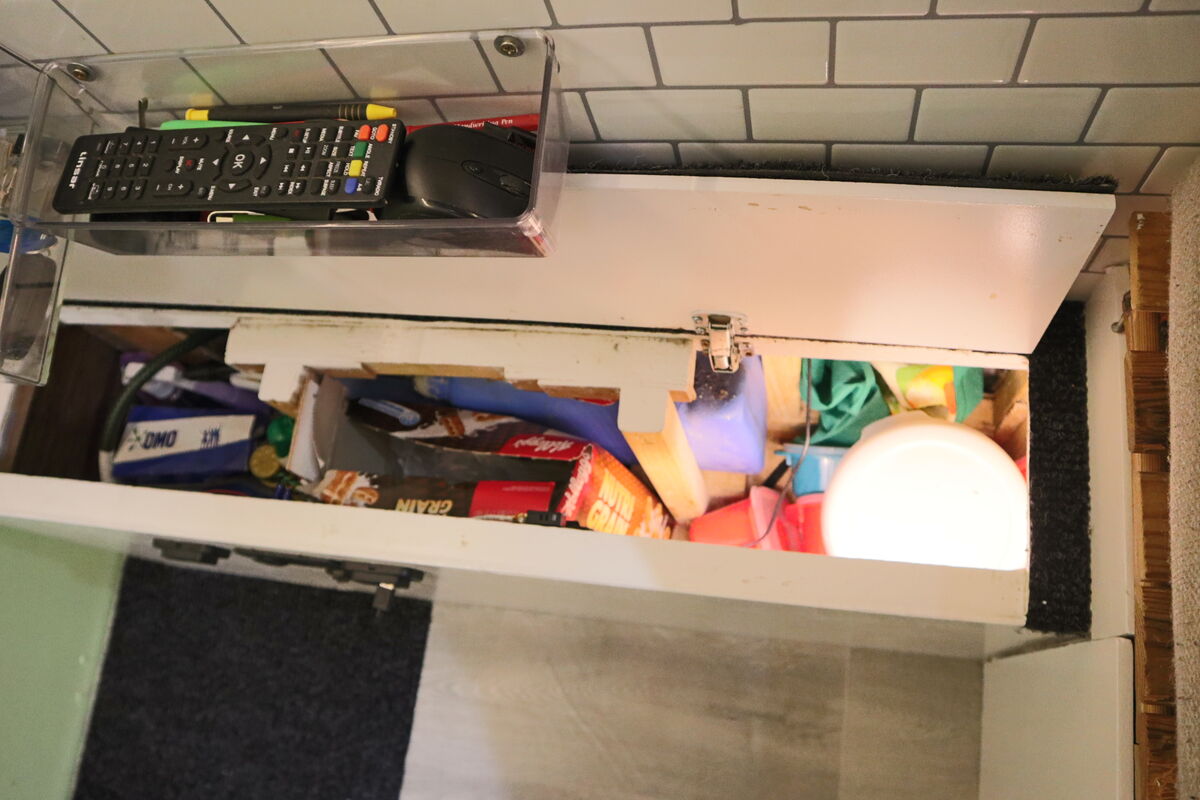
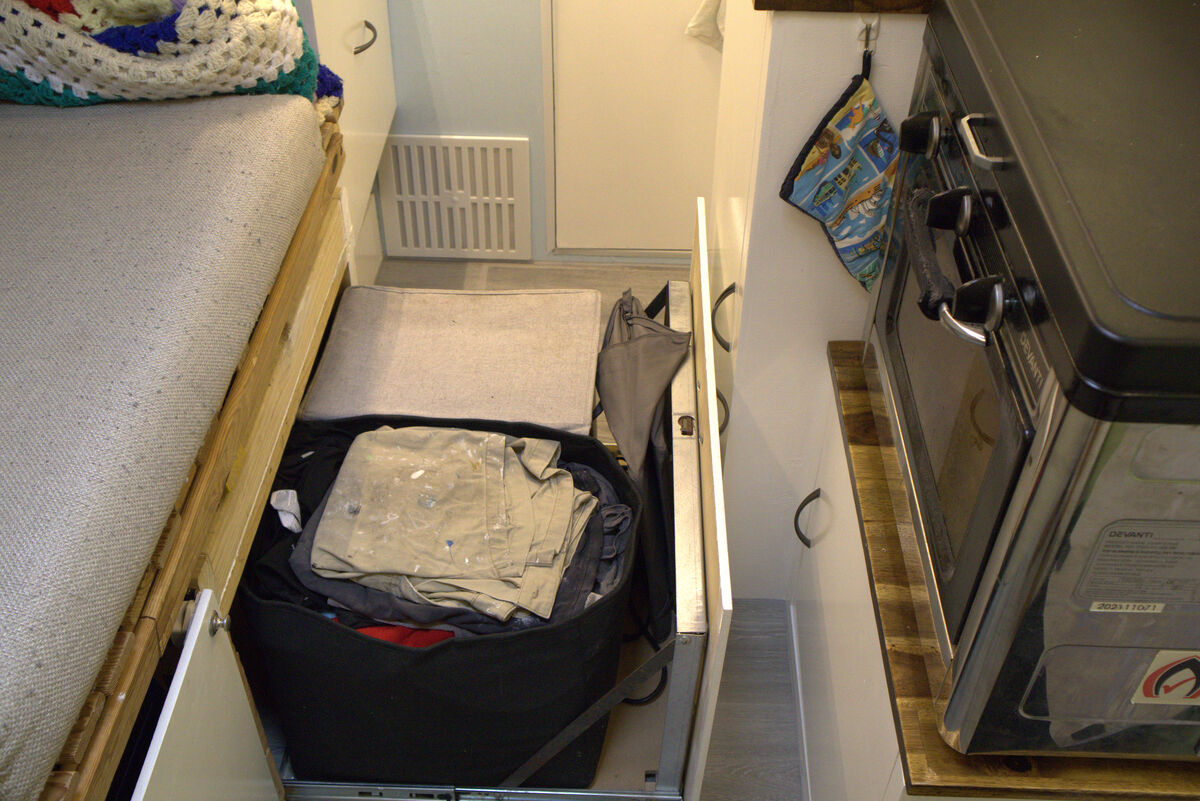
Under-bed storage and slide-out drawers — making every space count
Go Deeper
Full bed measurements, the hinge mechanism and build method are in the Bed and Storage Guide.
13
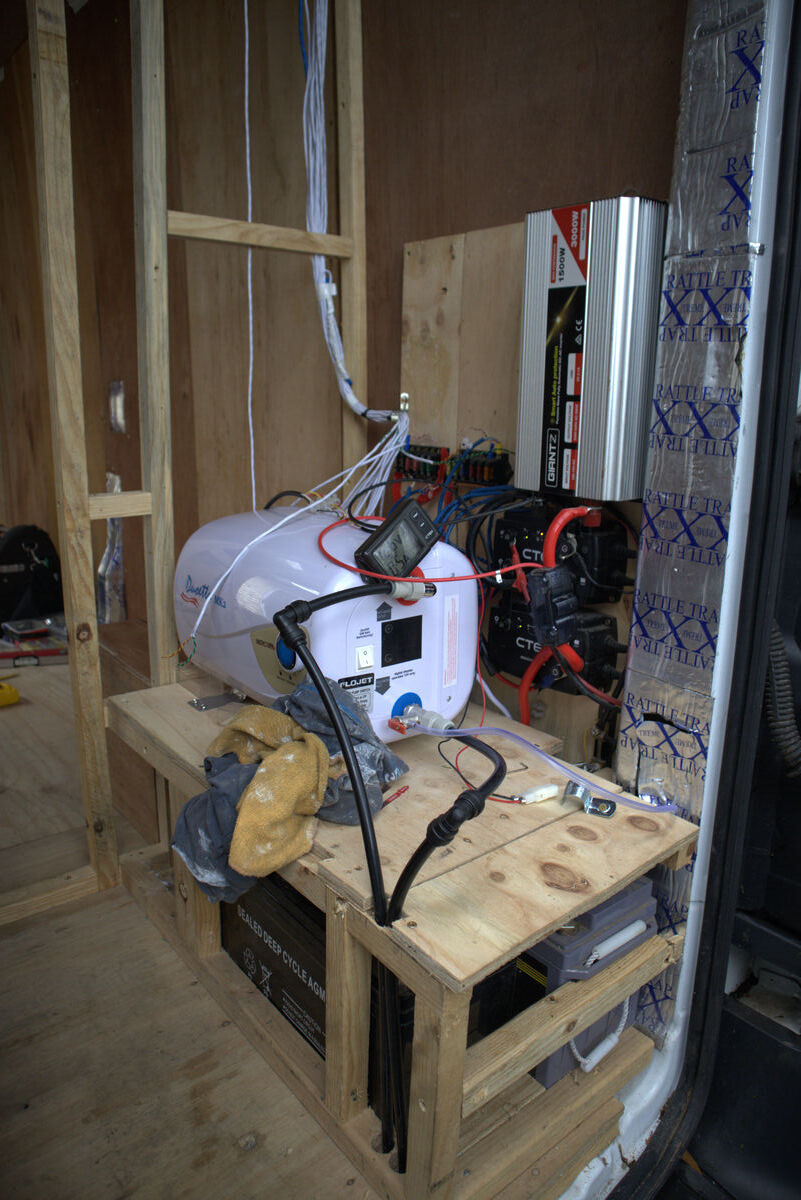
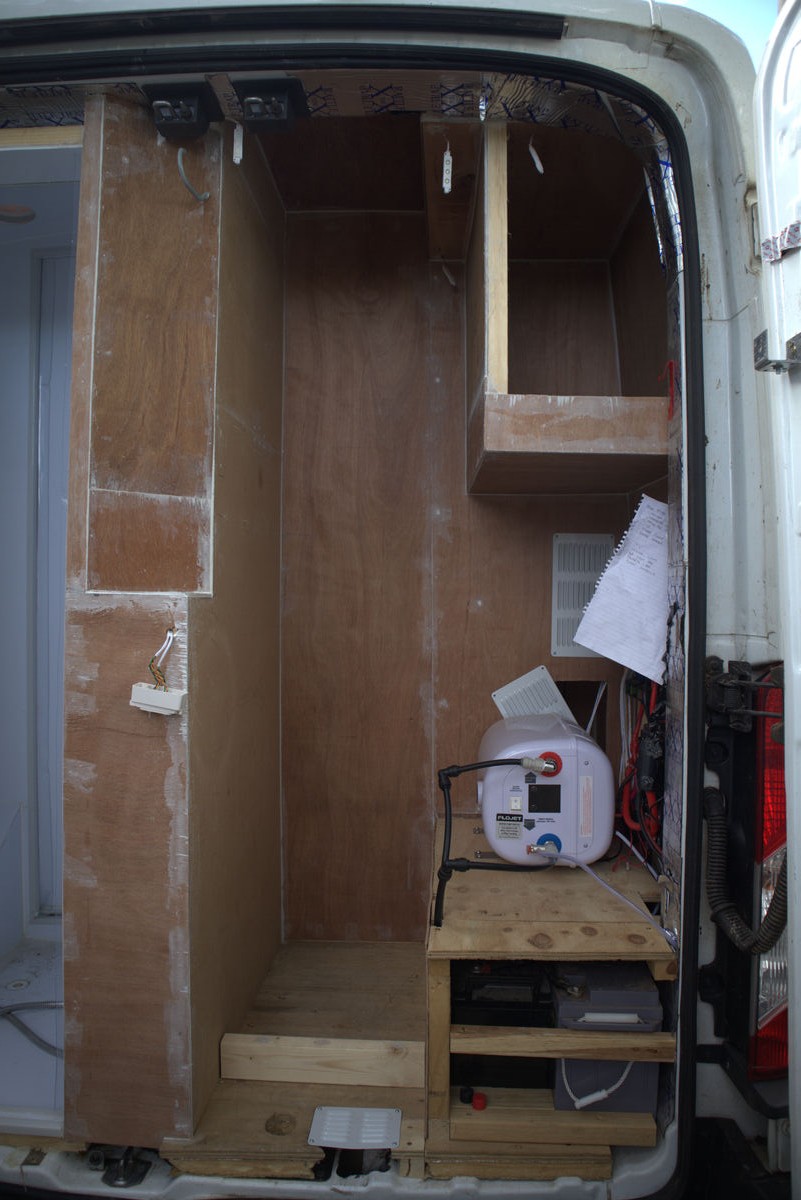
The Garage
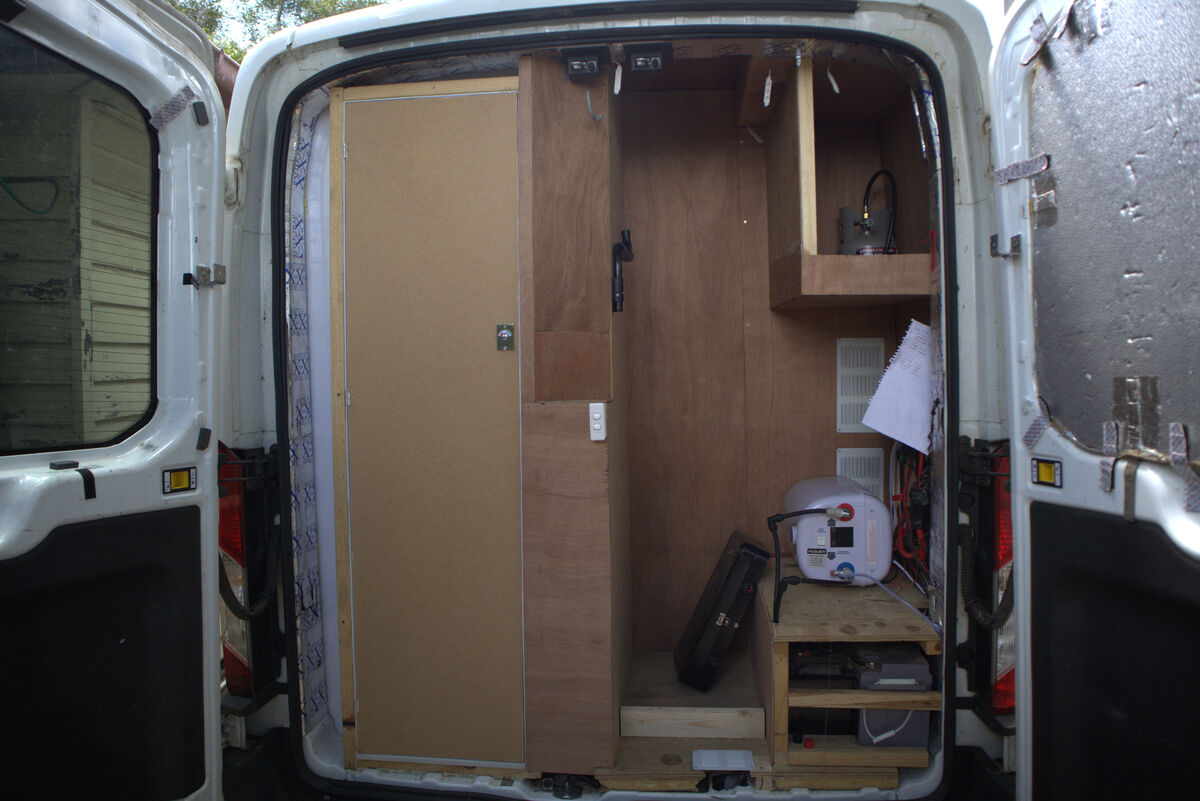
The nerve centre of the van — batteries, inverter, solar controller, and hot water system all live here.
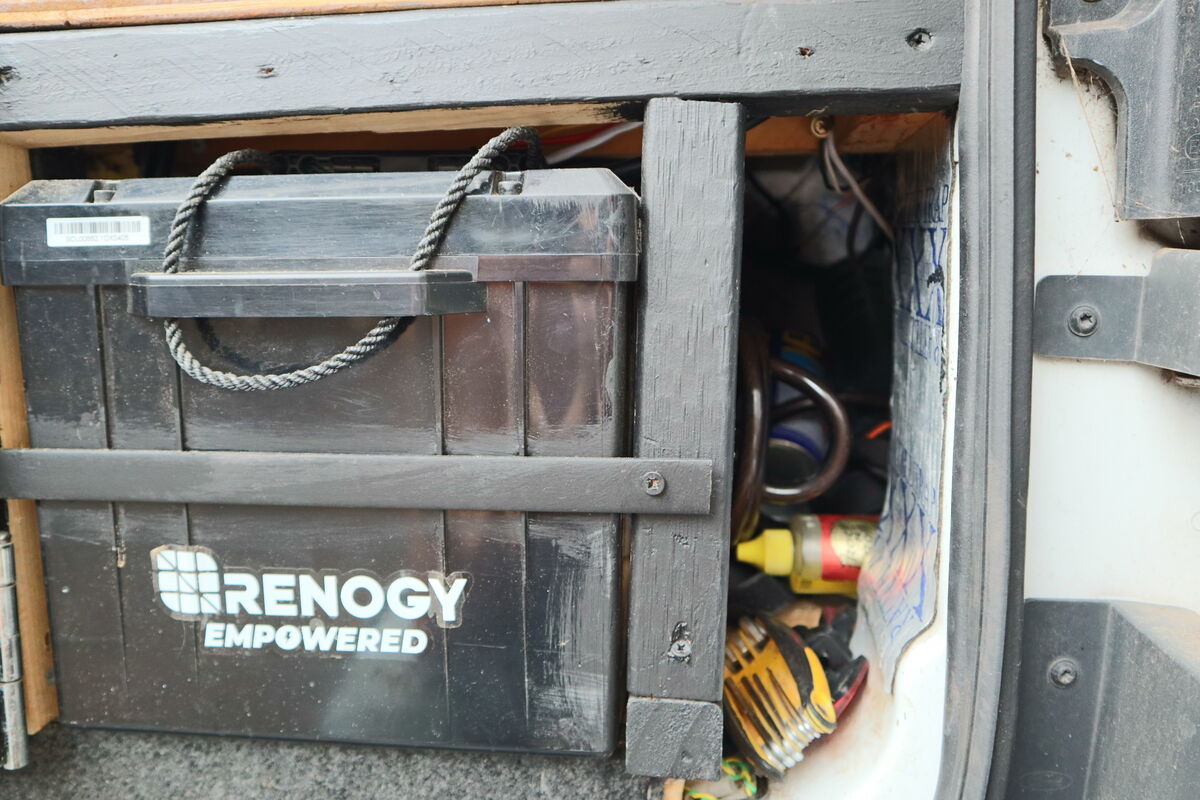
The garage area at the rear of the van contained all my electrical gear and the hot water system. On my initial build I used 475 amp hours of AGM batteries. These are sealed lead acid, not as good as lithium. After 5 years they were maxing out at 80% capacity. When I upgraded to 400 amp hours of lithium the difference was immediate.
I cut a hole in the floor for the battery vent. Battery ventilation is a required safety item — follow your battery manufacturer's venting guidance.
Battery Advice
Go lithium from the start. I've built a garage conversion with cheap lithium batteries and I've used quality ones in the van. The performance gap is real. Buy quality lithium, pay more upfront, and never look back. The AGM route is cheaper now but more expensive later.
Garage area starting to take shape
Garage progression: framing, filling, painting
The finished garage — all electrical gear centralised in one ventilated area
Lithium battery upgrade and solar controller wiring
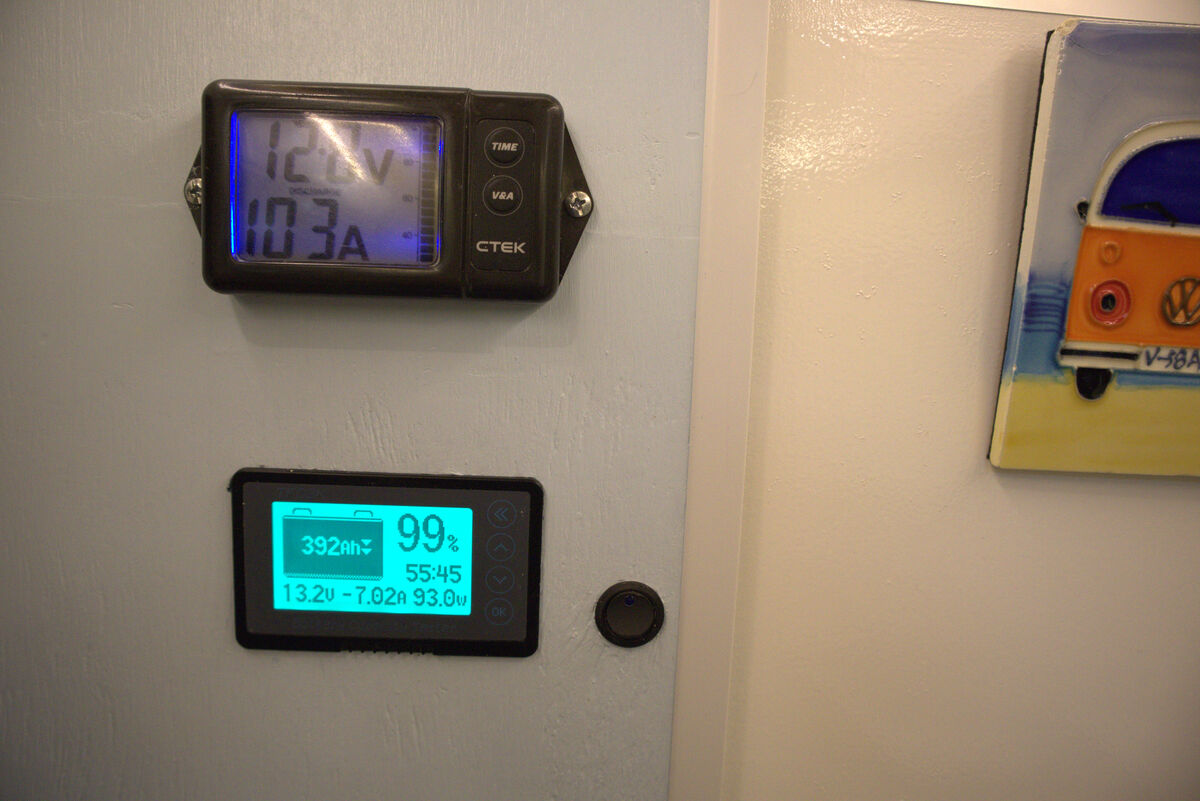
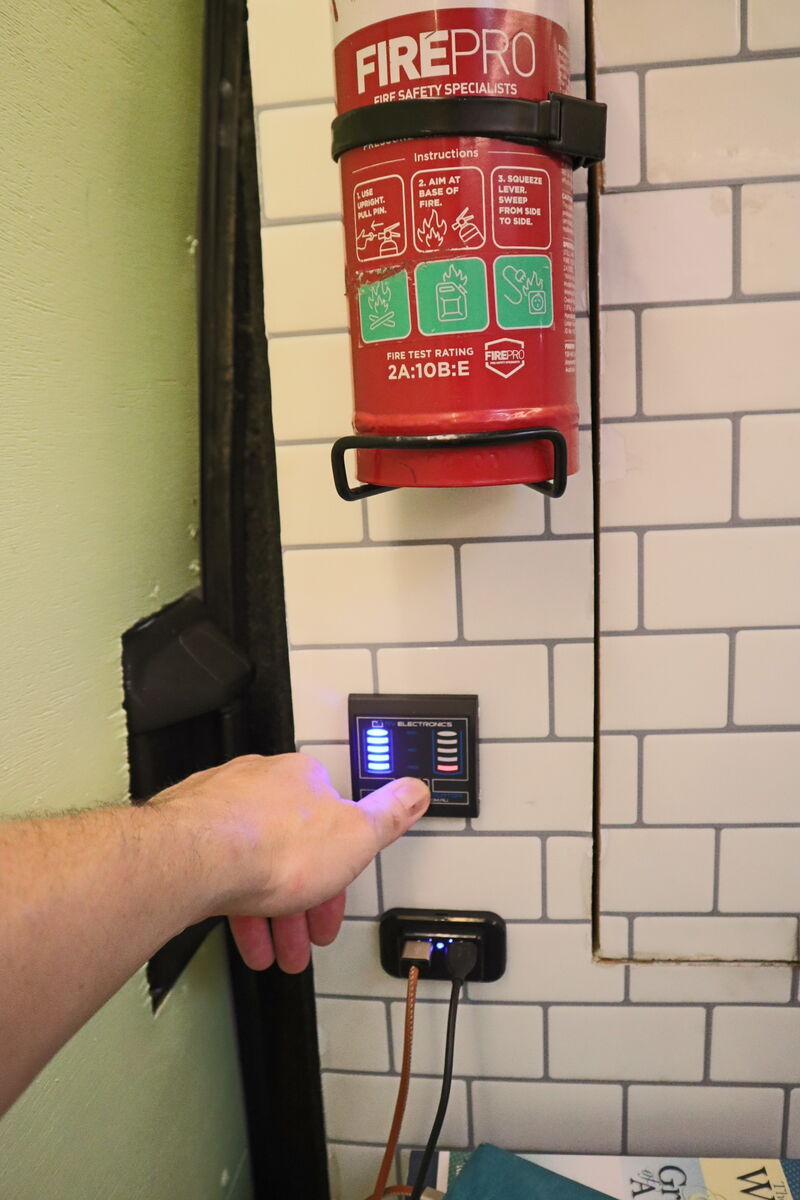
Dual solar readout displays — monitoring the full system
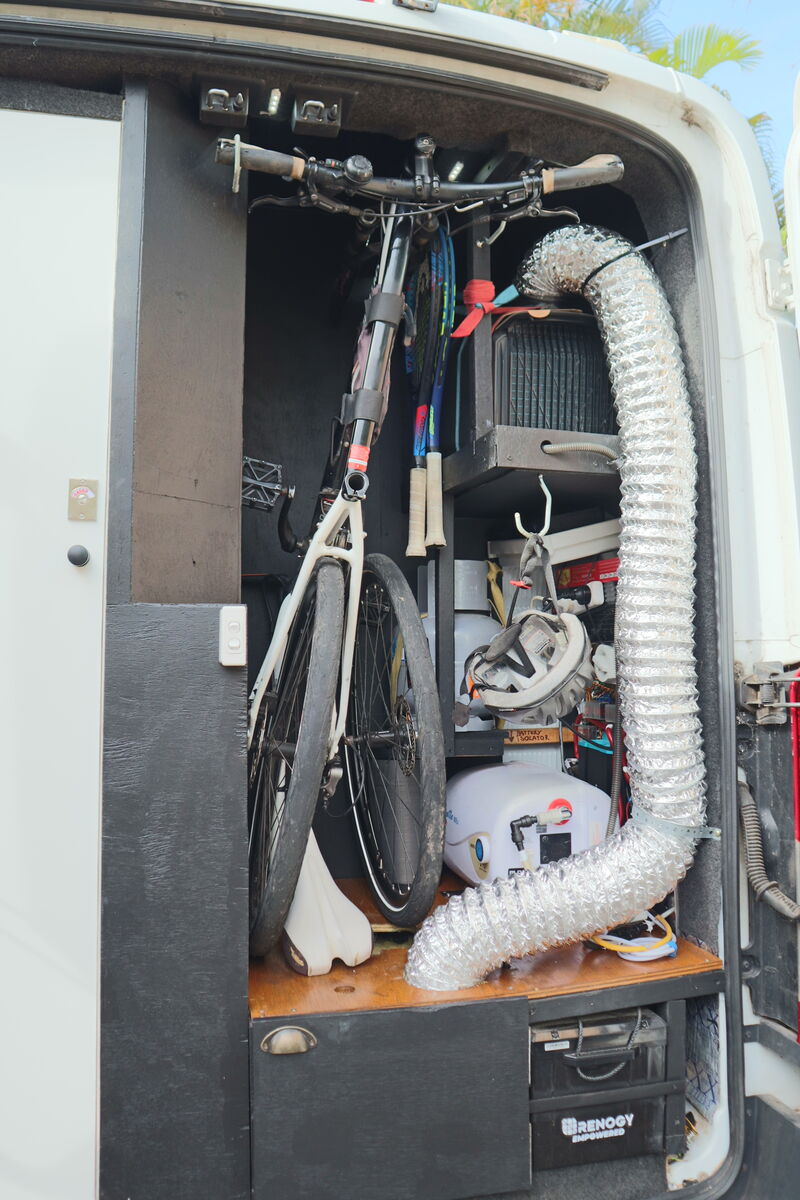
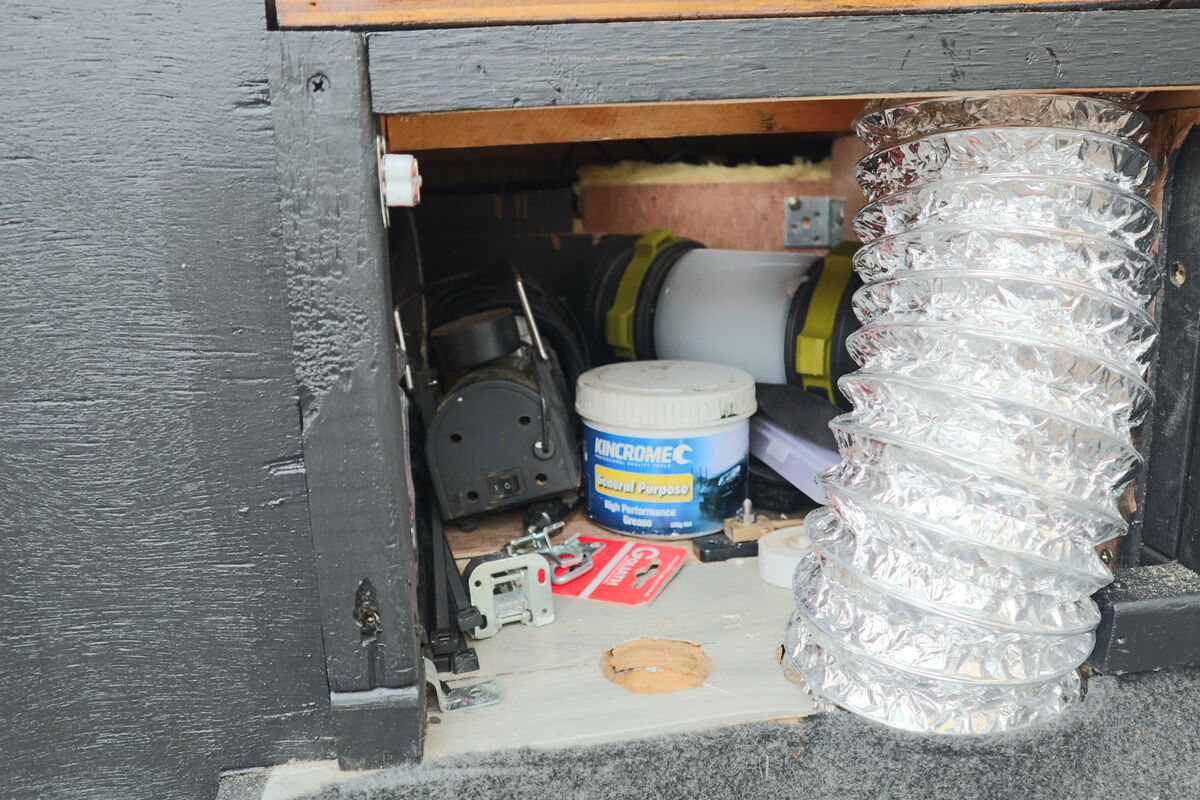
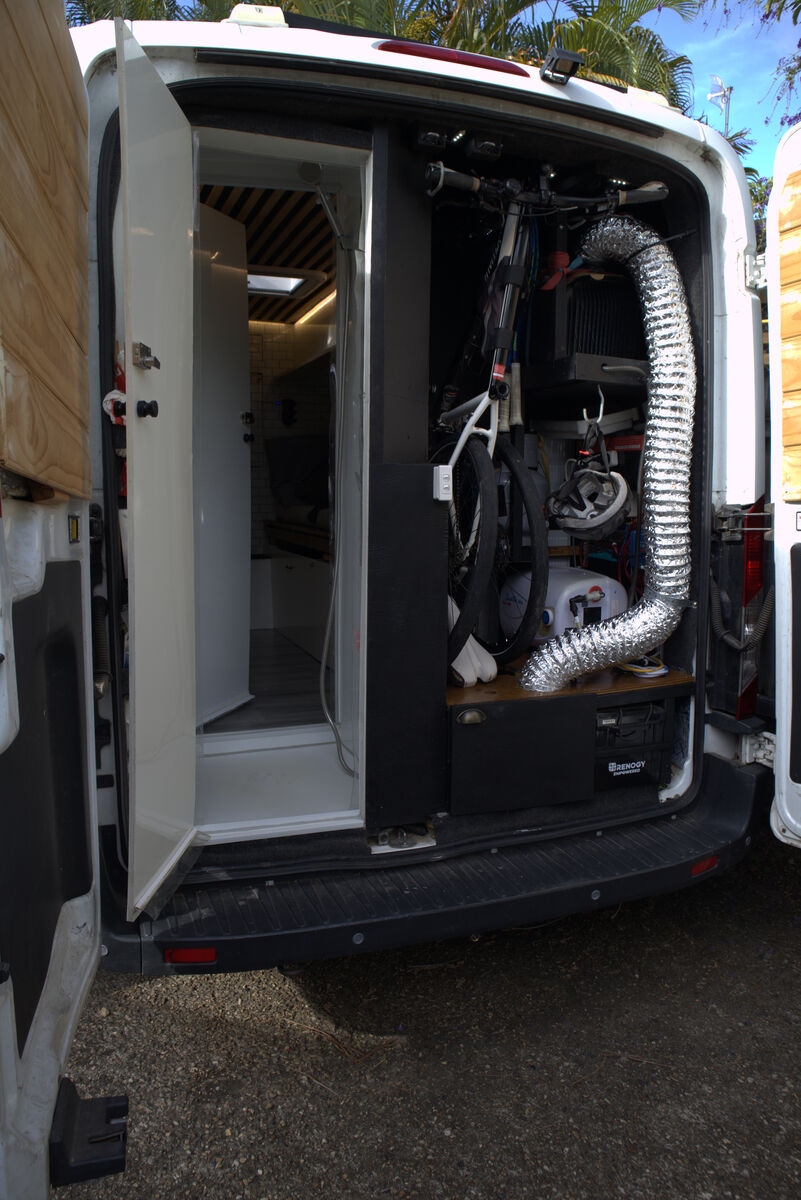
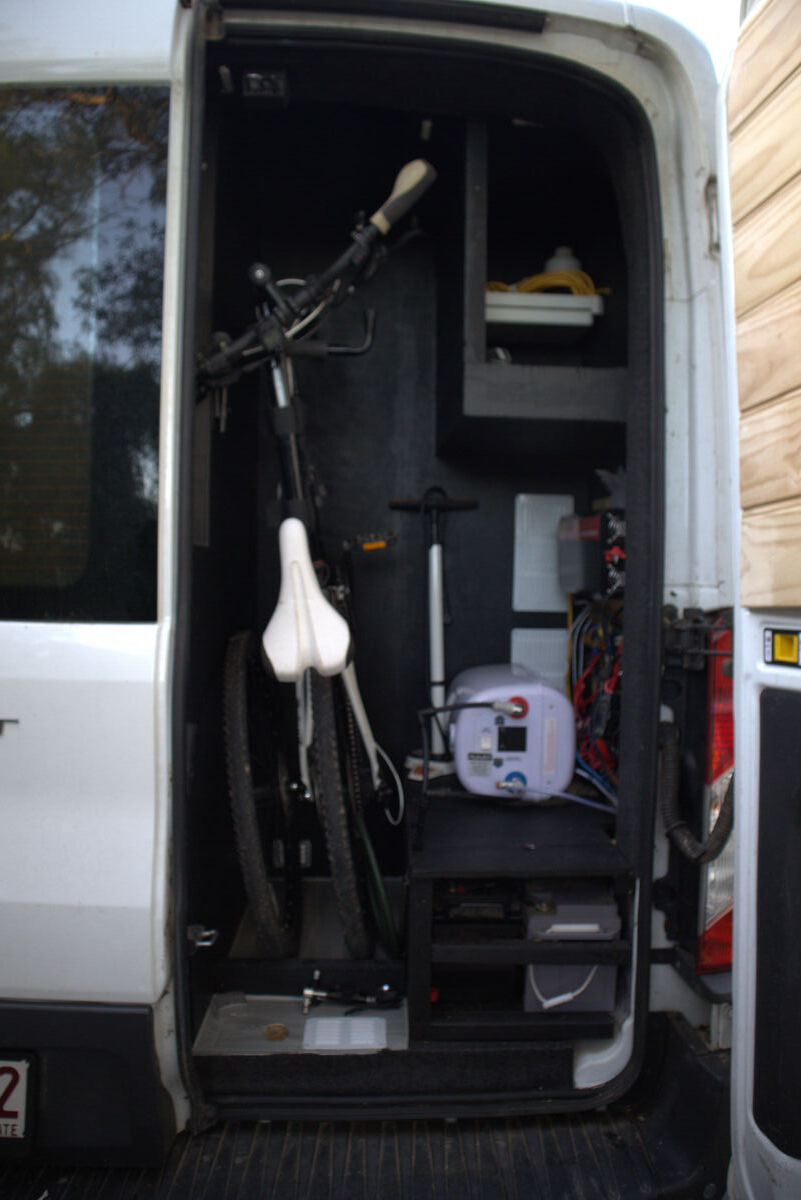
Garage doubles as storage — bike fits in with room to spare
Go Deeper
Full electrical system design including battery sizing, solar calculations, inverter selection, DC to DC charging, fuse boards and wiring diagrams are all in the Electrical Guide.
14
The Upgrades
After two years on the road, you learn exactly what you'd change. Living in it full time is the ultimate test.
After two years on the road I arrived at my sisters place in Tasmania and decided to upgrade. Living in the van full time shows you exactly what you want and what you'd change. You don't know until you actually live in it.
Slide Out Drawers
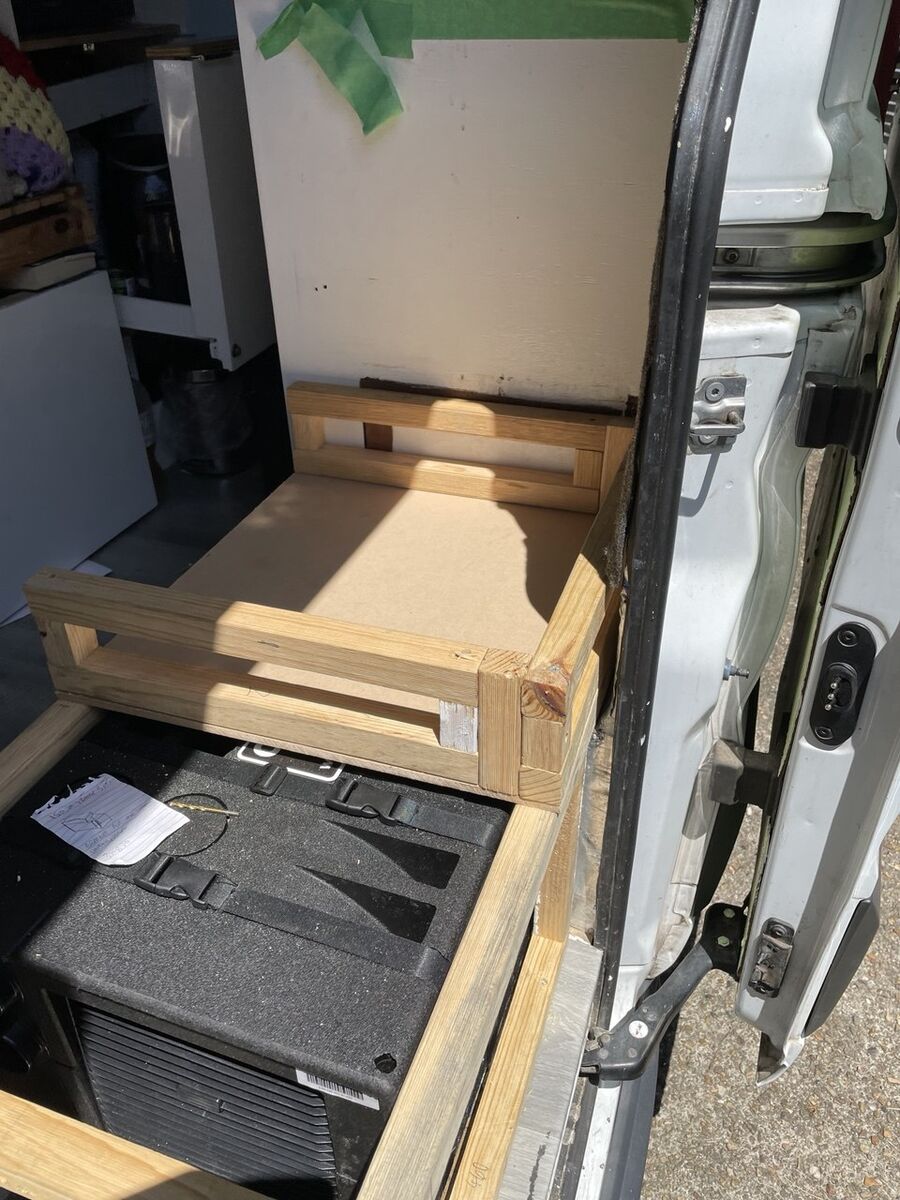
This was the biggest quality of life improvement. Converting deep fixed cupboards to pull out slide drawers made everything so much more accessible. I built metal frames and mounted them on heavy duty runners. Set both runners at the same distance so the front face sits perfectly straight. Fit a push catch so they don't slide out while driving.
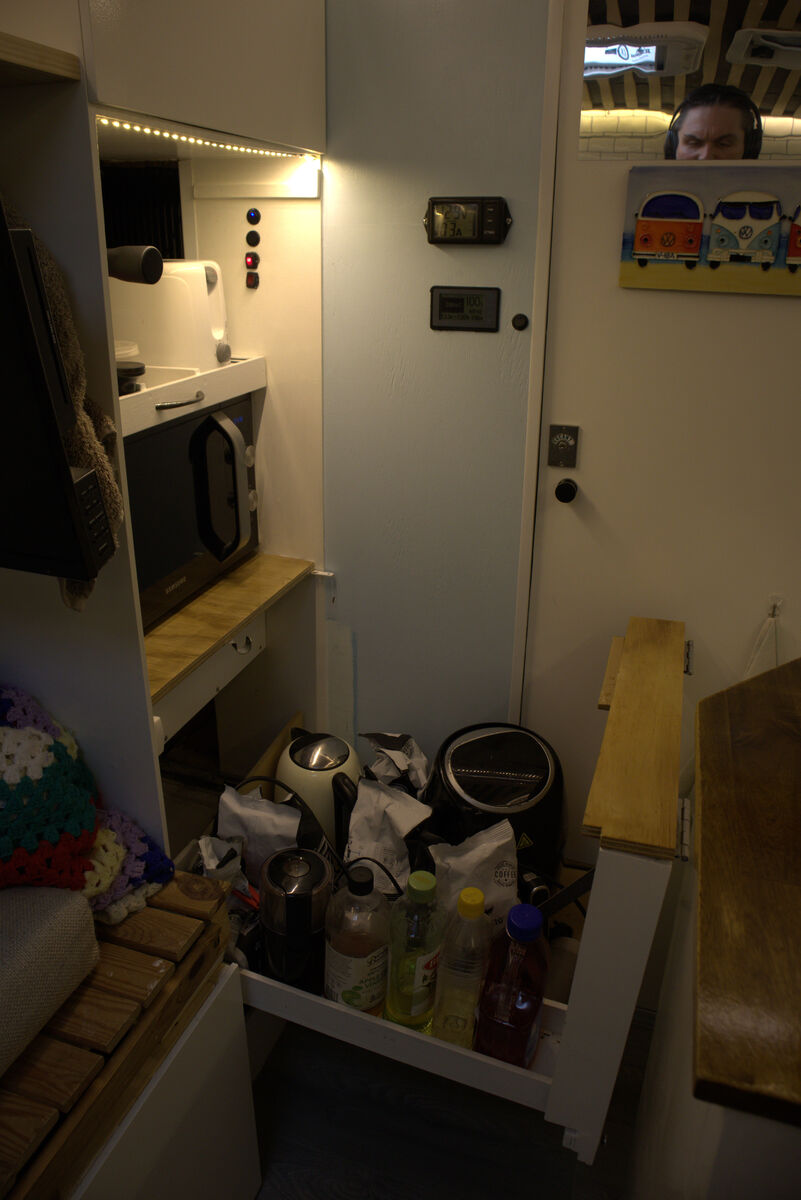
Next to the fridge freezer I made another slide drawer. Then another for the air fryer and kettle. Then one for the coffee machine and toaster. You can see the pattern. Once you have one slide drawer you want them everywhere. They're that good.
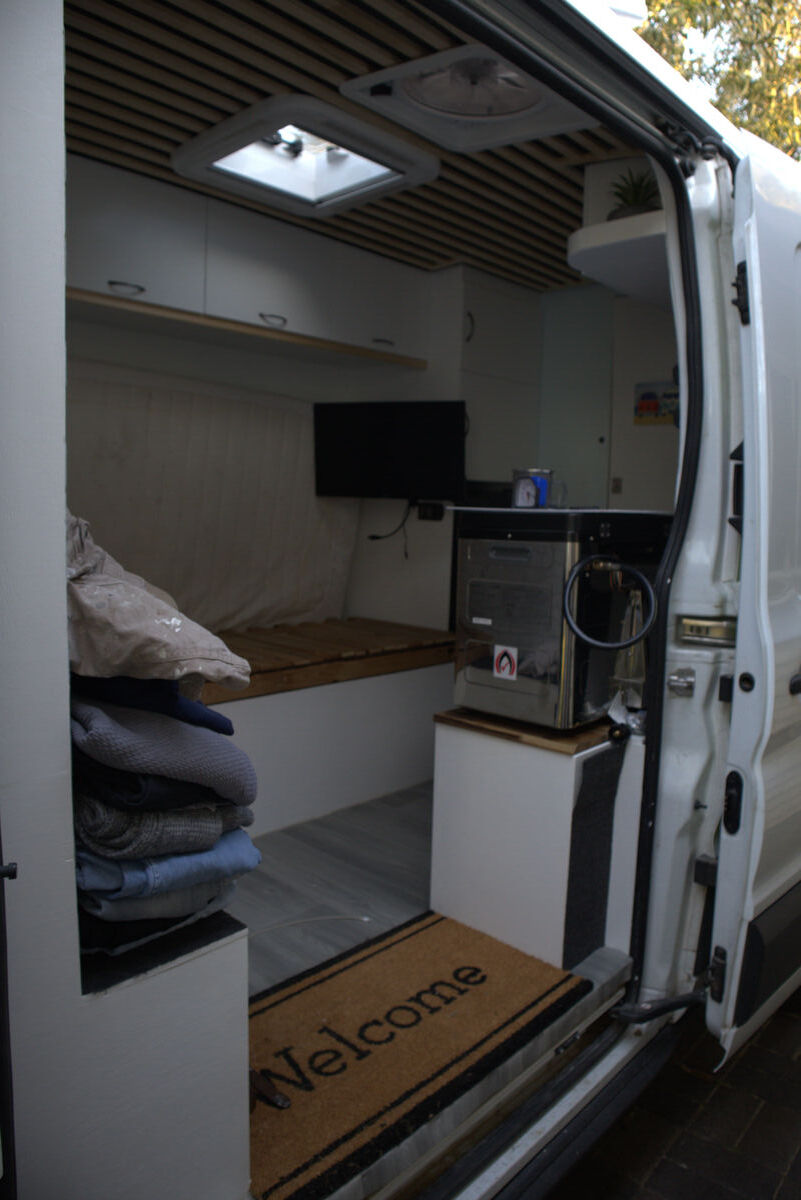
Slide-out drawers: 90L fridge freezer (left) and coffee machine (right)
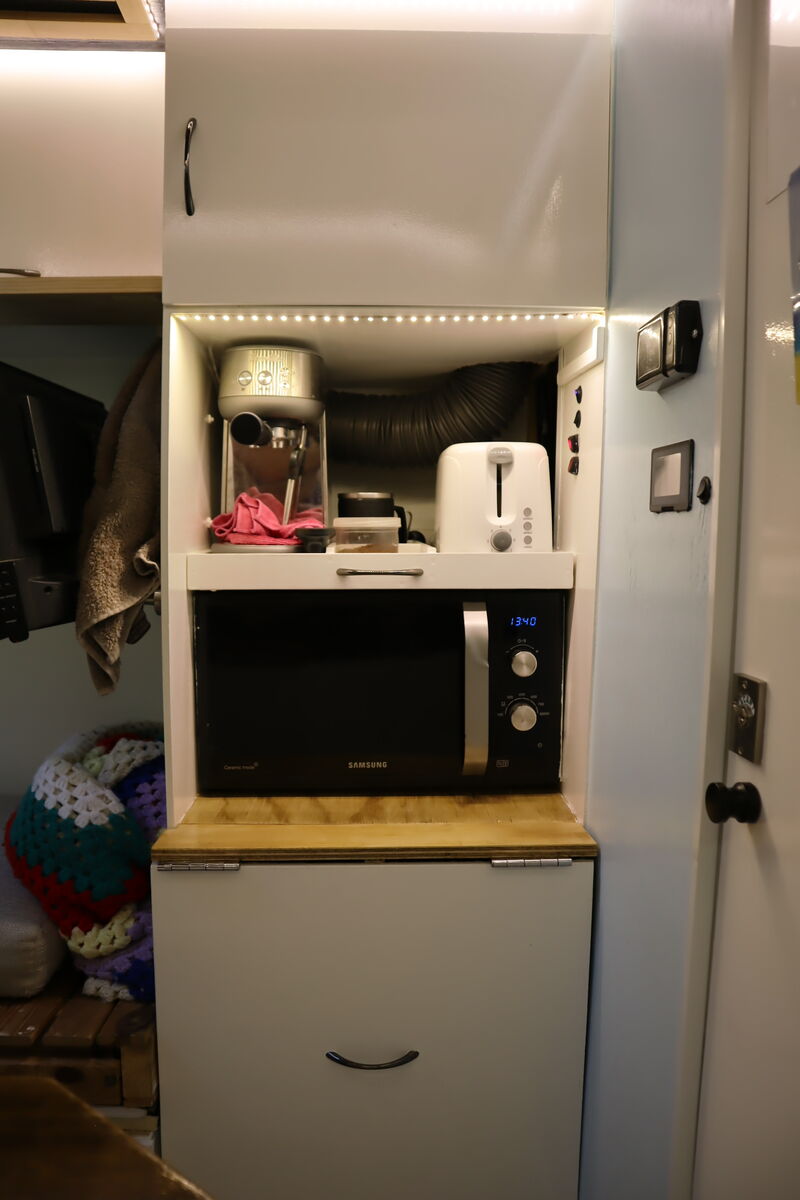
Kitchen slide-out storage and microwave in its own compartment
Drop-down shelf accessible from the cockpit — added during upgrades
Solar Upgrade
The flexible panels worked great for stealth but I needed more power. I found the right glass roof mounted panels and didn't buy the cheapest. Mounted them with brackets bonded with Sikaflex. One large panel is enough for most builds.
The Final Upgrade (And the Mistake)
I decided to go all out on air conditioning. The portable unit was more like a fart of semi cold air, so after watching YouTube I went for a floor unit with more kick. On YouTube people say things like it only takes 15 amps which was absolute nonsense. This unit on full power was drawing 60 amps at a constant rate.
I went all in. Put another 440 watt glass panel on the roof making 880 watts total. Had to turn the panels sideways to fit and even then they finished level with the sides of the van. By the time it was all done I looked at it and thought I shouldn't have changed anything. I have a lot of power now but I spent a lot, and I still can't run the air con at night or on cloudy days.
Lesson Learned
Was air con worth the effort and money? No. My advice: if you really want air con, look at roof-mount split systems and design your entire electrical system around it from day one. Don't try to bolt it on later like I did. High-current air con loads need correctly rated wiring and fusing for safety.
If I was rebuilding this section today, I'd either skip air con entirely and optimise airflow/insulation, or commit to a purpose-designed roof system planned into the electrical design from day one.
The air conditioning upgrade — looked good but drew 60 amps constant
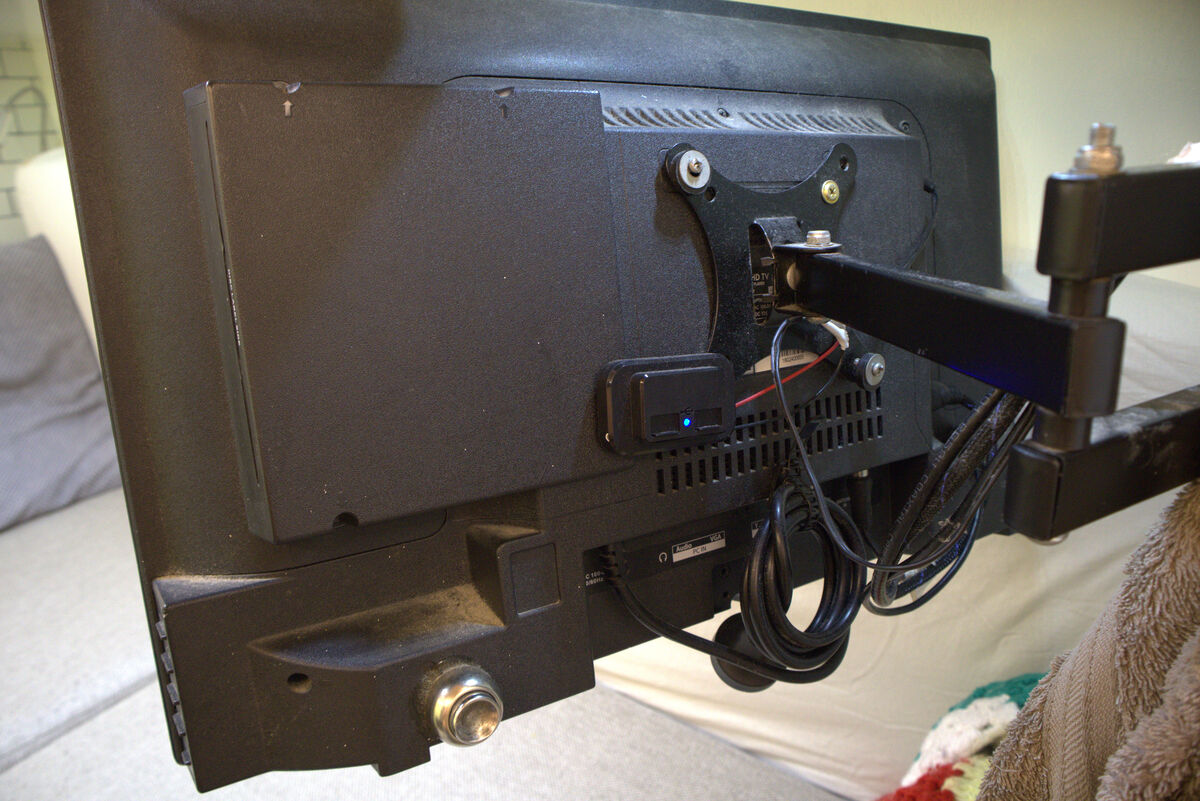
Entertainment
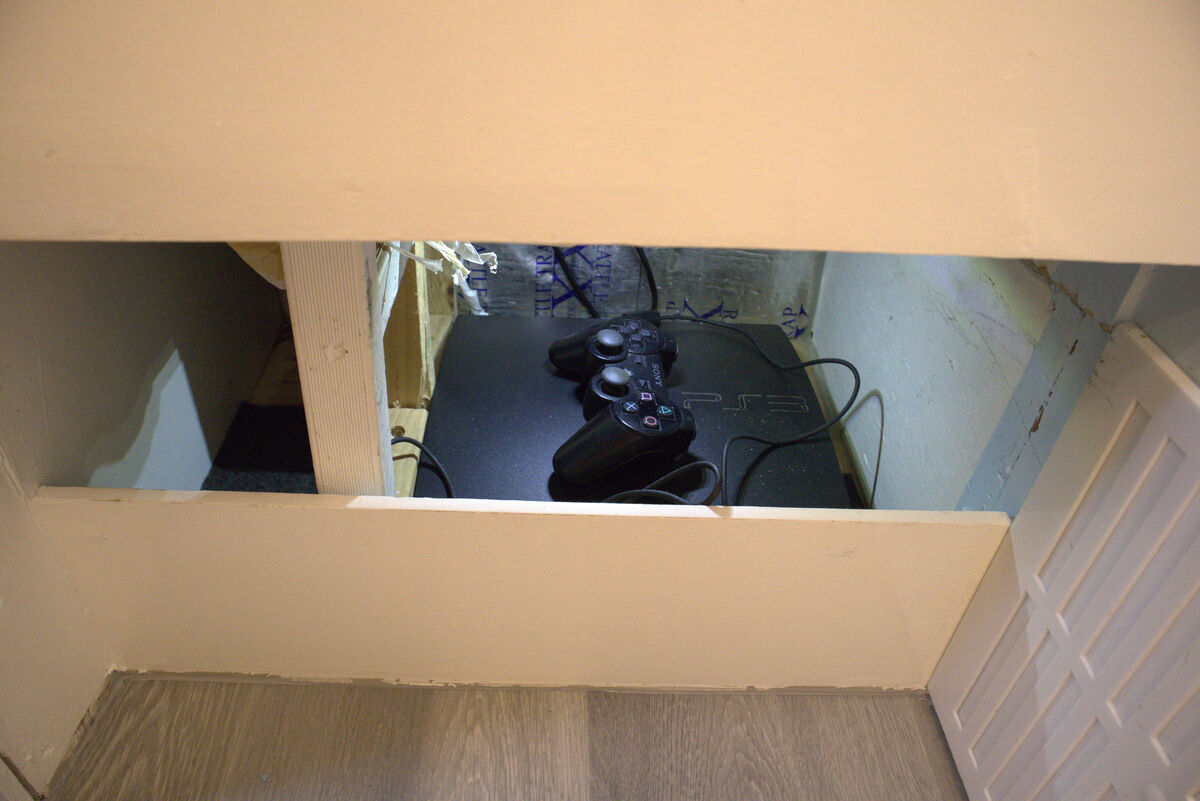
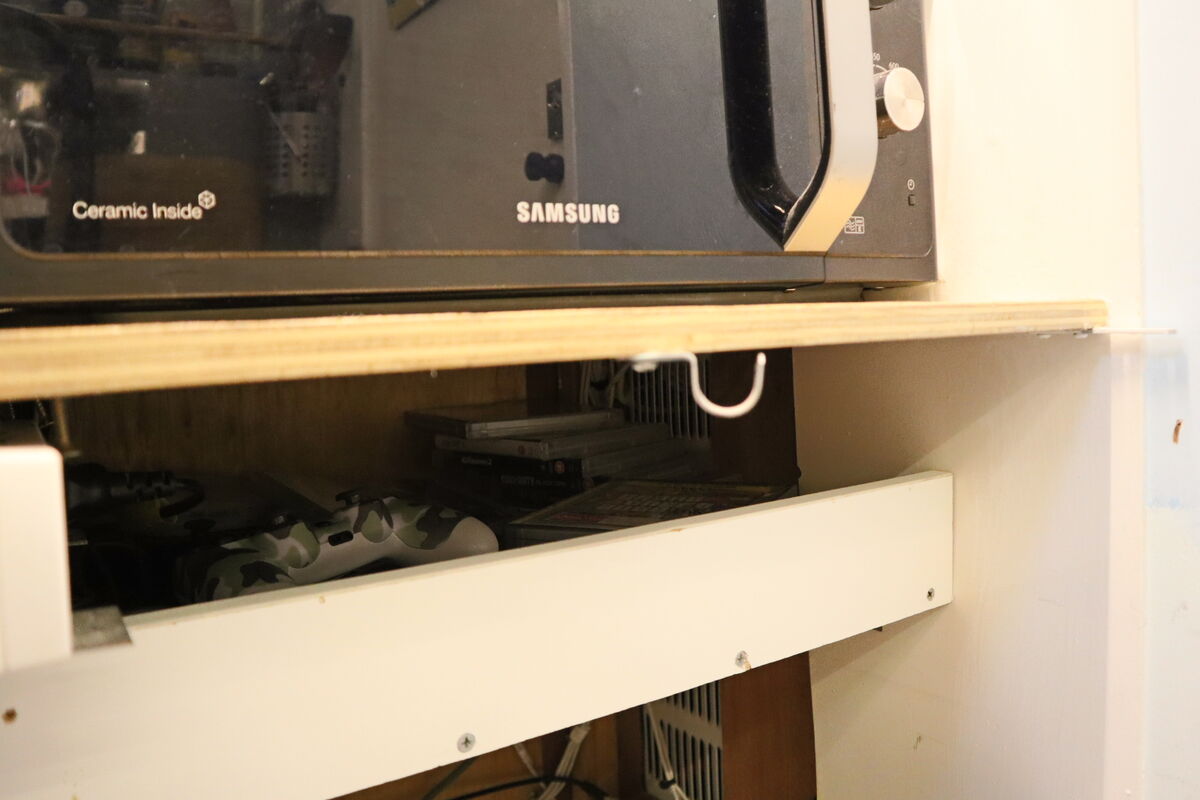
I ran a PS3 from a small storage bay with HDMI to my 12V swivel mounted TV. What I should have done was bought a mini PC like a Beelink SER5 Pro with a big external hard drive. These things run on 12V natively, they're tiny, and they handle modern games easily. Would have saved space and power.
I also ran a coax cable from the van aerial to the TV and it picked up every free to air channel. Doesn't work everywhere but when it does its a nice bonus.
Gaming setup: PS3 with HDMI to the 12V TV, and game storage
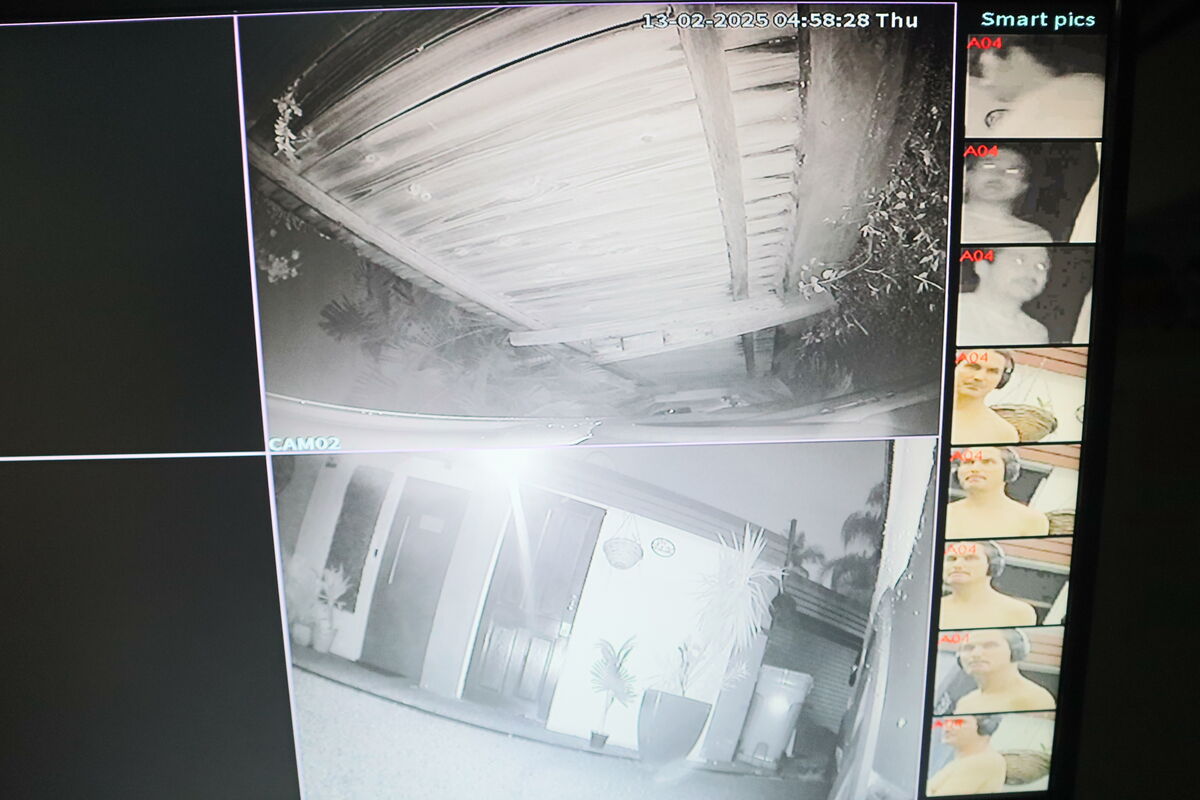
CCTV security — day and night vision views from the van camera
Privacy note: check your local rules before using CCTV or dash-cam recording.
15
The Cockpit
Control switches, reversing camera, and the nerve centre for driving operations.
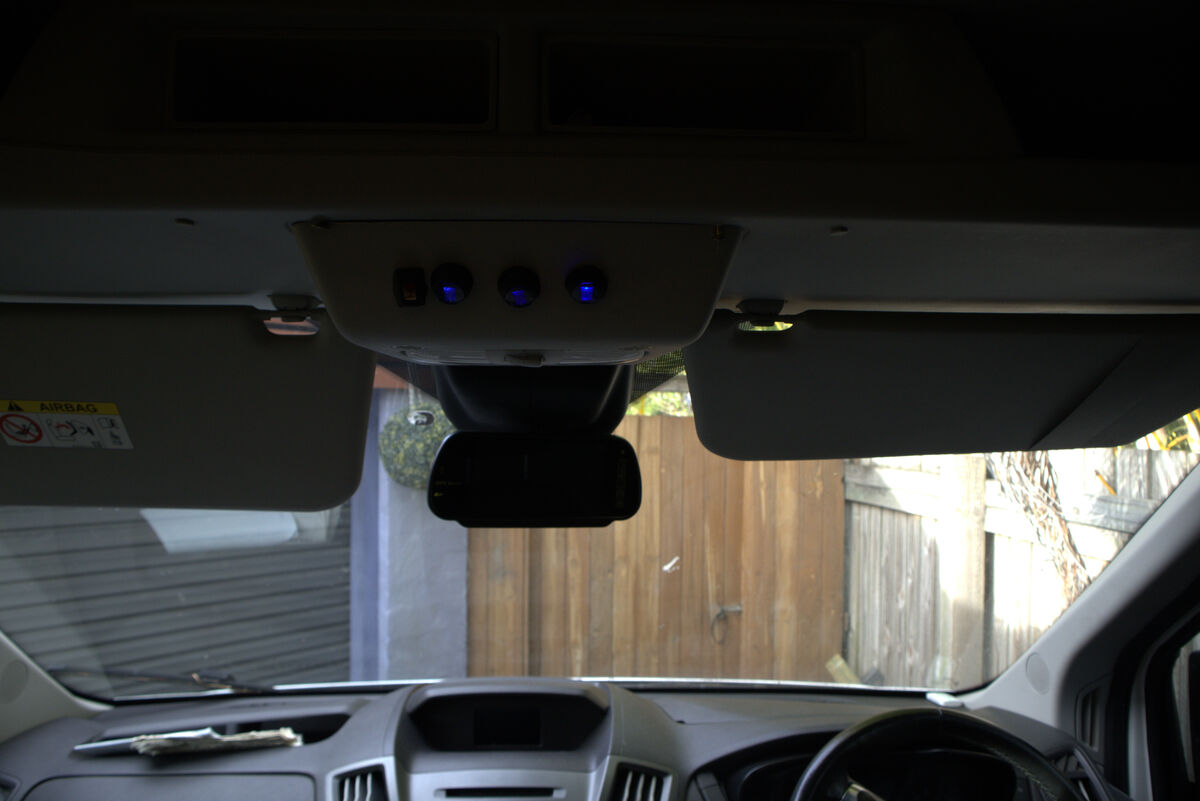
I installed switches in the cockpit: one for hot water, one for the water pump, and one for the grey water release. I originally had these in the living area but I wanted them up front too so I could release grey water while driving, and charge the hot water while the engine was running. The hot water system takes 27 amps and with the van running the DC to DC generates 50 amps from the alternator, so charging while driving meant less strain on the house batteries.
Just below the switches was my reversing camera display. A small LED screen connected to a camera on the bumper, wired so it only comes on when reversing.
Cockpit control switches — hot water, water pump, and grey water release all accessible from the driver's seat
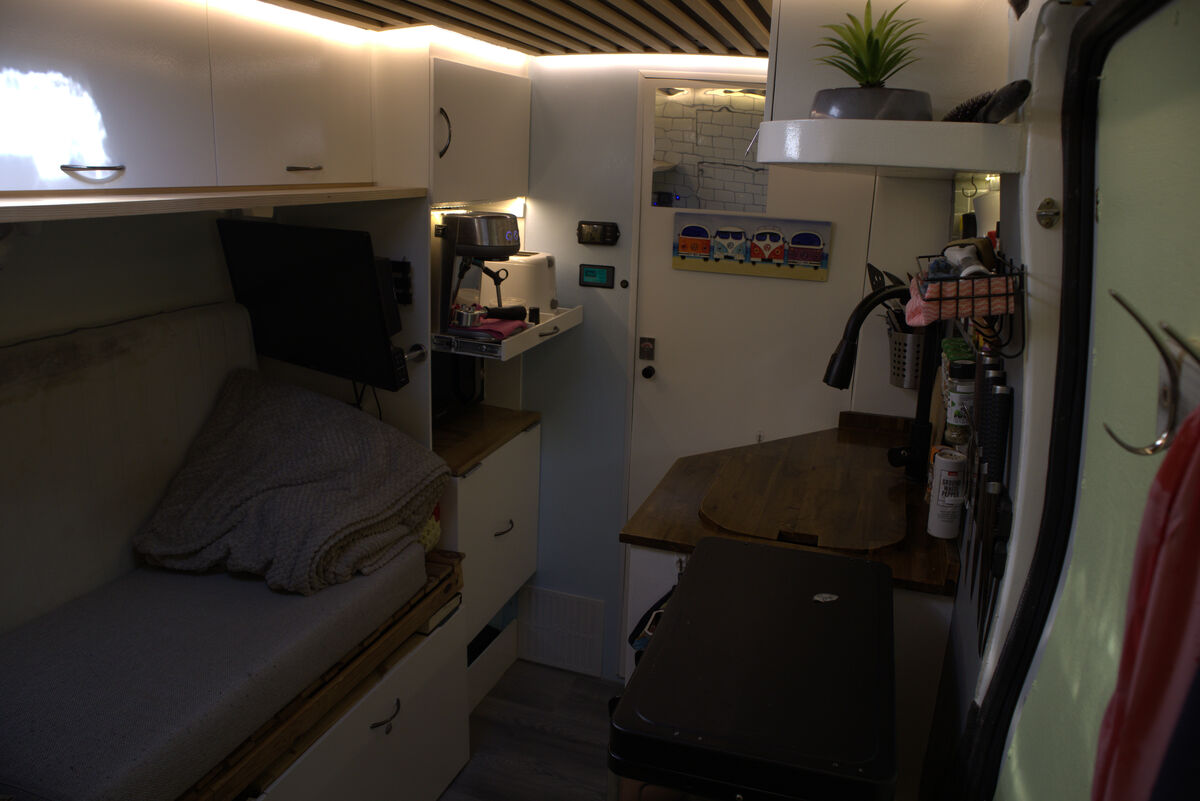
View from the living area through to the cockpit
✨
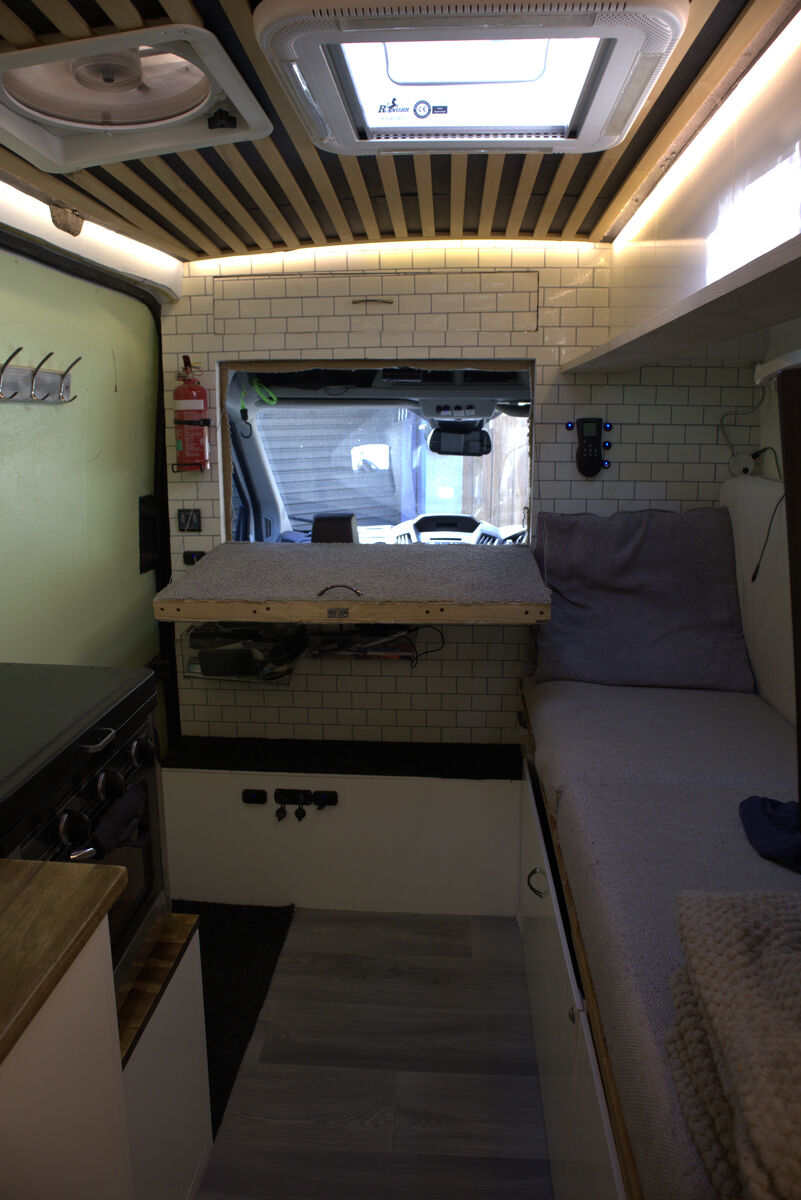
The Finished Van
Here's what it all looks like when it comes together.
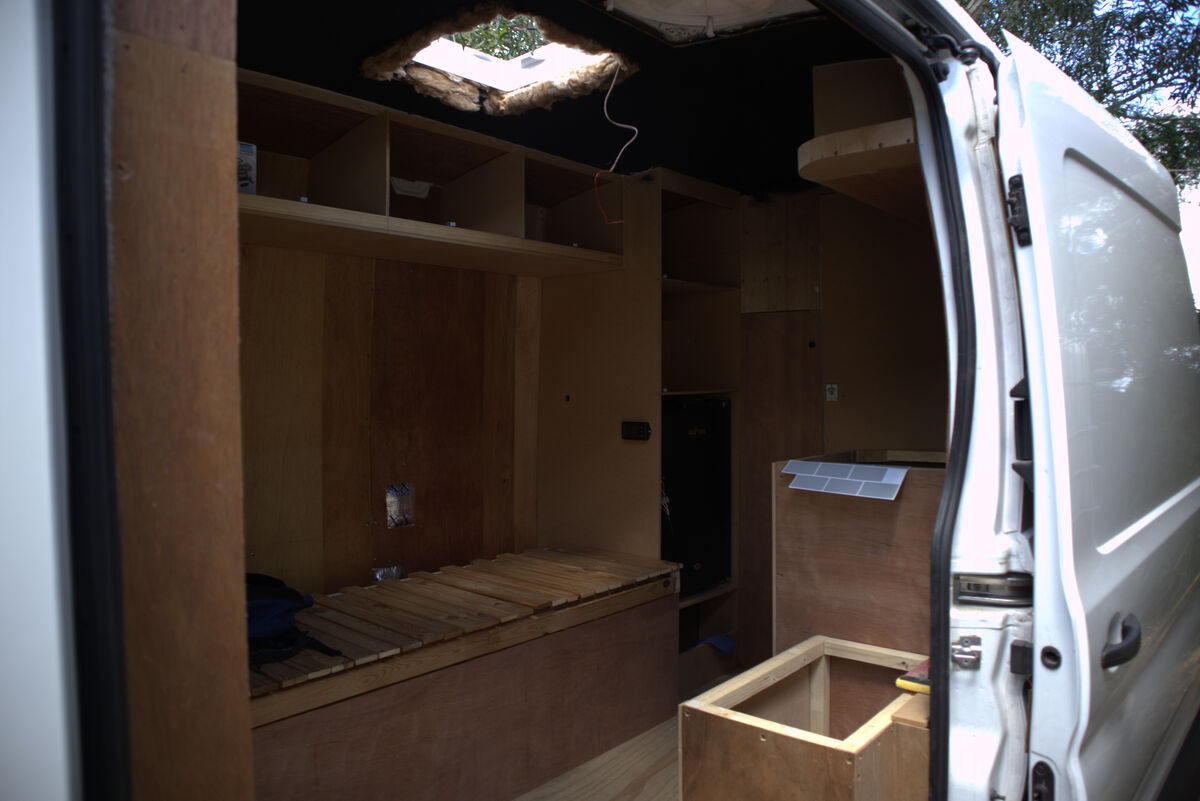
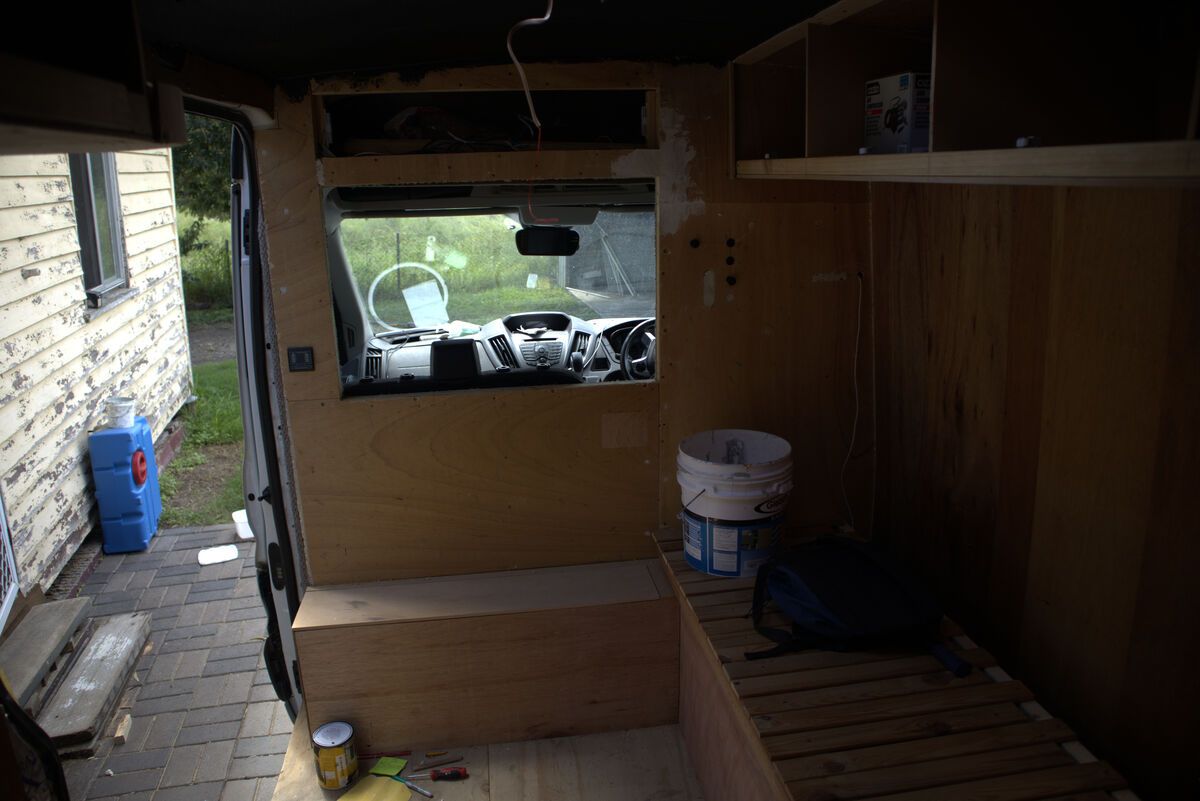
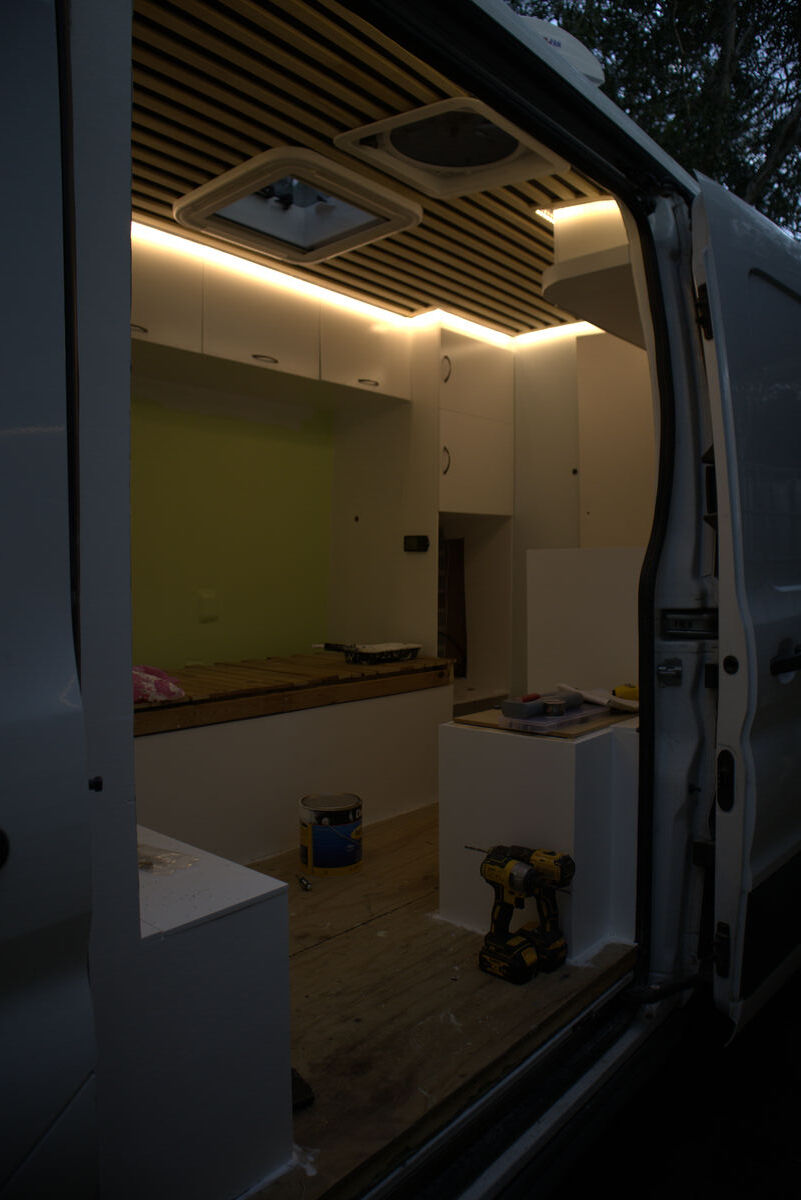
The interior starting to take shape during the main build
Looking towards the cockpit as things came together
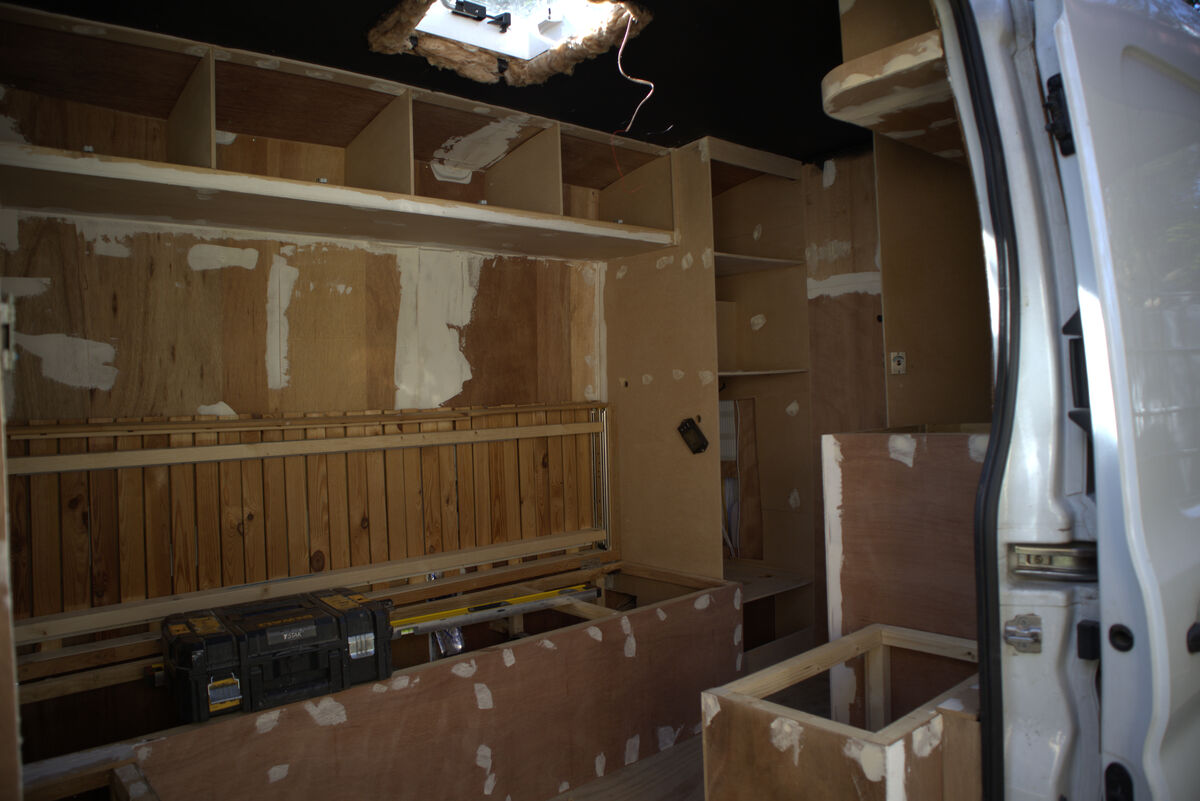
All filled and sanded — ready for the final finish
The front area fully finished
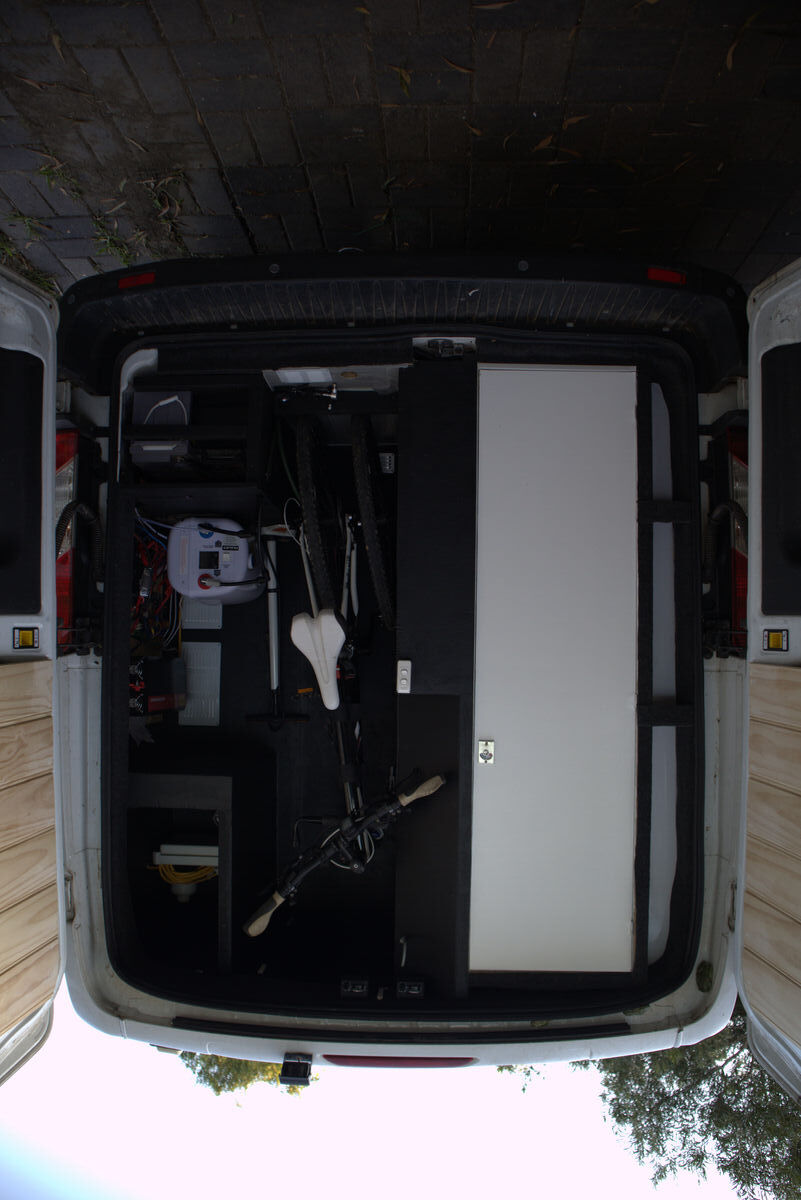
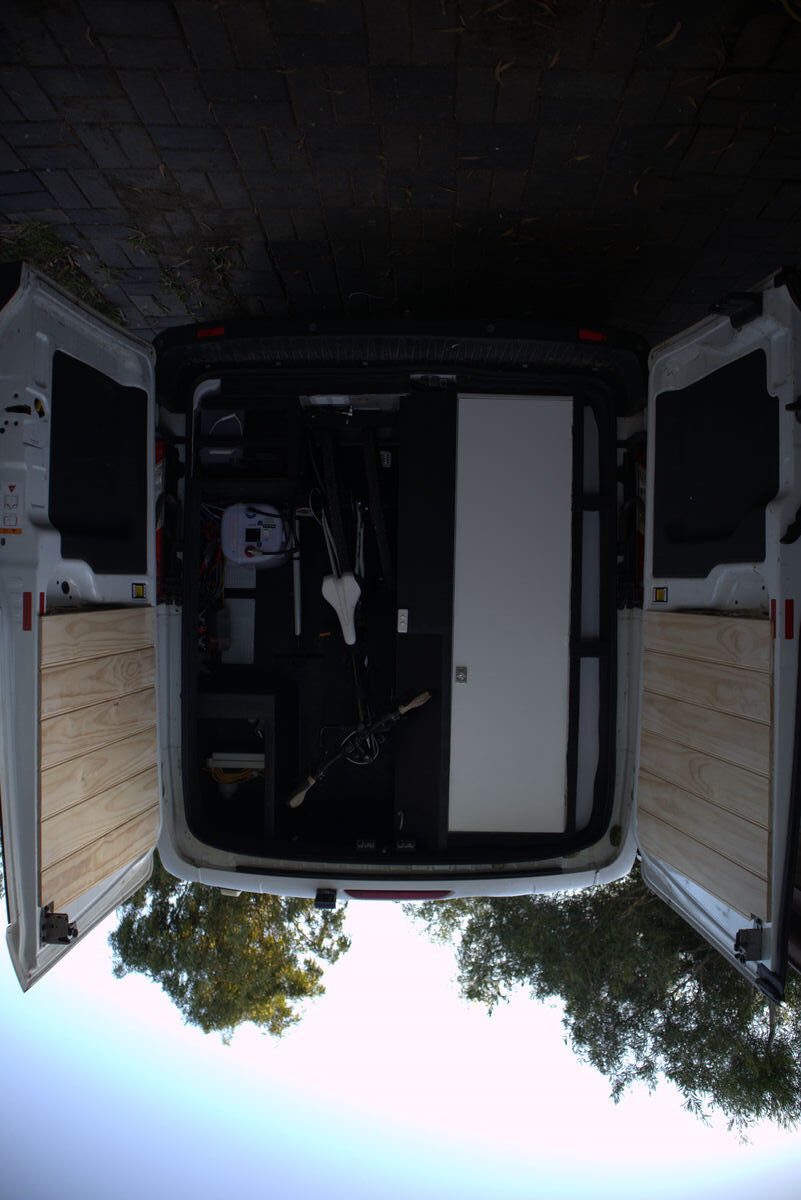
View from the rear doors — the full living space
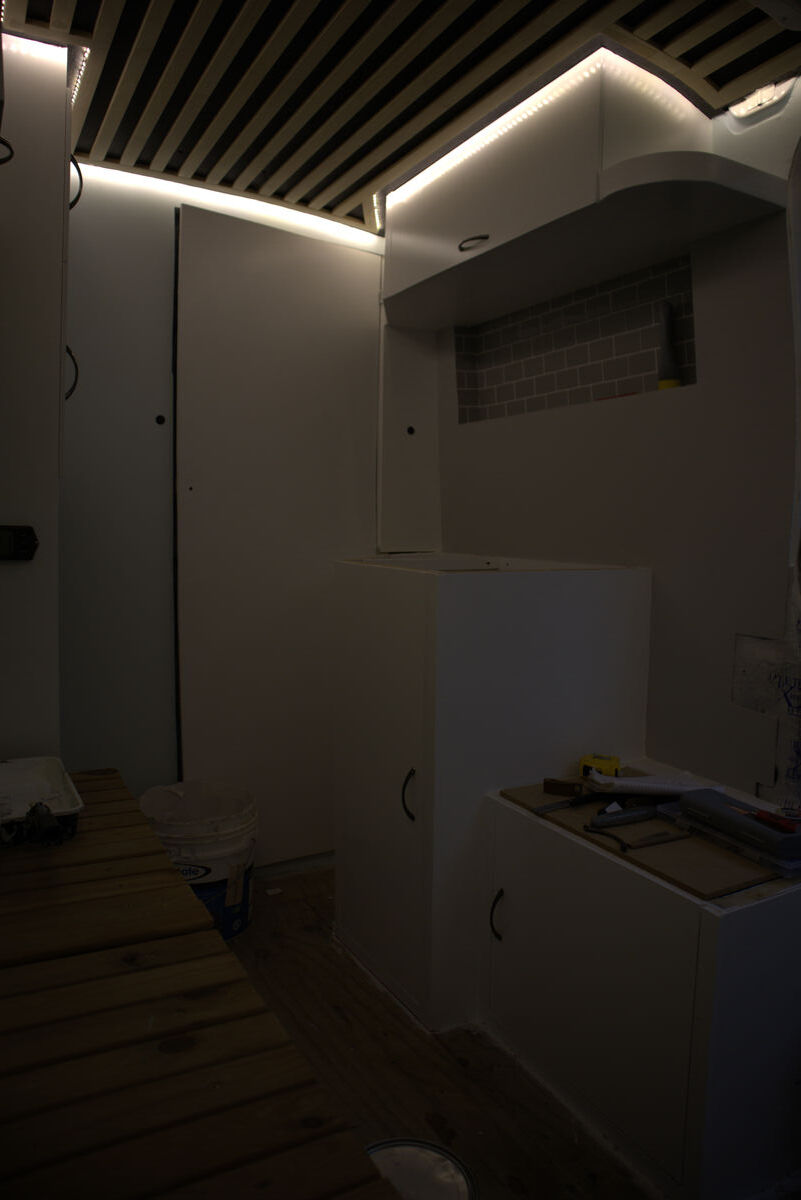
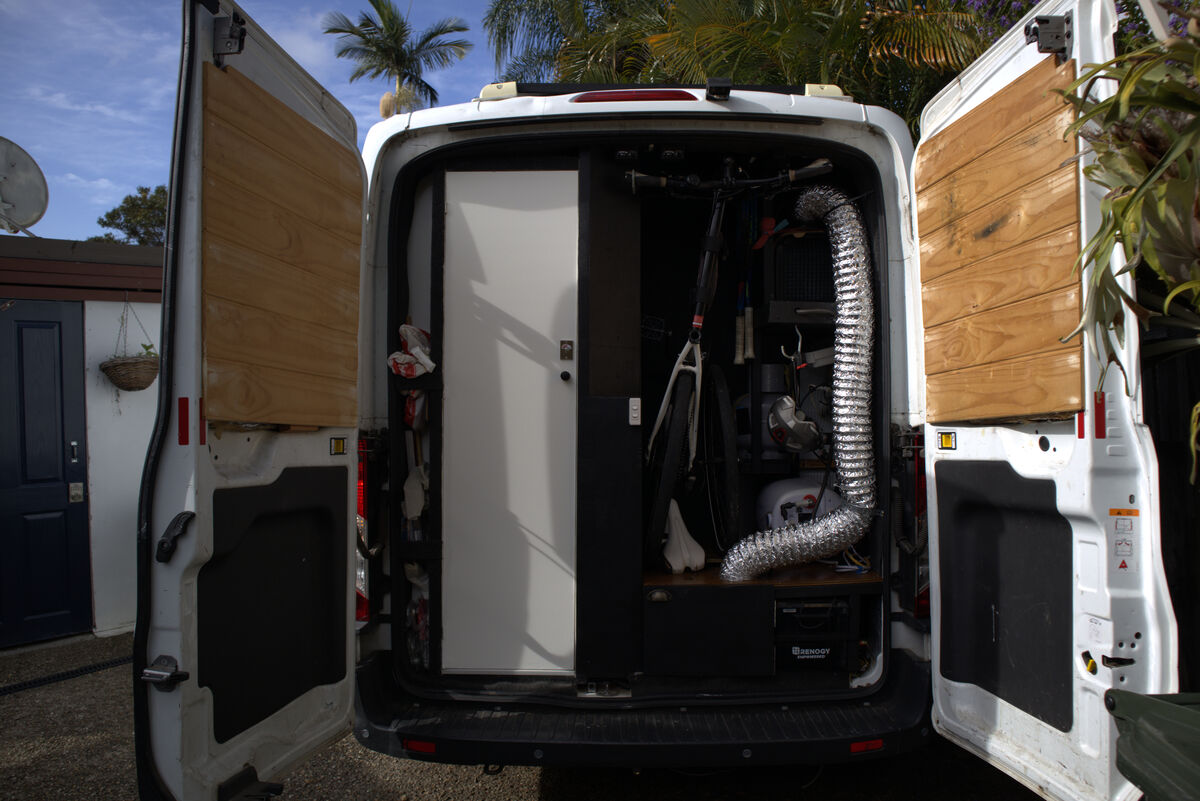
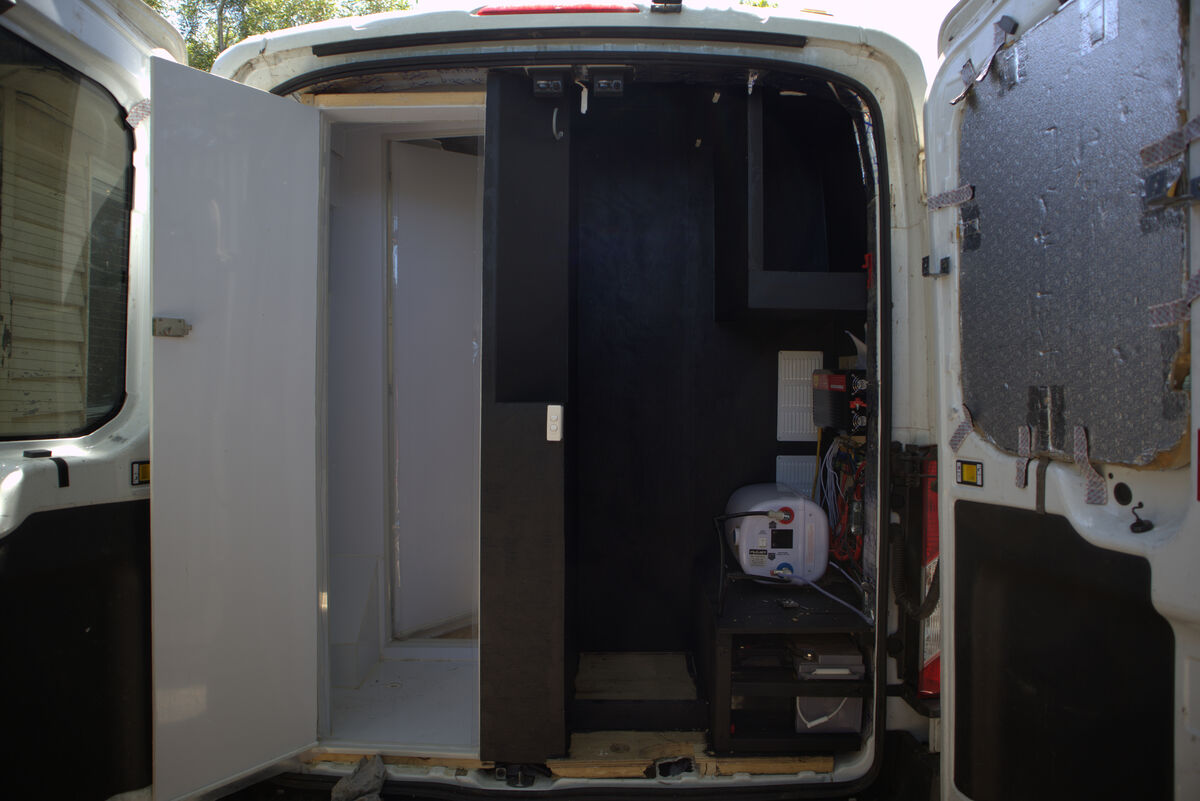
The rear area with shower and garage access
Garage and shower side by side at the rear
Everything accessible from the rear
The complete build — from bare metal to this
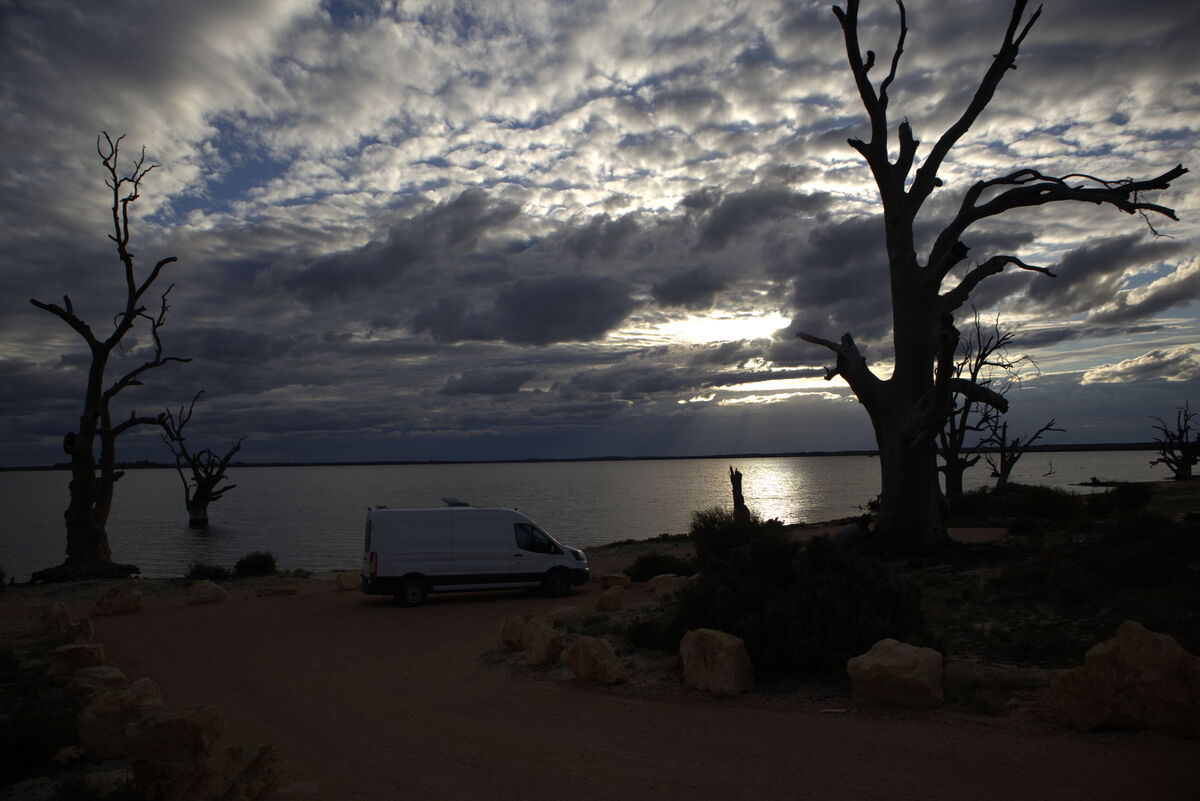
On the Road
Two years travelling Australia — waking up to a different view every morning
Final Thoughts
If you do a van from scratch, plan it. Planning is key. Don't rush it. I see people posting videos of how they converted a van in 7 days. Yes its possible, but they don't tell you it took them weeks to plan out every detail before they picked up a tool.
Don't go into it feeling inspired off YouTube without a proper plan. Its an amazing experience but make sure you have all the right information before diving in. As my old boss used to say, do your due diligence.
"Two years of van life cost me nothing beyond fuel and food. I could park anywhere, stay as long as I wanted, and wake up to a different view every morning. The freedom is real."
And there's something genuinely special about lying in bed, looking up through the skylight at the stars, with the Maxx Air fan pulling a gentle breeze through on a warm night. That right there is what van life is about.


.jpg)